How to Set Up the Windows Store App in Windows 10
Microsoft’s flagship software product we all know as Windows has gone through plenty of changes and innovations, some of it good while others are seen as a little bit of a nuisance by skeptics. Different people have different views regarding the changes that were done to the operating system that has become a favorite to millions of users around the world and our job here on WindowsTechies.com is to introduce everyone into these newest changes so people can start taking advantage of them while using their Windows devices. In this tutorial, we will be looking into one of the modern features that were introduced starting in Windows 8 and was carried over to Windows 8.1 and Windows 10. This feature is called the Windows Store and if you haven’t tried using it in your Windows 10 machine, we’re here to guide you in doing so and as well as show the steps involved in downloading modern/universal apps from this marketplace so be sure to have your Windows 10 computer fired up and prepare it for executing the steps that we will be showing below.
First Things First: Log in to Windows 10 With Your Microsoft Account
Just like Google Play or the App Store in Android and iOS devices respectively, Microsoft’s Windows Store offers a host of apps that can instantly add more features to your Windows 10 computer without the hustle and bustle that you would otherwise experience when you install the traditional Desktop programs. But before you’re able to enter the Windows Store, you will first need to log in to your Windows 10 machine using a Microsoft account. If you don’t have a Microsoft account yet, you will need to create one by going to Microsoft’s official website or you can click on this link to go directly to the sign up page. 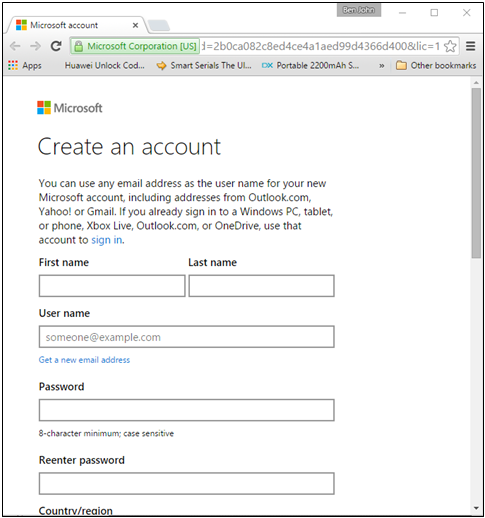 Once your Microsoft account is successfully created, you will now need to log in to your Windows 10 machine with it. After you’re logged in to your computer completely, Windows 10 will then start syncing some information to Microsoft servers so they can be synced as well to your other Windows devices where you log into using your Microsoft account.
Open the Windows Store Universal App
If you are logged in to your Windows 10 computer using a local account then clicking on the Windows Store icon that is pinned on the Taskbar will only bring up a message that tells you to sign-in with a Microsoft account or create one which is why you will first need to create your own Microsoft account as we have shown in the previous step. However, if you already have an existing Microsoft account then you can simply sign-in to your Windows machine using it. Now, there are many ways in accessing the Windows Store universal app in Windows 10 just as there are many ways in accessing it in both Windows 8 and Windows 8.1 and we have already mentioned one of the simplest methods above. If you have just upgraded your computer to Windows 10 and nothing else has been changed in it yet then you should be able to open Windows Store by clicking on its icon that is pinned on the Taskbar as highlighted on the screenshot below.  However, for most of us who have been using Windows for so long, we tend to remove unnecessary icons from the Taskbar and leave it with only one, two or three icons to make everything look clean and along with this process, we would most likely remove Windows Store as well from being pinned so if this is the case on your Windows 10 machine, you will need to access Windows Store in another way and you can simply do so by pressing the Windows key or clicking on the Start Button in order to open the Start Menu.
 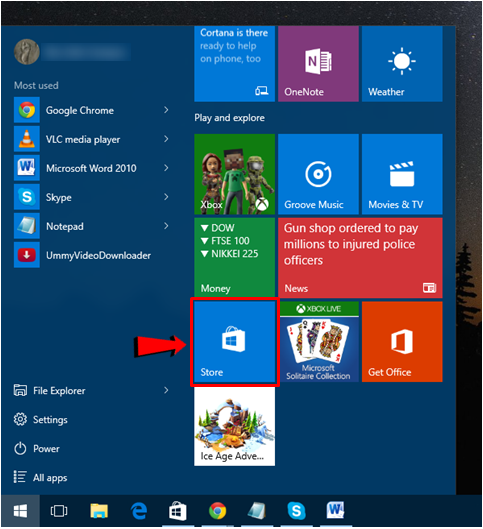 From the Start Menu, you will need to put your focus into its right portion which is called the “Start” section where the universal app tiles are found and from here, simply scroll down into the “Play and explore” section and under it, just look for the tile that is labeled “Store” as you can see highlighted on the screenshot above.
What If It’s Not on the Taskbar and Start Menu?
Having the Windows Store icon removed from the Taskbar and its tile unpinned from the Start section of the Start Menu would be somewhat a rare situation but it is still possible and in case you encounter this scenario on your Windows 10 computer or that of your friend then you don’t need to panic. There is still one sure way in accessing the Windows Store app so just start by again launching the Start Menu. 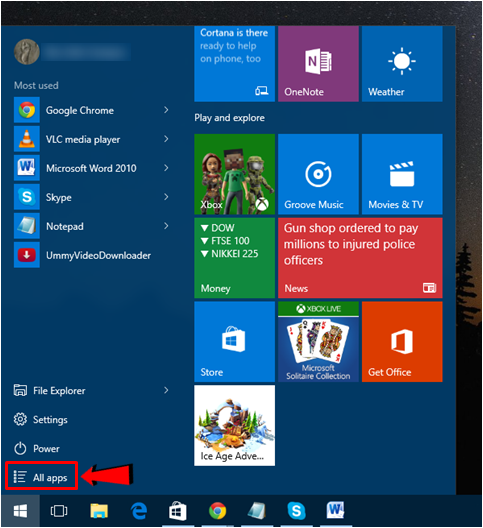 Now, on the Start Menu, instead of getting into the “Play and explorer” apps category of the “Start” section, you will need to put your attention on the items that are found at the left hand portion and click on the “All apps” link that is found at the bottom as highlighted on the screenshot above. After this link is clicked, the list of all your installed desktop programs and apps which are alphabetically arranged will open and from here, you will simply need to scroll towards the “S” programs and apps grouping, look for the shortcut for “Store” and then click on it once it is found!
 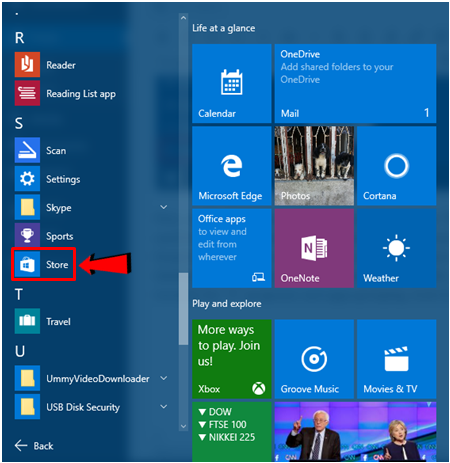 So that’s basically how Windows Store is accessed in your Windows 10 machine however, if you’re still looking for one more method in launching it then there’s actually one more way that I know and it involves another new innovation in this latest Windows operating system version from Microsoft. To be able to access this feature, you will need to press on the Windows + S keys and after doing so, the search box will appear at the bottom-left portion of the screen and if you’re thinking that it’s the Start Menu which has been pulled up then you’re wrong. It is the new location of the Search feature in Windows 10 and yes! It now is incorporated with the Start Menu. To be able to access Windows Store from here, all you need to do is input the words “windows store” into the search input box at the bottom as shown below.
  Now, after typing in “store” into the search query box, all you need to do is wait for the search results to appear on the top portion of the search screen and once they do appear, simply click on the shortcut that says “Store” as you can see highlighted on the screenshot above.
Getting Familiar With the Windows Store Home Page
Now that you have already learned how to create a Microsoft account so you can start using the Windows Store universal app, it is time to do some exploring to your account in this new platform. But before anything else, let’s first do a quick check if you did everything the right way so first, after launching Windows Store, you should be taken to a Window that looks exactly like the one shown below. 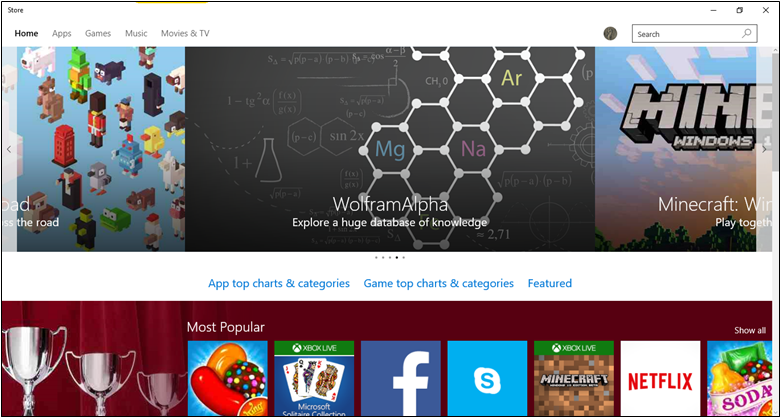 As you can see, you were actually taken to Windows Store’s home page and on this section, you will see some categories of apps at the top-left portion while on the top-right section, your Microsoft account photo and a search box is displayed. Let’s first focus on the categories that are found on the top-left portion of the Windows Store app. As you can see right now, you are actually on the home page and the apps that are displayed on the main screen are grouped as “Top Free” and “New”. If you wish to get more specific in terms of categories for instance, you would like to view some game apps then you will simply need to click on the “Game” category as highlighted on the screenshot below.
  Now, if you are looking for apps and want to see them in nice groups and well organized categories then you will simply need to click on the “Apps” category that is found just beside (to the left) of the “Games” category that we’ve clicked above. Once this category opens, you will be able to view some categories and groups of available apps sorted and grouped according to their use.
 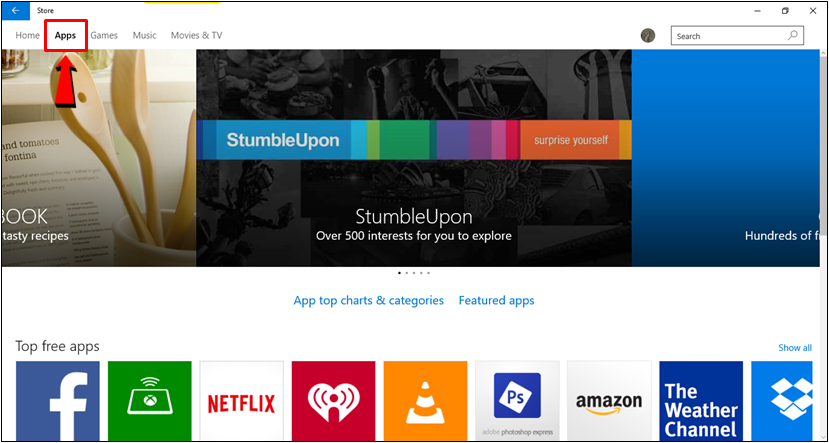 Now, if you’re fond of listening to music or you enjoy watching TV shows and movies then the next two categories to the right of the “Games” category are the ones that you would need to click. These categories basically contain the stuff that their names actually suggests so if you’ve been longing to find Katy Perry’s latest songs or want to watch the latest episode of “The Walking Dead” season 6 then you will simply need to look for these stuff under the “Music” and “Movies & TV” categories respectively. These categories actually represent Xbox Music and Xbox Movies which were separate services back in Windows 8 and Windows 8.1 but are now included in the Windows Store on Windows 10.
 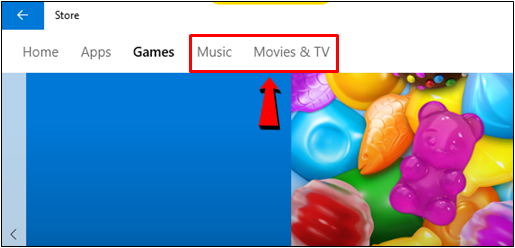 Now, if you have the name of the game or app that you want to download and install into your Windows 10 computer then you can simply input its name into the Search box that is found on the top-right portion of the screen and after doing so, simply press the “Enter” key and just wait for the search results to appear on the main Windows Store screen.
How to Browse Through Games and Apps on the Windows Store
Microsoft has introduced a new way of scrolling since Windows 8 and this gesture has been carried over even into Windows 8.1 and now in Windows 10. If you already have Windows Store opened on your computer screen then you might be surprised at how few available apps and games there are especially if you’re scrolling downwards on the home page or on any other category of the Windows Store app but the truth is the opposite is actually true. To make Windows Store’s look a lot simpler, Microsoft actually made the other apps, games and other stuff in it hidden. This is also an effort to make users more engaged whenever their in the Windows Store platform. In order to see the hidden stuff on every line of app, game and music icons that are displayed on the Windows Store screen, all you need to do is point on the line itself and on the right portion of it, you should be able to see an arrow-right button that sits on a semi-transparent bar as you can see being highlighted on the screenshot below. 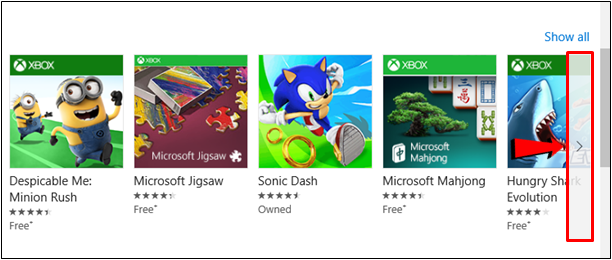 Now, if you’re using a computer that has a touch-enabled screen that you can simply swipe through the items in every app, game or music category in order to see all the other items that are available. However, if you want to view all of the apps that are available under a certain category, all you need to do is click on the “Show all” link that is found at the top-right portion of the app category group as shown below.
 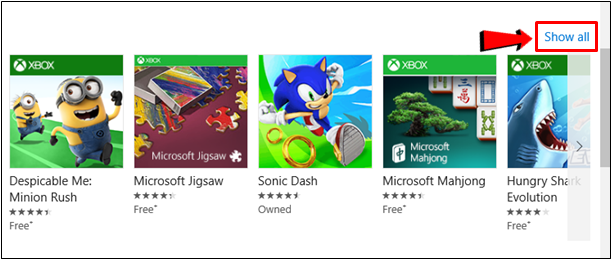 After clicking the “Show all” link, you should then be able to open the section that shows all available apps under the category itself and the good thing about it is that the apps are further categorized into different groups and you can refine your search using the available sorting/grouping rules that is located at the left of the Window.
 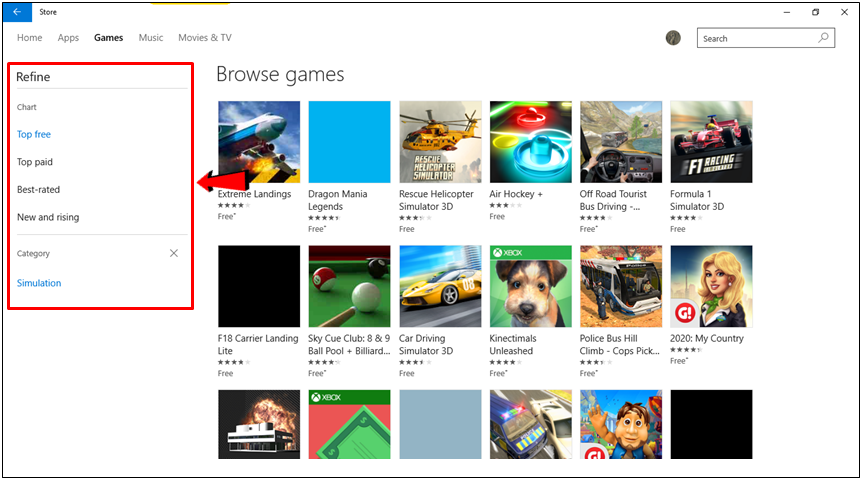 As you can see, dealing with the apps that are found in Windows Store and scrolling through them is quite simple but some users really can’t help but think that this application marketplace by Microsoft is more optimized for mobile devices that has a touch-enabled screen. However, as you will see later, even your Windows 10 PC or laptop can handle these modern apps but before we go into that, let’s first talk about the settings, tweaks and other stuff about your Windows Store account so you can start taking control with the information that’s being shared to the apps and even to Microsoft servers while you are using modern apps on your computer.
Accessing Settings and Tweaks for Your Windows Store Account
You’ve already learned how to create your own Microsoft account and you’re already familiar with the process of using it to get access to the apps that are available in the Windows Store app so this time, we’ll get to know all of the settings and tweaks that you can do to your Windows Store account and see what other information are available in this section. To access Settings for your Windows Store account, you will first need to open the Windows Store app and of course, you will also need to make sure that your Windows 10 machine is connected to the Internet. Once the Windows Store app fully loads, simply put your attention to its top-right portion and from here, you will need to click on your Microsoft account photo as highlighted on the screenshot below. 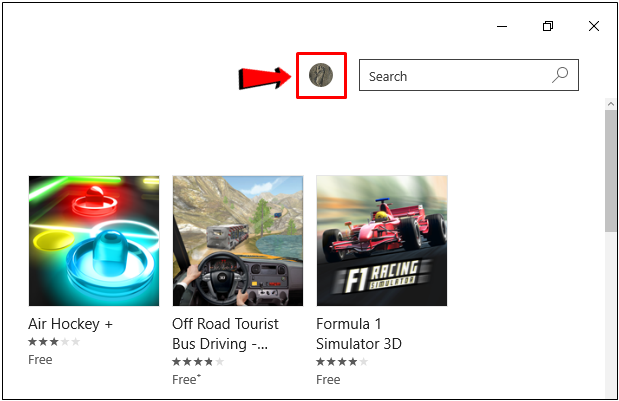 After clicking on your profile picture which is found on the top-right portion of the screen as we have shown above, you will be able to open an options box that contains links that are related to your Windows Store account. These links and their contents will be explained further below so just keep reading towards the end of this tutorial.
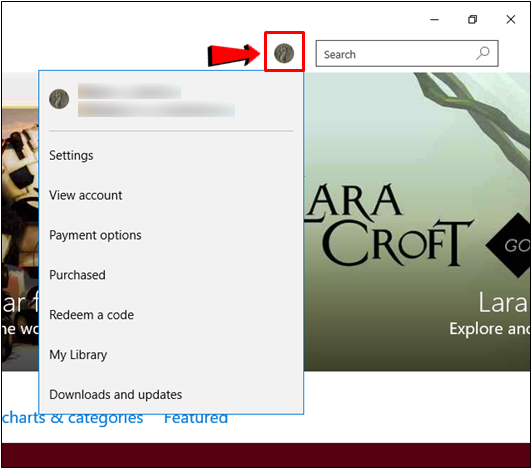
Settings
The very first item that you would find in the options box that appeared after you clicked on your account’s profile picture that is displayed on the top-right portion of the Windows Store is labeled “Settings” and as its name itself suggests, it obviously contains some tweaks that you can do to your Windows Store account. So let’s try to click on it and see what options are found under this section. 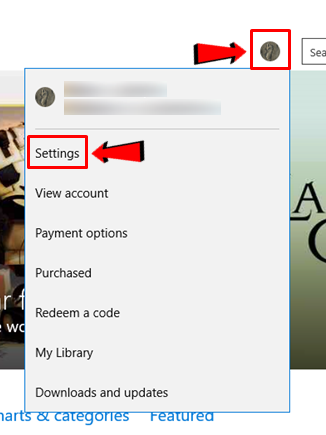 After the Settings link is clicked, you should be able to access the Window that shows some tweaks which looks like the one shown below. First option says “App updates” and under it is a switch that has a label which says “Update apps automatically”. If this option is switched on, all of the Windows Store apps that are installed on your Windows 10 computer will update automatically whenever updates are available. This means that apps will also be allowed to use some bandwidth and the sad thing is that there’s not much of a notification that appears on the screen whenever apps are being updated and you are only informed about updates once they are already downloaded and installed.
  If you don’t want Windows Store apps to do this probably because your Internet Service Provider (ISP) implements strict data caps which would easily be consumed when apps update themselves automatically then you can simply switch this option off by clicking on the switch itself in order to flip it to the “Off” position.
Live Tile
The next item under the “Settings” option is a switch that is labeled “Show products on tile”. When this is turned on, the Windows Store tile that is displayed on the “Start” section (the right portion) of the Start Menu will keep flashing apps and other Windows Store products which are available. 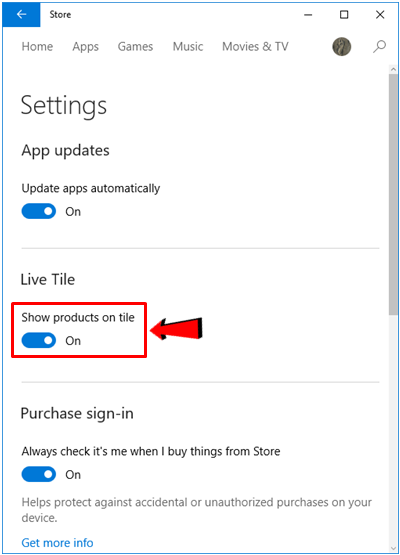 If you don’t want the Windows Store tile to be flashing information about the products that are found in it then you can simply turn this option off by clicking on the switch that is assigned to it.
Purchase Sign-in
Next option that you’ll find from the “Settings” section of your Windows Store account is the one that says “Purchase sign-in”. If you have browsed through the apps that are available in the Windows Store app then you should have noticed that not all of them are free. There are others that would require you to shell out an amount to be able to download and use them and even the free apps have in-app purchases such as some games that would entice you to pay just to get a good weapon or have access to certain features that would help you get into the higher levels. 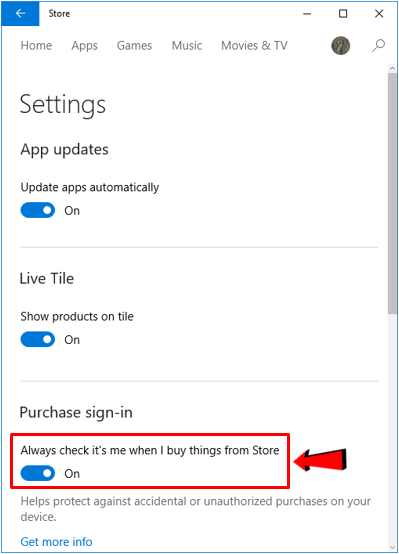 That’s what the “Purchase sign-in” option is all about. This item ensures that Windows Store first asks you to sign-in and enter your Microsoft account credentials before any purchase is paid. It’s an added security that would protect your bank account from being accessed by anyone who’s using your Windows device and deliberately purchase something from the Windows Store so our recommendation is to have this option always switched on.
Account
Next, after the “Purchase sign-in” option, you can scroll lower and find another item in this same “Settings” section of your Windows Store account which says “Account”. Under it, you will be able to find a link that says “Manage your devices” and when you click on it, a new tab will open on your machine’s default web browser which will take you to your Microsoft account and show all of the Windows devices which you’ve logged into using your Microsoft account. 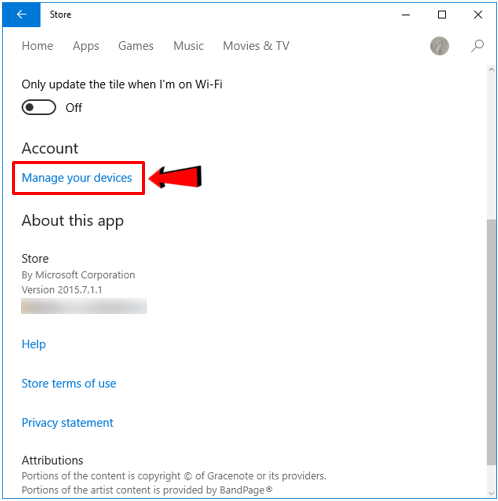 From the list of devices that would open on your machine’s default browser, you will be able to see if there are other devices that was able to use your Microsoft account without your consent. This is a good way to keep track of any malicious activity and prevent any problem that can take advantage of your Microsoft account.
View Account
Moving on to the item next to “Settings”, you will find a link that says “View account”. When this item is clicked, you will again be able to open a new tab on your computer’s default web browser and it will automatically open your Windows Store account. From here, you will be able to view your recent app purchases and many other information like the card that is linked to your Windows Store account and as well as the available gift cards if there’s any. You can also edit your account name, password and add payment options from this location.
Payment Options
As we have learned earlier, there are apps in Windows Store that are not available for free so to be able to use one, you will need to make a purchase so you can download and start using it on your Windows 10 machine. Even free apps also have some in-app purchases especially the addictive games that contain upgrades which would require you to shell out certain amount in order to get them. When making purchases in Windows Store, you will need to set up a payment option and that’s what this next section under your Windows Store account is for. If you click on it, a new tab will again open on your computer’s default browser and show the payment optons that you’ve already set up for your account. The options that are available are credit and debit cards, bank account and even Paypal. If you haven’t added a payment option yet then you can simply click on the “Add a payment option” link then follow the steps that would appear next until your payment option gets completely set up.
Purchased
After setting up a payment option for your Windows Store account, you can start purchasing apps from it and if you want to see the list of these purchased apps, all you need to do is click on the “Purchased” item that appears just below the “Payment options” link as highlighted on the screenshot below. 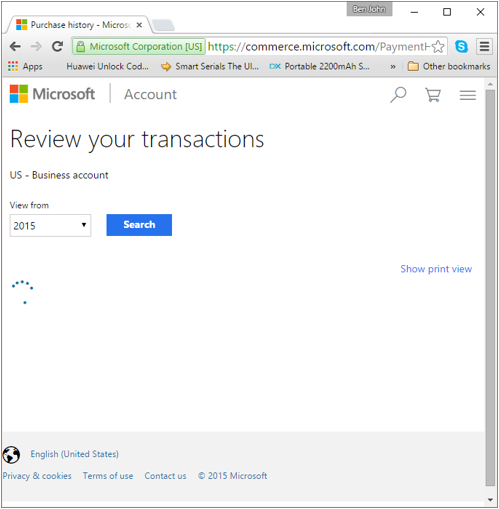 After doing so, a new tab will again open on the default browser that is set for your computer and it will show all of the apps that you have purchased from the Windows Store. Some free apps may also appear but you don’t need to panic because these are the free apps that you’ve availed some in-app purchases on.
Redeem a Code
The “Redeem a code” link that appears on the same options box which pops-out at the top-right portion of the screen whenever you click on your Microsoft account’s profile picture will again open a new tab on your computer’s default browser and open a webpage that will let you enter a code or gift card as shown on the screenshot below. 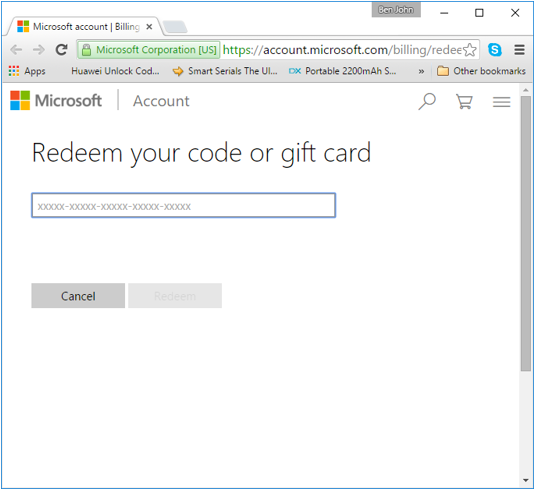 On this webpage, all you need to do is enter the code or gift card that you have then hit the “Redeem” button at the bottom in order to use the code.
My Library
Next, you will find a “My Library” link which when clicked would open a list of all the apps which you have downloaded and installed from the Windows Store. What’s good about this list is that the apps are categorized into four groups which are “Apps”, “Games”, “Music” and “Movies & TV”. You will also find out when a certain app was installed into your computer because its installation date also appears in this list as you can see below. 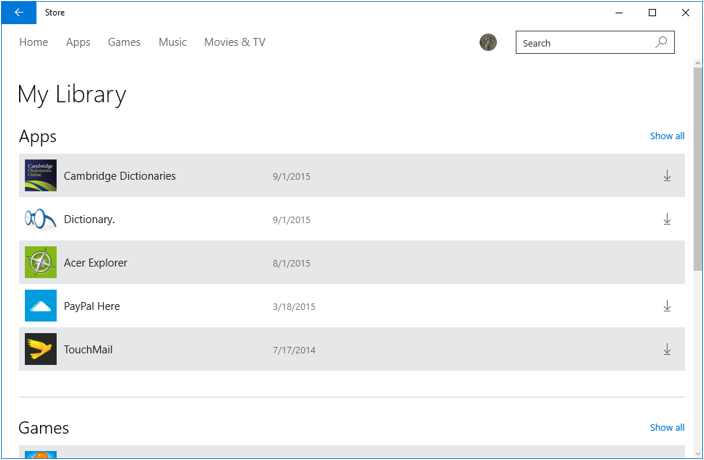
Downloads and Updates
Lastly, you will also see a “Downloads and updates” link as the last item on the options box that appears whenever your Microsoft Account profile picture at the top-right portion of the Windows Store screen is clicked. If you hit this link, you will be redirected to a comprehensive list of app downloads and updates that happened in some previous dates. This is a good way to track progress for your apps and see whether they are up-to-date.