How to Access the Optimize Drives Tool in Windows 8.1
In time as you use your Windows machine for different tasks, it would also suffer some serious problems and one of them is the overall decrease in speed and performance. While the cause of this problem is varied, the most common one is the cluttered files that are stored in your hard drive.
This is true especially if your computer is protected with a good antivirus software and is also well maintained in many other aspects but you still notice a significant slowing down in terms of its performance.
What’s the Solution?
Fixing this problem as soon as the earliest sign appears is very important so that further complications can be prevented and thankfully, Microsoft has developed a tool that will help you rearrange everything in your hard drive and organize all the clutter that can come as a result of everyday computer usage.
This tool is called “Disk Defragmenter” back in Window 7 but in Windows 8 and Windows 8.1, it has been given a new name which is “Optimize Drives”. It has also some improvements in its inner-workings and the process has some changes compared to how it was done back in Windows 7 but don’t worry because we will be demonstrating the whole process in this tutorial series but before anything else let’s first learn the different ways in launching the “Optimize Drives” tool in your Windows 8.1 machine.
When to Defragment Your Hard Drive
If your computer is running just fine then there is no need to optimize it or run the disk defragment tool however, if you see that there is a significant decrease in its performance then that’s the time that the disk defragment or the “Optimize Drives” tool should be run.
The slowing down is mainly caused by the disorganized packets of data that comes as a result of the repeated reading and writing process whenever you do several tasks on your computer. This happens especially on hard disk drives or HDDs. Defragmenting arranges all of these cluttered data into organized locations with all the related ones grouped together. This would then minimize the time that is required to read and write files as well as accessing them and eventually result to a faster Windows machine.
NOTE:
If your computer is using SSD or Solid State Drive, there would be no need for you to use the defragmenting tool that is built in with Windows. The same thing also applies to USB flash drives. Both SSDs and USB flash drives work differently in terms of allocating space for related data and other files. Both also have limited number of read and write process cycles before they stop working so defragmenting them would result to a decreased lifespan. Given the fast working speeds of SSDs and USB flash drives, there would be no need to run a disk defragment drive on it anyway.
How to Access the Optimize Drives Tool
Just like most of the built-in Windows features and tools, the “Optimize Drives” tool in Windows 8.1 can also be accessed in many ways and in this tutorial, we will be showing two available methods in opening this tool in your computer.
Use the Search Feature
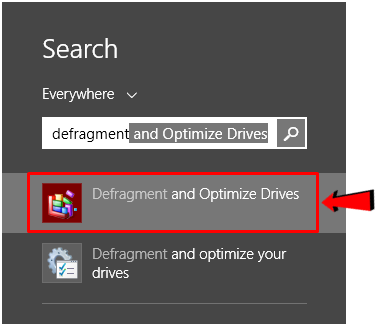
The first method is also the easiest one and in order to do this in your Windows 8.1 machine, all you need to do is open the Start Screen by pressing the Windows key or clicking on the Start Button. Once this screen opens, all you need to do is type “defragment and optimize drives” on your computer’s keyboard and after doing so the “Search” screen should slide-in from the right edge and show the search results as you can see on the screenshot below.
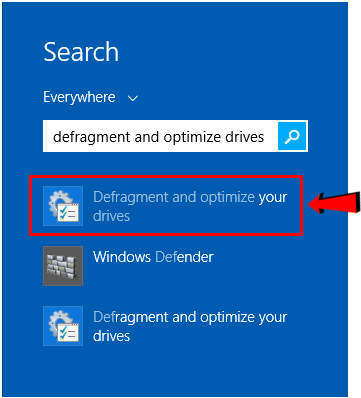
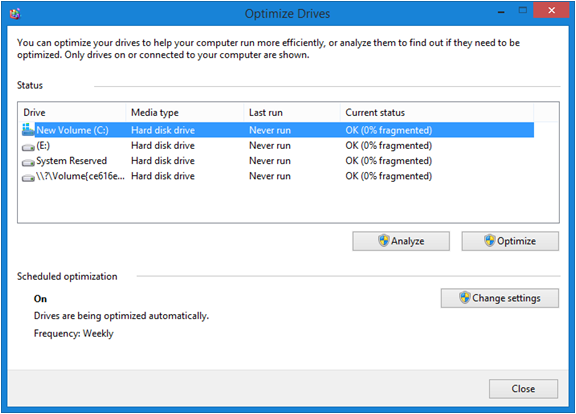
From these search results you can click on the link that says “Defragment and optimize your drives” and the “Optimize Drives” Window should open instantly. You can also press Windows + S to quickly open the Search screen and simply enter “defragment and optimize drives” into its input box then wait for the search results to appear where you need to click on the “Defragment and optimize your drives” shortcut in order to launch the “Optimize Drives” Window.
Access the Optimize Drives Tool from the “Apps View” Section
Another method in launching the “Optimize Drives” tool is by first accessing the “Apps view” screen. To get into this section on your Windows 8.1 computer, simply click on the Start Button or press on the Windows key and the Start Screen should open right away. On the Start Screen, simply hover the mouse pointer over it and a round button with an arrow-down icon in it will appear at the bottom-left portion as highlighted on the screenshot below. You will need to click this button in order to open the “Apps view” screen.

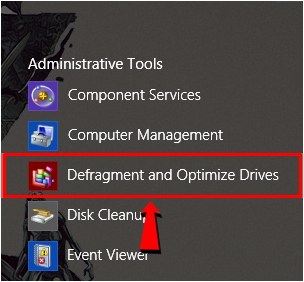
Now, on the “Apps view” screen, simply scroll towards the right until you see the “Administrative Tools” category and under it, you should be able to find the “Defragment and Optimize Drives” shortcut as shown below and you will need to simply click on it in order to open the “Optimize Drives” Window.
Launching Optimize Drives Using Command Prompt
Another method in accessing the “Optimize Drives” tool which can be less-known especially to novice Windows 8.1 users but is surely well-known to the more advanced ones is by using the Command Prompt Window. In fact, launching Command Prompt alone can be a big challenge but don’t worry, we will help you get through it easily. First, you will simply need to access the WinX Menu by pressing the Windows + X keys on your machine’s keyboard. After doing so, you should be able to see the menu which will pop-out of the bottom-left portion of your screen as shown below.
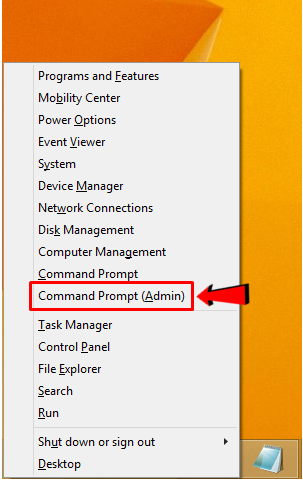
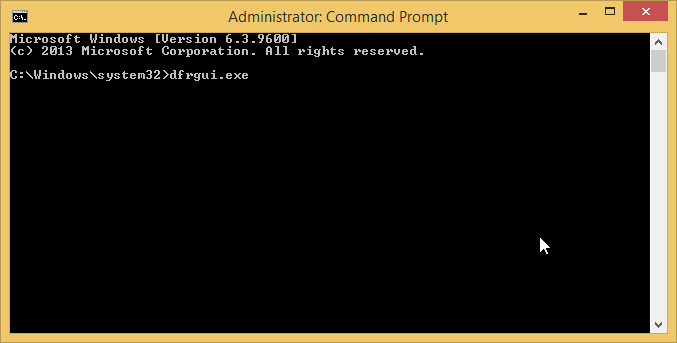
From the WinX Menu, all you need to do is click on the link that says “Command Prompt (Admin)” as highlighted on the screenshot above and you should be able to launch the Command Prompt Window instantly. On this Window, you will need to enter “dfrgui.exe” (excluding the quotation marks) and after doing so, you will need to press the “Enter” key in order to execute the command and launch the “Optimize Drives” Window in an instant!
Use the Run Box Tool
Lastly, you can also open the “Optimize Drives” Window using a small but very useful tool called the “Run” box. But first, you will need to launch it simply by pressing the Windows + R keys simultaneously and after doing so, the tool will appear at the bottom-left portion of your computer screen as shown on the screenshot below.
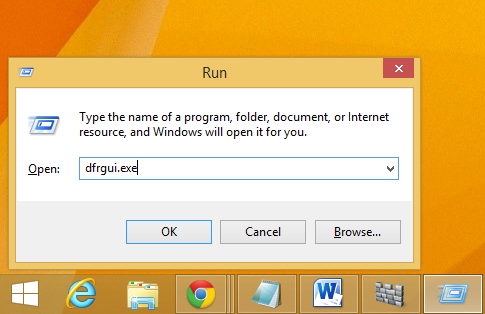
Within this tool is an input box where you can type-in commands which can be executed. In order to launch “Optimize Drives” using this tool, all you need to do is type-in “dfrgui” into its input box then hit the “OK” button that is located at the bottom of the “Run” box and the “Optimize Drives” Window will launch right away.
A Simple Tool that Can Make a Big Difference!
Accessing the new version of the “Disk Defragmenter” tool which is now called “Optimize Drives” in Windows 8.1 is pretty simple and with all the varied methods that we have shown above, it would surely be impossible for to get confused when trying to use it. It would also make a great difference especially when your computer is already starting to slow down in time. In our next tutorial, we will be showing the steps in using the “Optimize Drives” tool in your Windows 8.1 computer so be sure to stay tuned-in with us to learn even more about this awesome tool that is built within your Windows OS.