Installing Android Apps to Your Windows 10 PC
Previously, we’ve talked about a software that enables you to install Android apps into your Windows 7, Windows 8, Windows 8.1 or Windows 10 PC but we’ve only reached up to the process of downloading it and having it installed into Windows. We also gave the most reliable site where you can download the software itself and for any software program that is being offered for free, there is no other reliable source for its setup file than the developer’s website itself.
The software program more properly called an “app player” is named NOX and in case you’re clueless on what it is, what it does and how you can download it for FREE so you can have it installed on your Windows machine then you must read our previous tutorial that treats all of these things in great detail!
After reading that tutorial, we would assume that you have followed all the steps that are shown in it and finally have NOX installed on your computer. The process is pretty straightforward and even novice users can do them without encountering some major problems. In this tutorial, we will walk you through all the process that are involved in installing Android apps to your Windows PC using NOX and as well as tour you through its different parts, settings and basic navigation buttons so be sure to have the software open on your computer and just follow the steps that we are going to show below.
The Home Screen
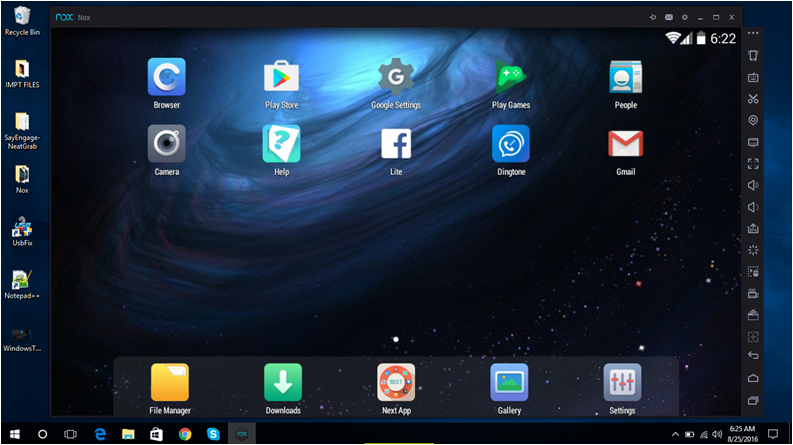
Right after you open the NOX app player software, it will automatically take you to its Home screen which contains all the basic apps that you would normally find in Android smartphones and tablets. Before we start, you need to know that NOX installs a smartphone version of Android specifically Android 4.4.2 Kitkat and the device is Nexus 5 so the Android apps that you will be getting are mostly for the smartphone version but who cares if you can actually enjoy them on your PC right?
Now, since we are in the Home Screen, you need to be aware of the basic things that will help you navigate through NOX. First of all, the “Back”, “Home” and “Menu” buttons are found on the Navigation bar at the right as highlighted on the screenshot below arranged from top to bottom respectively.
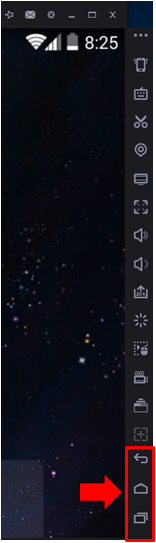
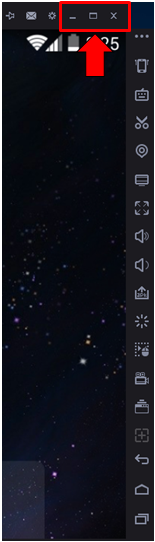
Those are the basic navigation buttons that you need to be aware of right now since we are only dealing with the basics in this tutorial and you will need these buttons especially as we install new Android apps to NOX later on. Now, you also need to be aware that NOX opens as a Window in your computer so as usual, you will be able to find the “Minimize”, “Maximize/Restore” and “Exit” buttons at the top-right portion of the Window as you can see on the screenshot below.
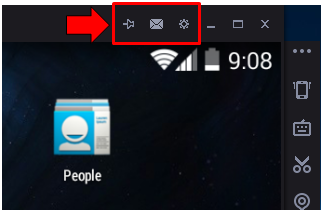
Also, if you want the NOX Window to always stay on top of all the other Windows that are open in your computer, there is an additional button for that that is found on the top-right portion of the Window at the left-most section of the set of buttons in this area represented by a push pin which is the “Stay on Top” button. Right next to it is the “Message Box” button represented by an envelope and a “Settings” button which is represented by a gear as shown below. These are additional buttons that you will not find on an ordinary Window and we will be talking more on what these buttons really do on our next tutorial.
So now that you already know the basics in navigating the NOX app player software, it is time to get acquainted with the process in how you can install Android apps to your Windows PC through it. First of all, you need to be aware that you need to login to your Google account since NOX acts like a device existing in your Windows PC. Just follow the steps that are shown below in order to successfully add Android apps in NOX.
Setting Up Google Play Store
Now that you already know the basics in navigating within the NOX app player software, it is time to start installing some apps from the Play Store but before that, you must first prepare your Google Account logins which are going to be used in logging in to the Play Store app. So let’s start by launching Google Play Store simply by clicking on its icon that is found on NOX Player’s Home screen.

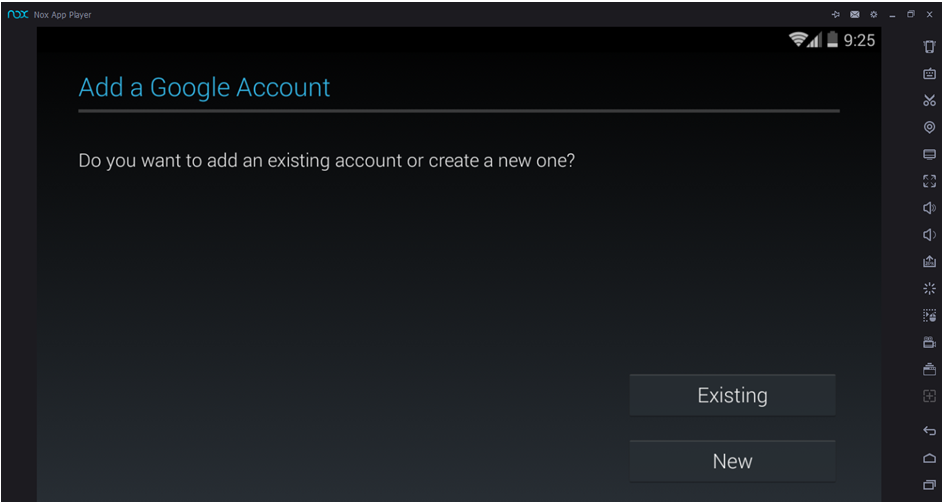
After clicking on the Play Store icon, you should be able to launch the app and it will automatically ask you to log in with your Google Account. If you already have a Google Account which you used in logging in to your other Android devices then you can simply use it and click on the button that says “Existing” but if you don’t have a Google Account yet then you need to click on the “New” button instead. Let’s assume that you already have a Google Account so we will be clicking on the “Existing” button in this tutorial.
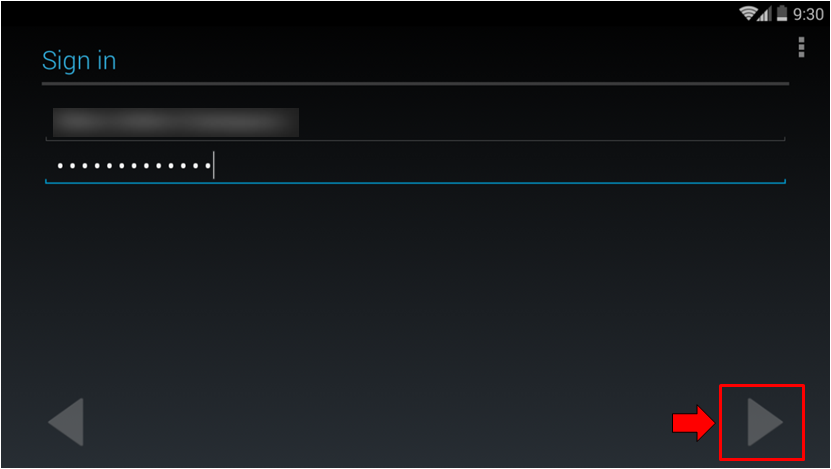
After clicking on the button that is labeled “Existing”, Google Play will take you to the “Sign in” page where you will simply need to enter your Google Account Email and its Password. Just input these required credentials into their designated boxes and after you do so, simply click on the arrow-right button that is found on the bottom-right portion of the screen as shown below.
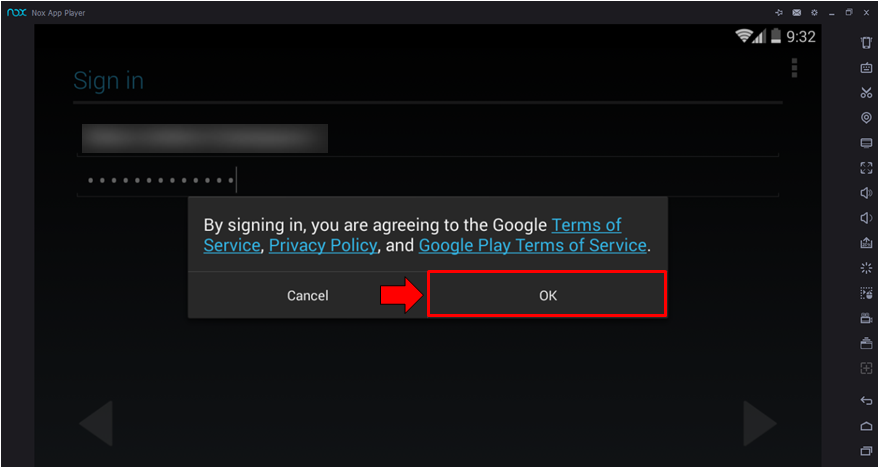
The next screen will then display a prompt that asks you to agree to the “Terms of Service, Privacy Policy and Google Play Terms of Service”. From here, simply click on the button that is labeled “OK” and you should be able to proceed on to the next step which will now show that you are currently signing in to your Google Play account.
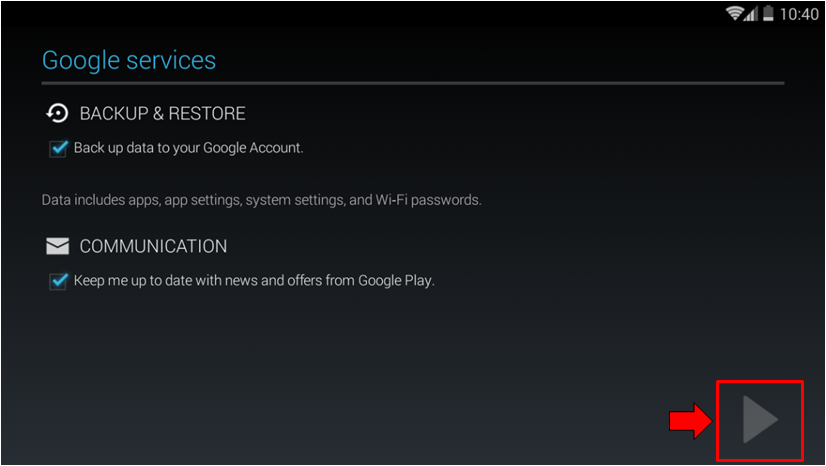
Once you are signed in, Google Play will then ask you if you want to enable certain Google Services such as “Backup and Restore” and “Communication”. If you want to enable any of these Google Services that are being offered, just tick inside the checkbox that is located at the left portion of each one of them while if you don’t want to enable any of them, simply untick on the corresponding checkboxes beside each service. Once you are done, just click on the arrow-right button that is found at the bottom-right portion of the screen to proceed on to the next step.
As you can see, the whole process in signing in on Google Play Store is the same as how everything is done when you first sign in to it on your Android smartphone or Tablet. The next step will now ask you to setup your payment info. While most of the apps in Play Store are offered for FREE, there are also some that has limitations and therefore you need to purchase a license or upgrade to the Premium version of the app to enjoy full features.
Others apps also have price tags on them so in order to make the purchasing of apps easy, you can choose to setup a payment info which would become the account from which the amount for purchasing certain apps would be debited from. Just input the needed information on this screen and once you are done, simply proceed to the next process and another prompt will ask you to accept the Google Play Terms of Service then finally, what follows is the Home screen of the Google Play Store app as you can see below!
Installing Your First Android App!
The process involved in installing an Android App on your Windows PC using the NOX app player software is pretty straightforward. First of all, if you have already tried installing an app to your Android smartphone or tablet then the process in doing it on NOX installed in your Windows PC is pretty much the same process with some variations for every type of app depending on its type.
Some would require you to sign-in with your social media account or Google Play Games account while others will first show what aspects of your information are needed to be accessed by the app itself so it can work properly. This is making things fair for the user and acts as a disclaimer as well that before installing an app, a user is informed of the things that the app can access to give a space for decision in whether to install the app or not to take place.
Most of us already have an Android device and of course, we have already been able to install an app to it so there’s really no need of showing the steps here but for the benefit of those who will be installing their very first Android app then we will show the whole process here and we will be working with the “Gmail” Android app for demonstration purposes.
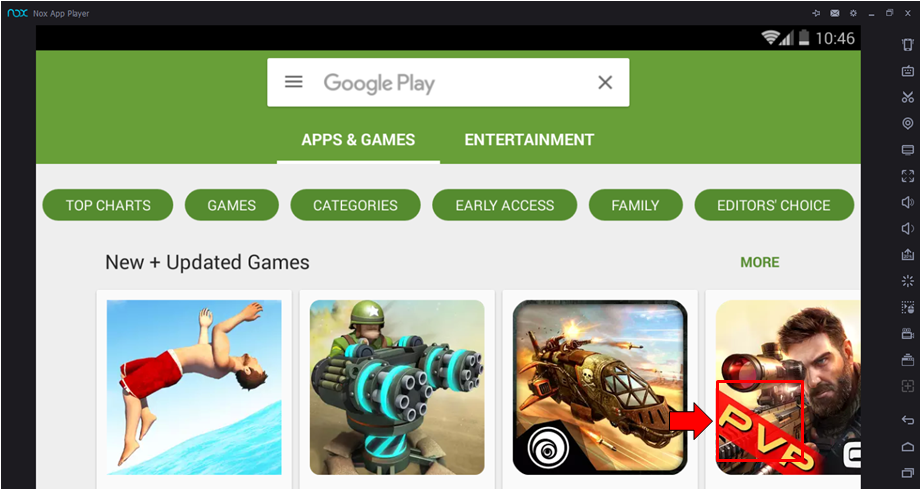
First of all, while you are already on the Home screen of the Google Play app, you will need to find the app that you want to install out of the thousands if not millions of apps that are available in the app marketplace. Since we want to install Gmail into NOX on our Windows PC then the first step would be typing in “Gmail” (excluding the quotation marks) into the Search box that is found on top of the Google Play Home screen then hit the “Enter” key.

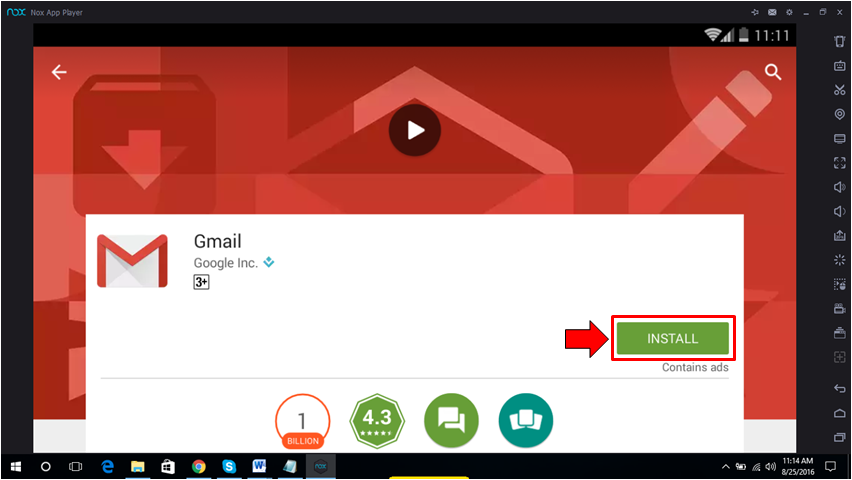
After doing the above steps, Google Play will now display the search results matching the Search term that you entered and from here, you should be able to find “Gmail” listed as the first item on the list as you can see on the screenshot above. Once you find it, simply click on it in order to enter the App description page where you can find relevant information about the app such as the number of users who already downloaded it, its overall rating, screenshots of the app itself and as well as reviews from users. This is also the section where you will be able to find the “Install” button that is intended to initiate the app install process. From here, simply click on the “Install” button itself in order to start loading the app into NOX on your Windows PC.
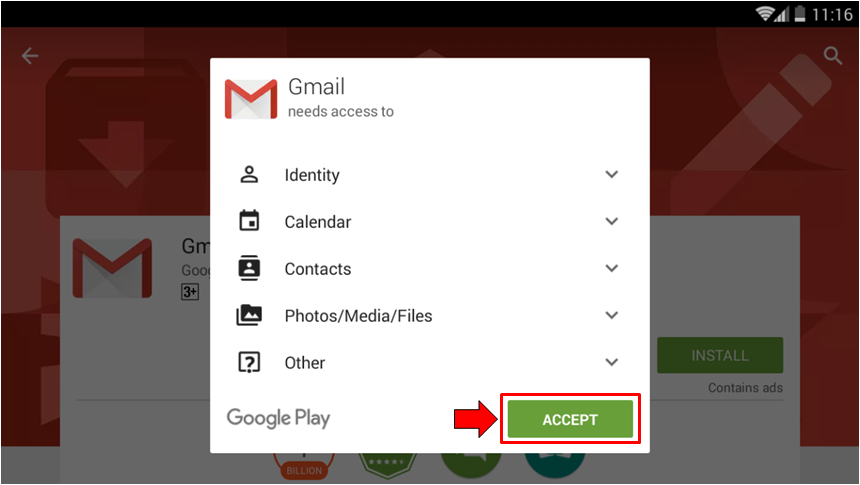
What follows next after you click on the “Install” button is a notification that shows the aspects of your personal information that the app can access. If you agree to these access permissions granted on the app once it gets installed on your computer, just click on the “Accept” button that is located on the bottom-right portion as highlighted on the screenshot below.
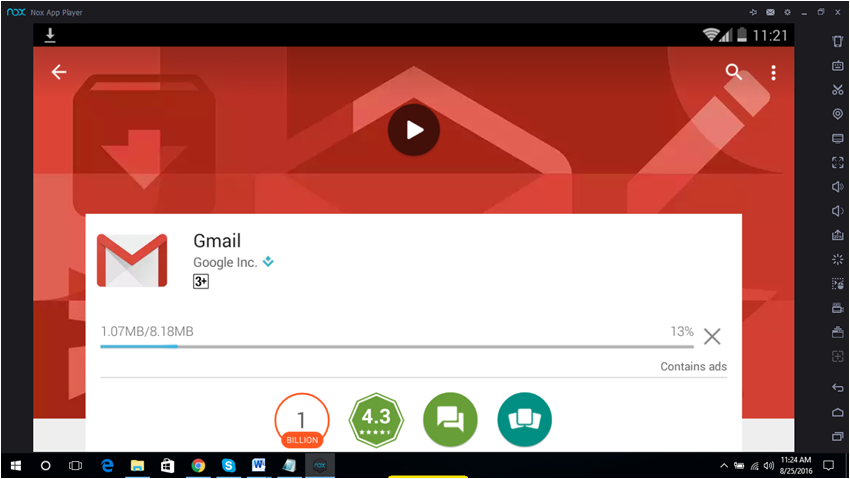
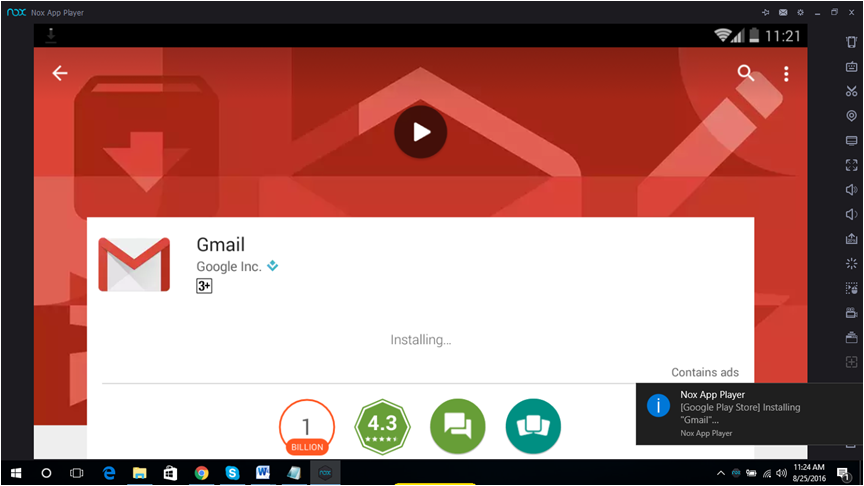
What would come up next is the app finally being downloaded and the overall download process will be displayed on a progress bar as you can see being shown on the screenshot below. The time it takes for the download to complete depends on your Internet connection speed. The faster the connection is, the faster the download would take to complete.
Unlike desktop programs, Android apps automatically get installed after they are downloaded so there’s really no need of going to the Downloads folder, looking for the setup or .exe file and executing it in order to initiate the install process because the app that has just been downloaded automatically gets installed as you can see on the screenshot below.
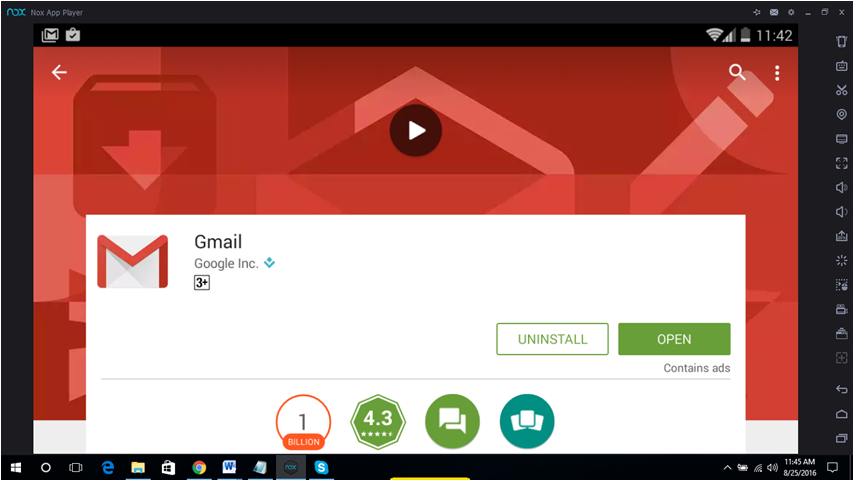
Once the app is installed, you should be able to see two new buttons on the same app description page as you can see on the screenshot below. The buttons are labeled “Uninstall” and “Open”. If you changed your mind and want to uninstall the app then you can simply click on the “Uninstall” button while if you want to open the app, simply click on “Open”.
The Gmail app automatically signs you in to your Gmail account using the Google Account that you used in signing in to Google Play. There is no need of signing in although you can choose to add accounts to it at a later time. Now that the app is already installed, you can simply exit from Google Play by pressing the “Back” button which is located at the bottom-right portion of the screen as we have shown earlier three (3) times and you will automatically be back to the Home screen.
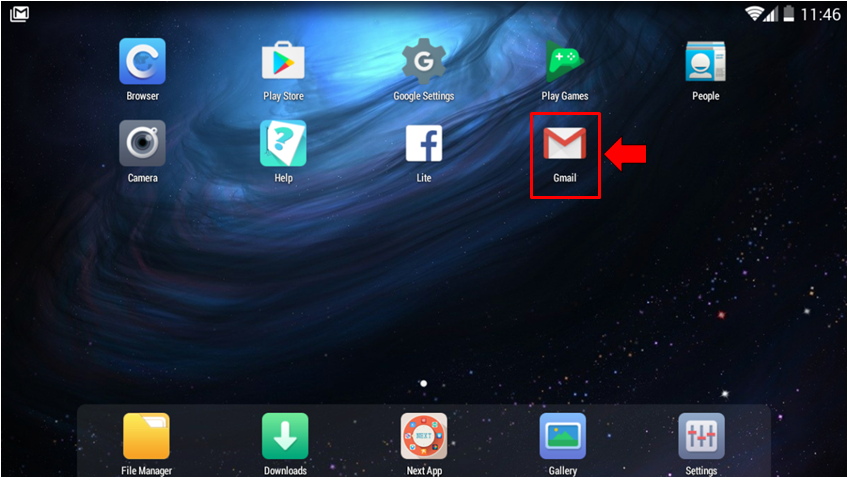
From here, you will be able to find another way in launching the Gmail app or any other app that you have installed simply by clicking on its icon that is already on the Home screen itself as you can see on the screenshot below. It actually as easy as that and the whole process of signing in to Google Play as well as installing your desired app is the same as the process when you are doing it on a smartphone or tablet.
Were you able to install NOX on your Windows PC and start installing Android games and apps to it? How was the overall process? Did you encounter any problem in one of the steps that we’ve shown in our tutorials? We would be pleased to hear from you so we can offer our assistance and help you get through the process. Please feel free to let us know about your concerns and questions simply by posting them as comments below.