Learn What’s New in Windows 10 with the Get Started App
Windows 10 has been out for 3 days now and while most of it would look familiar to Windows 8 and Windows 8.1 users, majority of the features that were included in it may be a bit confusing to those who are jumping from an older Windows version like Windows 7 to the brand new Windows 10 dubbed as the “best one yet”.
Newer innovations in Windows 10 really make it a lot more comfortable to use compared to its predecessors Windows 8 and Windows 8.1 especially if you’re a big fan of the Mobile and Desktop environments merged into one operating system thing but it will always be a big plus to have something built-in with Windows 10 that would guide you through the steps in using its newly-added features.
While the “Help” feature comes in handy, it may not provide every answer especially regarding the features that are leaning towards the Mobile environment. Contacting support isn’t also the best way to find help since it requires Internet connection and a very good description of what the problem is and what you are trying to look for. These challenges which would all enhance user experience and overall satisfaction has led Microsoft to develop and include a modern app that would guide users through Windows 10 in a very good way.
This feature is called the “Get Started” modern app and in this tutorial, we will be exploring through the ins and outs of this tool in order to help you get a good grip on your newly upgraded Windows 10 computer so be sure to follow the steps that we will be showing as we advance towards the end of this article.
How to Access the Get Started App
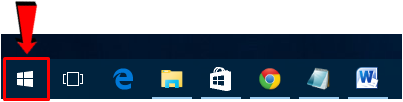
After learning a little bit about Windows 10’s Get Started app, it is time to learn how it can be launched so we can start exploring through the nuggets of information that are stored in it. To access this app, you will first need to click on the “Start Button” or press the “Windows key” in order to make the Start Menu appear.
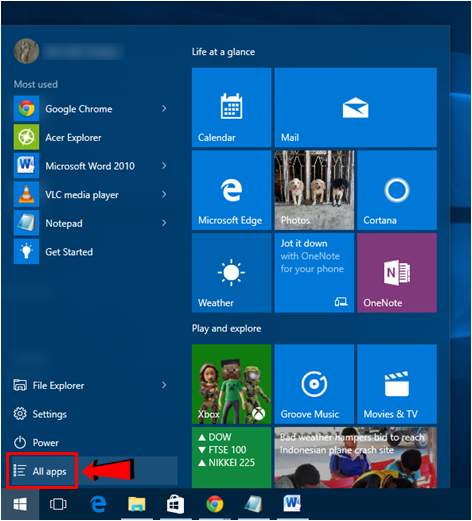
Once the Start Menu opens, you will simply need to click on the “All apps” link that is found at the bottom of the left-hand portion as highlighted on the screenshot below. Doing this will give you access to the list of all the installed and as well as the built-in apps and programs in your newly upgraded Windows 10 machine.
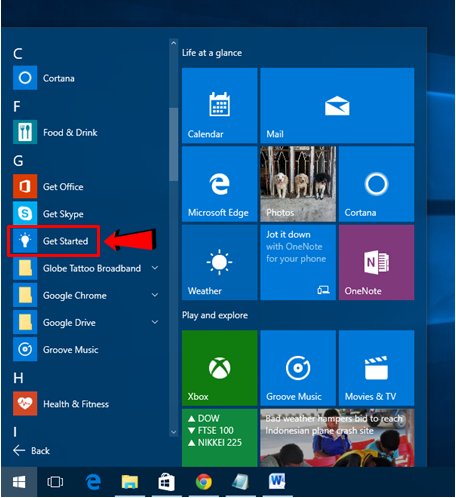
After the link is clicked, the list of all your installed as well as the built-in Windows 10 apps and programs will appear and they are arranged in alphabetical order. Once this list appears, simply scroll towards the “G” group and once your on it, simply look for the app that is labeled “Get Started” which looks exactly like the one highlighted below.
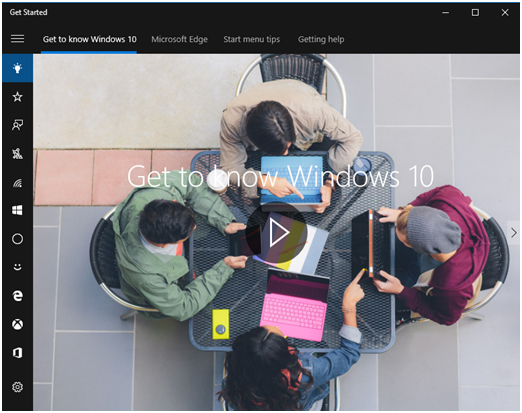
After hitting the “Get Started” shortcut that is found on the list, the “Get Started” modern app will now open and show the main video on its interface which is titled “Get to know Windows 10”.
A Very Familiar Interface
Just like any other modern app that is built within the Windows 10 operating system, the “Get Started” app has a well laid-out interface that will surely be very familiar and easy to use especially to those who have been using Windows for a very long time.
If you look closely on the main user interface of the “Get Started” app, you’ll see that there are tabs that are located on top and the app opens the first one which is labeled “Get to Know Windows 10” by default on the first time that you launch it.

Now, you can scroll through these tabs that are found on top of the app and you’ll be able to see all the other videos that are entitled the with the same label that you’ll find on the tabs. In order to play the videos, you will need to have a stable Internet connection.
How to Access the Get Started Guide Categories
After enjoying the videos about some of the main features in Windows 10, you can start exploring all the categories that are found on its right portion as highlighted on the screenshot below. These categories are currently displayed as icons that extends from top towards the bottom.
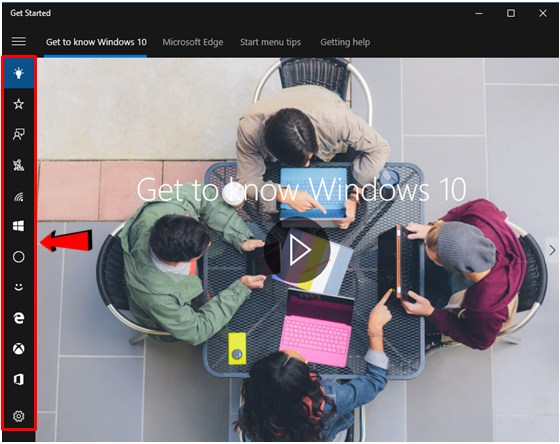
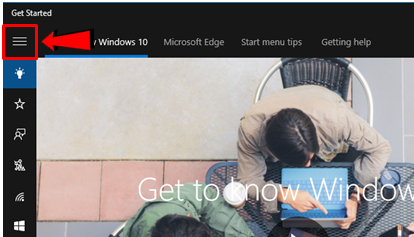
The icons will look familiar especially to those who have been using Windows 8, Windows 8.1 and even some of the Technical Preview versions of Windows 10. However, if you upgraded to Windows 10 from Windows 7 then you will need to at least see some labels on each icon in order to really know what they are. In order to display the labels for each icon, all you need to do is click on the “three horizontal lines” button as highlighted on the screenshot below.
After clicking on the button, you will now be able to view all the labels that are available for each of the icons that are found on the left hand portion of the “Get Started” app as shown below. However, the ones that are displayed are not everything yet, you can scroll towards the bottom of the category list and you’ll see that there are actually some others which are available.
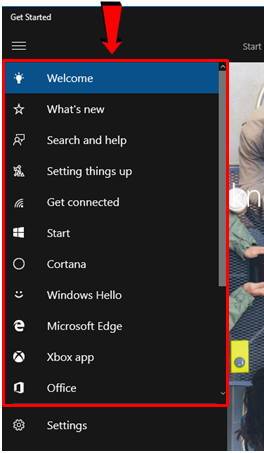
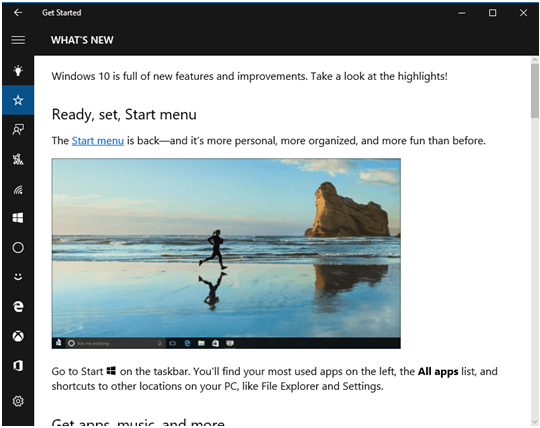
From this list, click on the category that is labeled as “What’s new” and after you do so, you should be able to see an article that describes the brand new stuff that were included in Windows 10. If you’re a beginner with Windows 10 then we would recommend that you read the contents of this section and even the rest of the items so you can really get to know Windows 10 and every awesome feature that it offers.
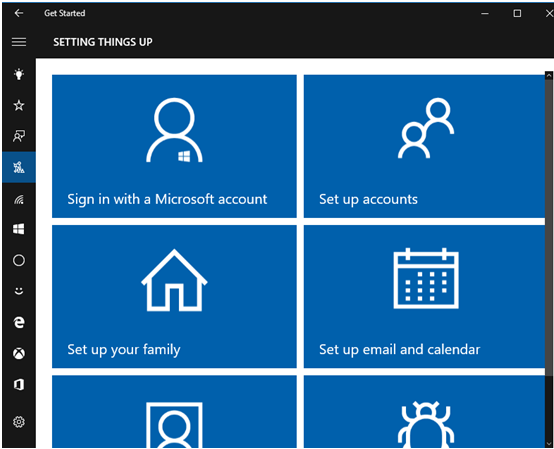
As you start to explore, you can click on each of the categories first and you should be able to notice that not all of them contain articles. Others contain tiles that are labeled according to sub-categories that belong to the main category itself. For instance, if you click on the item that is labeled “Setting things up” that is the fourth category on the list, you’ll see some tiles that look exactly like the ones shown below.
Again, if you are just starting to know Windows 10 and it is your first time to use it, we would recommend that you first read everything that the “Get Started” app contains. The categories are arranged in such a way that it would take you step-by-step in setting up your computer and personalizing it according to your desire.
Pinning a Get Started Shortcut on Other Easy-to-Access Locations
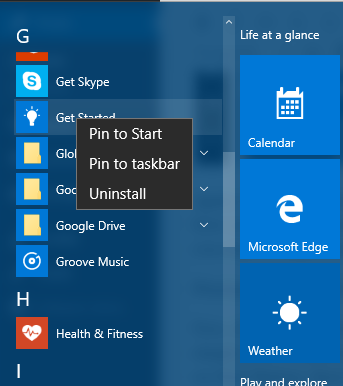
Now, if the method of accessing the “Get Started” app that we have shown above is quite lengthy to do, you can simply place a shortcut of it on the Taskbar or even on the Start section at the right. To do this, you will simply need to click on Start Button, then hit the “All apps” link as we have shown earlier.
After doing so, you will again see the list of all the apps and programs that are installed and built-in with your Windows 10 machine and from here, you will simply need to scroll towards the “G” group, right-click on the “Get Started” app shortcut then simply click on the “Pin to Start” or the “Pin to taskbar” options that appears on the right-click menu that appears as shown on the screenshot below.
Master Windows 10 Here in WindowsTechies!
As you can see, Microsoft has really made sure that users are well aware of all the features which they can take advantage of in the new Windows 10 operating system. They did this by creating an app that serves as a guide for the basics in using this newest Windows edition but if you want to learn more about Windows 10, you’ll find some of the best tips and tricks here in WindowsTechies.com so be sure to stay tuned-in with us here to learn all the latest in Windows 10 which is dubbed as the “best Windows OS yet”.