Making the Best Use of the Taskbar in Windows 8.1 (Part 1)
One of the oldest features that you will find on every computer that runs with the Windows operating system, from XP to Vista and down to Windows 7 or even in Windows 8 and Windows 8.1 is the one that is found at the bottom of the screen and is called the “Taskbar”.
![]()
There seems to be nothing that can compare to this feature’s usefulness and all the unique capabilities that it has and surely most of us are really awestruck with the one who arrived to the idea of incorporating such into the Windows operating system.
Just imagine having no Taskbar on your Windows computer? Have you ever thought of how different would it be for all of us if this feature was never included in the world’s most-loved operating system? Where will all the open task go. Well, it’s easy to say that in the absence of the Taskbar, Microsoft could have surely thought of something else but its absence, without another feature that can take its place would surely be disastrous in many ways.
The Taskbar Feature Through the Years
Aside from being one of the most useful features in Windows ever, the Taskbar is also one of the less-changed feature because of how it perfectly caters to the needs of the operating system itself. For instance, the Taskbar in Windows editions older than XP display the icons of all the open or active programs and apps in a Windows machine and this capability has been carried over down to the Windows editions that are available in our present day.
![]()
Improvements such as being able to pin program icons and other shortcuts into the Taskbar has just been added in later versions of the Windows operating system but its basic feature- the ability to display icons representing the apps and programs which are currently up and running has stayed and it will probably be the Taskbar’s basic capability for good.
The Start Button has also been a mainstay of the Taskbar since Windows editions prior to Windows XP and down to Windows 7. It has been removed in Windows 8 but when Microsoft received numerous complaints from loyal customers pleading for it to be taken back, the Start Button has been restored in Windows 8’s improved version dubbed as Windows 8.1 and the Start Menu which is the main feature that is accessed when the Start Button is clicked has been restored (in its new and improved version) in the upcoming Windows 10 operating system scheduled to be released this year.
![]()
The system tray that displays system time, date, volume icon, network status icon, Action Center and even the apps and programs that are running in the background has also remained untouched at least for most of its appearance and the stuff that it carries with it.
![]()
Through the years, the Taskbar has really stayed for what it is and having it taken away would surely make a great difference that can take the Windows operating system down from its presently high position being one of the world’s favorite operating system.
So What Else Can the Taskbar Do?
To beginners or even average Windows users, the Taskbar is just a simple feature that provides a place where the icons for active programs and apps are displayed but if we dig deeper into what the Taskbar really is intended for, we’ll actually discover even more about this awesome feature found in every Windows computer and that’s what we’ll be learning about in this tutorial so just read on towards the end of this tutorial to learn even more!
Moving the Taskbar to Different Top, Right, or Left Edges of the Screen
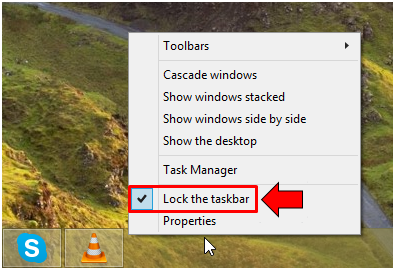
The Taskbar’s default location on every Windows 8.1 computer is at the bottom of the screen and this is also the same with all of the previous Windows editions. But did you know that the Taskbar can actually be moved to all the other edges of your computer screen? To do this, you will simply need to right-click an empty space on the Taskbar and after doing so, just remove the check mark from the “Lock the taskbar” option (by clicking it) from the right-click menu that will appear as highlighted below.
Once the check mark is removed, the Taskbar can now be dragged to the location where you want to place it. Just click and hold then drag it to the top, right or left edge of your computer screen and you will see that it will now be transferred to the location where you dragged it to.
Adding a Quick Access Toolbar to the Taskbar
There surely are some locations and features of your Windows machine that you wish were easier to access and the good news is with the help of the Taskbar, you can actually place quick access toolbars beside the System Tray. To do this, you will need to right-click an empty space of the Taskbar again then once the right-click menu appears, simply point the mouse to the option that says “Toolbars” and another Window will appear which will show the available toolbars that you can add to the Taskbar as shown below.
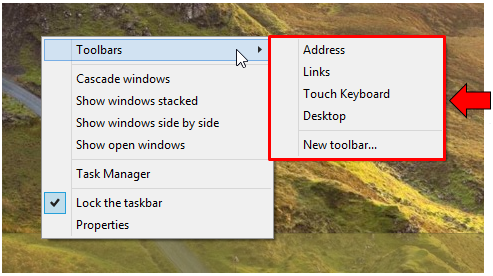
As you can see, the toolbars which are available are “Address”, “Links”, “Touch Keyboard” and “Desktop”. Now, let’s try to make all of them active and see what happens to the Taskbar. To activate each toolbar, all you need to do is click on each one of them in order to put a check mark (which means that they are already active). Once all toolbars are activated, the right-hand portion of the taskbar will look like the one shown on the screenshot below.

Adding Custom Toolbars to the Taskbar
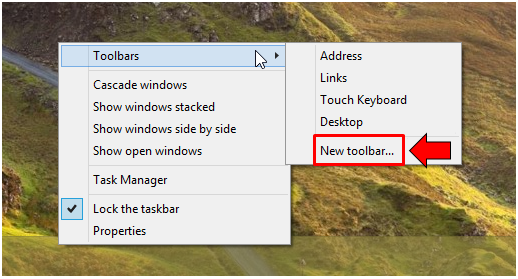
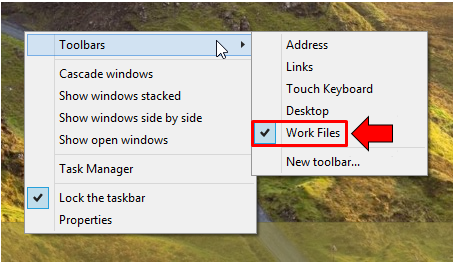
Aside from the toolbars that are readily seen from the options box when you point the mouse on “Toolbars” found on the right-click menu, you can also add custom toolbars such as a folder in the documents library or from any other location by clicking on the “New toolbar…” option as shown below.
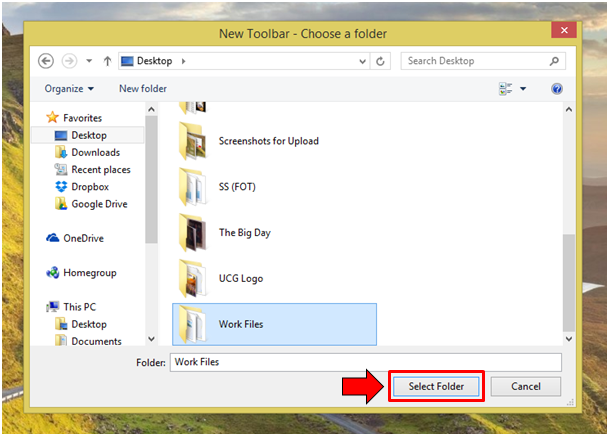
After clicking “New toolbar…” a Window will open which is labeled “New Toolbar-Choose a folder” and from here, simply select the folder that you want to add as toolbar into the Taskbar by looking for it using the navigation pane that is located at the left side of the Window. Once you find the folder, all you need to do is click on it then hit the “Select Folder” button found at the bottom-right portion of the Window as shown on the image below.
Once a new toolbar is added to the Taskbar, it will now be part of the list that would appear in a box whenever you point the mouse on the “Toolbar” options as shown below. If you want to remove the new tool bar from the Taskbar, all you need to do is remove the check mark from it.
There’s Still More on Our Next Tutorial
The Taskbar is truly one of the most useful features in Windows but its many uses doesn’t just stop with what we’ve already shown in this tutorial, there are still more than you need to learn about and we’ll be showing it on our next tutorial so be sure to bookmark our website to stay updated of all the latest news, tips and tricks that you can apply on your Windows machine!