Managing Wireless Networks in Windows 10
Wireless networks are found in almost every corner of the neighborhood that you are living in. In our modern day and age, it is almost impossible to go anywhere without picking up a WiFi signal on our mobile devices. We are truly in the age of information and the accessibility of all these exploding knowledge, entertainment and whatever is found in the Internet is made easier by devices that transmit data and as well as our modern devices that receive and decode them in order to show useful information on LCD screens.
Being connected to the Internet is therefore the “in-thing” in our present age and as we enter a new chapter of the Windows operating system, it would be very helpful that we all learn how to connect to any wireless network that our Windows 10 devices might detect whenever we go to different places.
Windows 10 is going to be available as a FREE Upgrade and in fact, Microsoft has already been rolling out the “Get Windows 10” app through Windows Update to different Windows computers and devices running the upgrade-supported Windows operating system versions like Windows 7 SP1, Windows 8.1 and Windows Phone 8.1. With this development and with the very fast progress in Windows 1o Preview Builds (now already in Preview Build 10130), it is also important that you keep up with the steps in how you can connect to a wireless network so you can always stay online anytime, anywhere.
In this tutorial, we will be taking you through the steps that are involved in connecting to a wireless network in Windows 10’s latest build so you can at least be familiar with the process when the final version comes out on the 29th of July.
Network Status Icon Changed
The icon that represents the network status which is found on the System Tray of the taskbar has never been changed in terms of its appearance since Windows Vista, Windows 7, Windows 8 and Windows 8.1 and even in earlier Preview Builds of Windows 10 but in Preview Build 10130, we were surprised to see that the icon has already been changed into something that looks like the one that is found in mobile devices as you can see on the screenshot below.
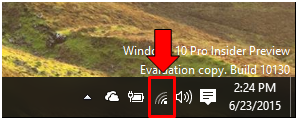
However, it’s not only the network status icon that has been changed but also the screen that appears when you click on it and that’s what we will be talking further about in this tutorial.
Viewing Available Networks
Now that you already know how the new network status indicator icon looks like in the System Tray section of the taskbar, you will need to click on it and after you do so, a new and improved screen that shows all available networks will appear as you can see below.
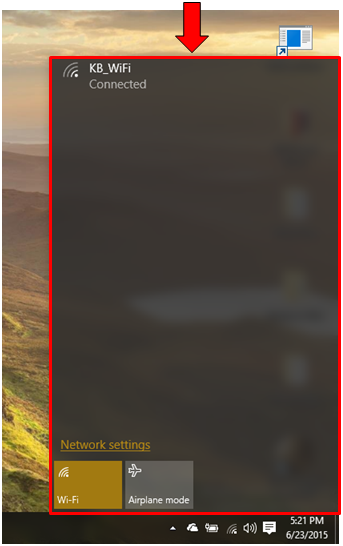
Now, you can see the available networks that your device is currently detecting. From this screen, you will also see tiles at the bottom for quickly turning off the “Wi-Fi” receiver radio and as well as switching on the “Airplane mode” setting if you are travelling on an airplane.
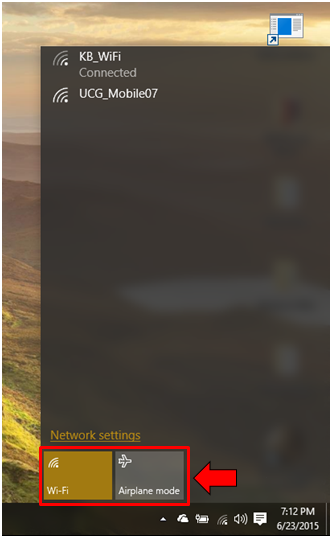
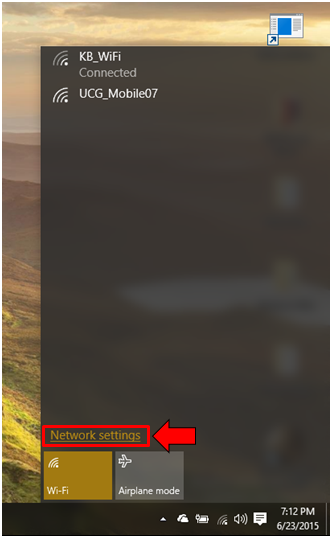
On top of the “Wi-Fi” and “Airplane mode” tiles which both function as switch in turning these functions on and off, you will find a link that says “Network settings” and we will be dealing much with the contents of this link as we advance in this tutorial so you can learn how to change network settings in the upcoming Windows 10 operating system.
NOTE:
The screenshots that are shown in this tutorial are taken from Windows 10’s latest Preview Build 10130 and may still be subject to change in the final Windows 10 release but you can expect that most of the steps shown here will basically be the same.
What’s Under Network Settings Link?
After clicking on the “Network Settings” link that is located just above the “Wi-Fi” and “Airplane mode” tile buttons, you will be able to open the modern “Settings” screen which shows all available aspects and related locations for tweaking the network settings on your computer as shown below.
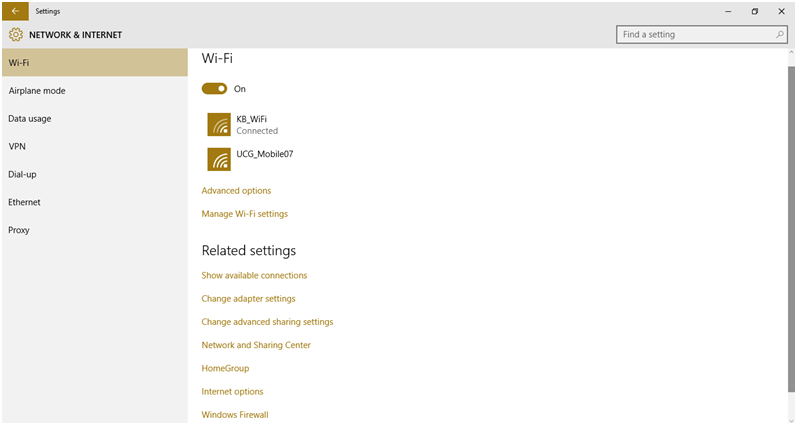
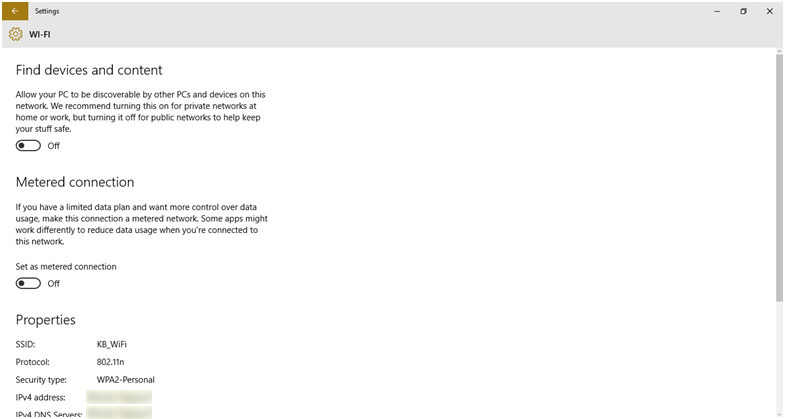
Now, from this modern settings screen, you will find a switch for the Wi-Fi signal receiver on top which you can easily click to turn the Wi-Fi radio on or off and just below it are the available wireless networks that you can select from now, if you move lower, you will see a link that says “Advanced options” and when you click on it, you’ll be able to access a switch that will make your computer become discoverable to other devices that are connected to the same network that you are currently connected to. There’s also an on/off switch for making the connection as a metered one or not and if you scroll even lower, you’ll be able to see the “Properties” of the wireless network that your machine is connected to as you can see on the screenshot below.
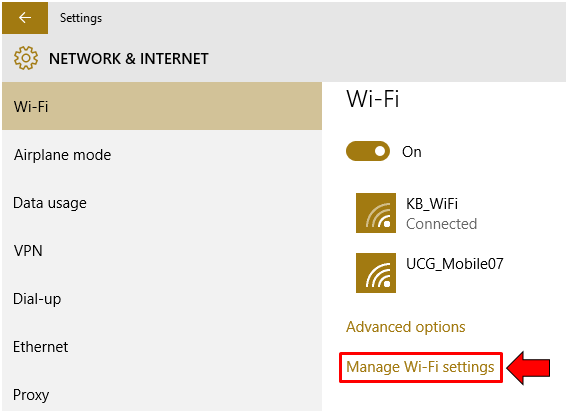
Now, click on the arrow-left icon that is located at the top-left portion of the screen and you will be taken back to the previous section where you were in and from here, simply click on the “Manage Wi-Fi settings” link as highlighted on the screenshot below and you will be taken to the screen where even more wireless network tweaks can be done.
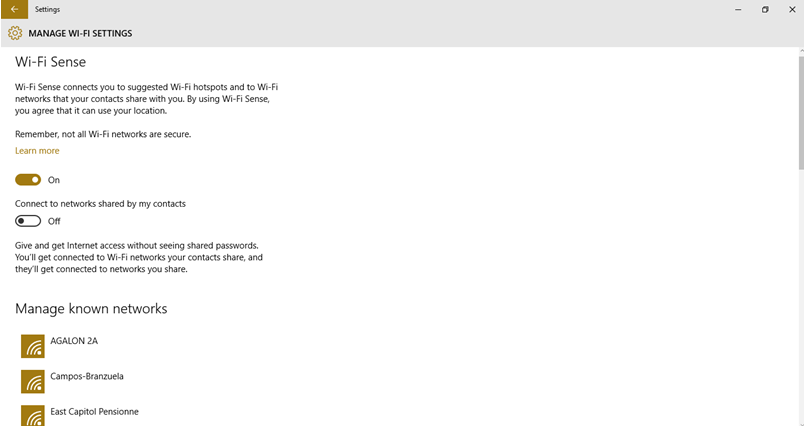
The screen that will follow will now look like the one shown on the screenshot below and from here, you will be able to get access to a new feature that is called “Wi-Fi Sense” which is basically an automatic way for you to connect to wireless networks that your friends or contacts have shared with you. If you scroll lower, you will see all of the networks that you computer has connected to in the past and you can manage them like forgetting the ones that you don’t know or have forgotten about and saving only the ones that you know and connect to most of the time.
Managing Known Networks
Now, as we have mentioned earlier, you can actually manage the networks that your device or computer has connected to in the past and are already appearing under the “known networks” section. If you wish to delete data about a certain network such as its security key/password. You can simply tell your computer to do so by first clicking on the network’s name or SSID and after you do so, it will be highlighted and a button that says “Forget” will now appear as you can see on the screenshot below which you will need to click so that the network’s data and other information would be removed from your computer.

Once a network is already forgotten by your computer or device, you will not be able to automatically connect to it when it even when the network itself is in range so we recommend that you only forget those networks that you only connected once like those found in hotels, airports and other public places that you once visited. As you can see, managing networks in Windows 10’s latest Preview Build has quite changed from how it used to be done in older Windows versions or even previous Windows 10 builds but remember, there can still be changes to these things in the final Windows 10 release but what’s important is that you already have a glimpse with some of the aspects of this upcoming Windows edition dubbed as the “best Windows yet”!