Organizing Your Pictures using the Photos App
On this third article for the Photos app series, we will be exploring some options and tweaks available when you want to organize your pictures and discover some tricks that can be done so you can use an image to represent the Photos app tile on the Start Screen or become the image for the Lock Screen. We will also discuss the “Edit” option in a greater detail for the benefit of the novice users so be sure to get your machine ready to follow the steps that I’ll be showing below.
Get Your Pictures Organized
Having all your pictures saved in one folder would be a big hassle especially if you work on each one of them. It won’t be a problem if there are only a hundred of them but if we’re already talking about thousands of images that are mixed together, searching for a specific one would surely take time. This is the reason why you need to learn how to organize your pictures and this time, we will be learning it the modern app way. Here are the steps that you can follow in doing this crucial step.
1. Access the Photos App
Modern style apps don’t appear anywhere on the Desktop screen but instead, they are found on a new environment called the Start Screen. This brand new section on every Windows 8.1 machine represents the world of Tablets and the modern apps that can be installed in them from the Windows Store. To access the Photos app, you will need to click on the Start Button or press the Windows key and once it opens, simply look for the tile that is labeled Photos and click or tap on it.

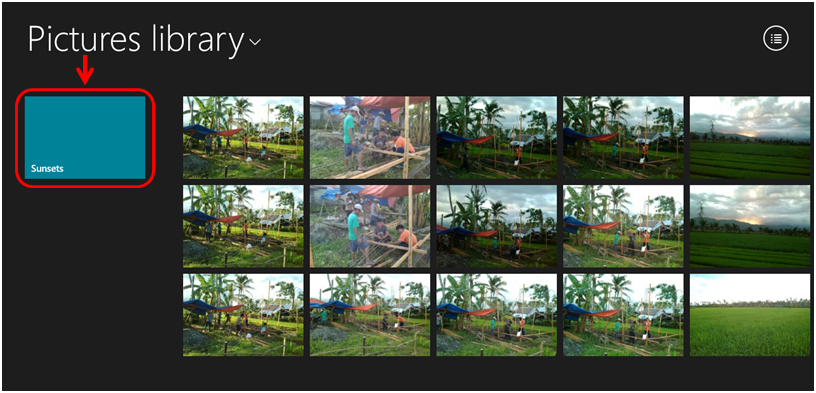
2. Click on New Folder from the App Bar
Once the Photos app opens, simply right-click on an empty space of the main screen and click the “New folder” option which you can find on the App bar that appears at the bottom of the screen. After doing so, a white screen will appear which contains an input box where you can enter the name that you want to assign to the folder that you are going to create.

After entering your desired name, just click or tap on the button that says “Create”. After you do so, you’ll be able to see the new folder at the left of all the images that appears on the main screen of the Photos app as you can see on the screenshot below.
3. Copy or Cut: What’s the Difference?
From here, you still can’t drag-and-drop the images to the folder that has just been created. This action is just possible when you are working in File Explorer on the desktop screen but in modern-style apps such as the Photos app, you will first need to select the images that you want to save into the newly created folder by right-clicking on them one-by-one. After all of them gets selected, just click on the “Copy” or the “Cut” option located on the App bar at the bottom of the screen.
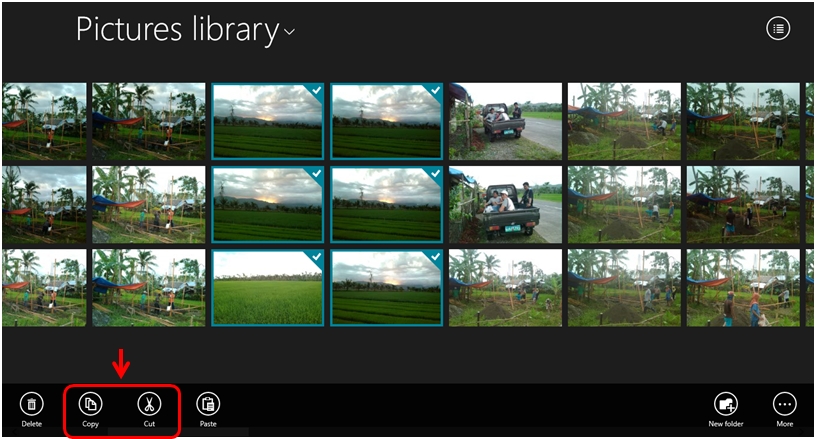
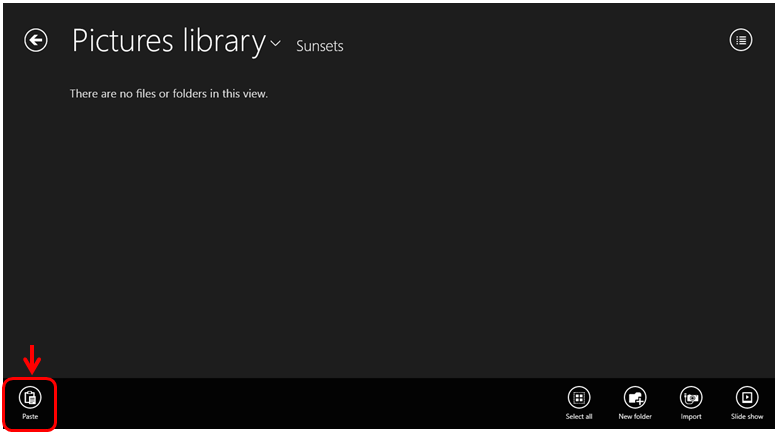
If you select the option that says “Copy”, the images will remain on the Pictures library and a copy of it will just be moved to the new folder. To do this, simply click or tap on the folder and once it opens, just right-click anywhere on the screen as long as its an empty space then hit the “Paste” option that appears on the extreme-left end of the app bar appearing at the bottom.
If you selected the “Cut” option instead of the one that says “Copy”, the images you selected will be taken out from the screen after you paste it into the new folder. This is an effective way of organizing your pictures without saving double copies of them in separate folders.
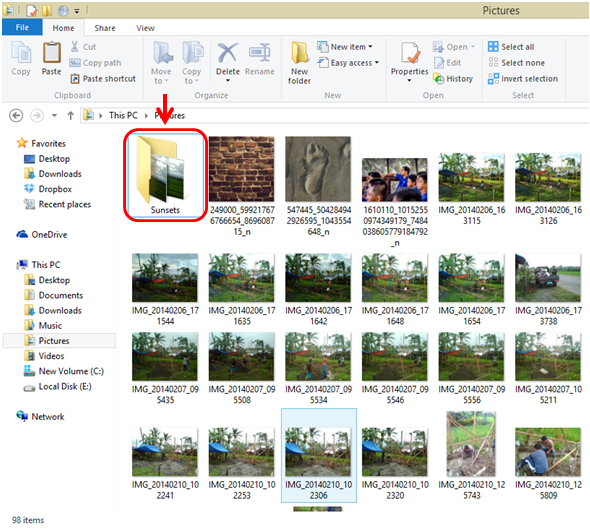
Locating the New Folder You Created
The new folder which you have just created would exist not only in the Photos app but also in the Pictures library on your Windows 8.1 machine. To go to the location where it is currently saved. All you need to do is minimize the Photos app and get the the Desktop screen. After arriving on the desktop screen, just open File Explorer and click on the “Pictures” link located on the navigation pane at the left portion of the Window.

After clicking on the link, you will be able to access the images saved in the Pictures library which will appear on the contents pane. From here, the newly created folder should appear as the first item on the list. You will be able to view its contents simply by clicking or tapping on its thumbnail from the list as you see on the screenshot below.
Personalizing the Photos Tile
The Photos tile looks dull if you just leave it plain on its default thumbnail or may also become boring if it keeps on flashing the same set of pictures when the Live Tile feature is turned on. To neutralize these extreme effects of having a plain or over-decorated Photos tile, you can use one of your personal photos to represent the tile itself that is pinned on the Start Screen and that alone, nothing more, nothing less. To do this, simply click on the on the picture that you want to set as Photo’s app tile image and once it opens, just right-click anywhere on the screen and the App bar will appear at the bottom. From here, just look for the option that says “Set as”.
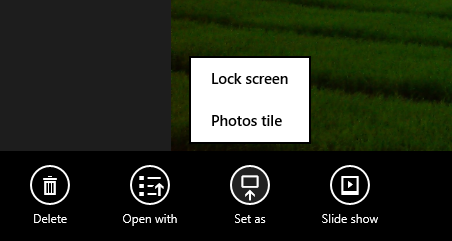
After doing so, there will be two options that will appear inside a white box. From these options just select the one that says “Photos tile” and the image you selected will automatically become the background of the Photos tile which is pinned on the Start Screen. This will remain unchanged unless you use another image or turn on the Live Tile feature.
Setting a Picture as the Lock Screen Image
You might already be bored of the Lock Screen image that is set for your Windows 8.1 machine and you want to change it to something that you personally took using your camera or smartphone. To do this, simply open the photo that you want to set as Lock Screen image using the same process that you’ve done in setting an image from the Pictures library as the Photos tile background image. Once the image you selected opens on the Photos app screen, simply right-click on it and hit the “Set as” option that appears on the App bar at the bottom. After doing so, the same white box containing two options will appear. From these two options, you will need to click on the one at the top which says “Lock screen” as you can see on the screenshot above. After doing so, you can lock your computer and you will notice that the Lock Screen image will now be the picture which you have selected.
Manage Pictures Easily with the Photos App
Windows 8.1 is no doubt the most efficient Windows operating system that has ever been released by Microsoft. With the company’s smart decision to combine two worlds (Desktop and Tablet) into one, they actually made things a lot easier for users in managing different aspects and contents on every Windows machine. Learn more about the latest stuff in Windows 8.1 only here at windowstechies.loc!