On the Ribbon: The View and Share Tabs
We’ve already gone through the options that are available on the “Home” tab of Windows 8’s new ribbon-based File Explorer options and also learned some tips that will help guide the use of the new stuff found in it. However, that’s not everything yet. If you try to look at the top-most portion of the File Explorer Window, you’ll notice two other tabs that are labeled “Share” and “View” and clicking on these tabs will reveal more options for sharing, viewing and doing some other tweaks on the files saved on your Windows machine.
The Share Tab
Just beside the “Home” tab lies another one that is labeled “Share”. When you click on this tab, you’ll see another set of options lying on the ribbon which are all aimed to sharing a specific content that you have selected and browsed into in Windows 8’s File Explorer. Since this tab is a new one, here are some tips that will help you get started in using the options that are found in it.
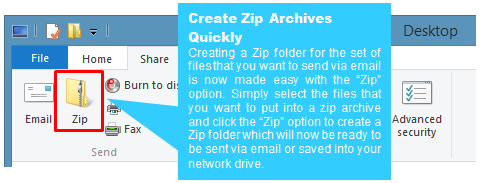
Tip # 1 Email Files or Create a Zip Folder in One Click
The first two options that are found on the “Share” tab helps you to email any file (document, photo, music or video) quickly using your Microsoft Outlook account. If you want to take advantage of this option, you first need to setup your Microsoft email account by going to the Control Panel > User Accounts and Family Safety > Mail then add your Microsoft account and follow the instruction that follows in order to complete the process.

Sitting next to the “Email” option is the “Zip” button. If you are familiar with some file compression software like 7-Zip or WinZip then you should also be familiar with what this option does to your files. You can use the “Zip” option before sending files via email to make things organized, compressed and archived properly. Creating a zip file also reduces size and makes it easier to share stuff across networks or even over the Internet.
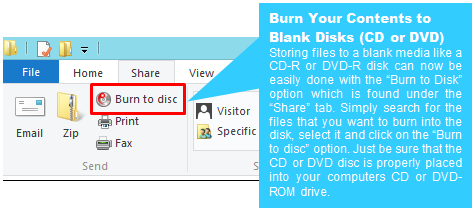
Tip # 2 Burn Disks Easily
You might have a blank CD or DVD which you would like to burn contents into. If this is the case then all you need to do is stick the blank media into the DVD-ROM slot and click on the “Burn to Disk” option. Just be sure that the total size of the contents that you are going to burn would fit on the available storage space of the disk you have chosen.
Tip # 3 Choose Your Type of Burn Mode
You can choose between two different types of burning mode. One is “Mastered” which is the mode that should be chosen if you are planning to use the disc on other devices like a DVD player. This mode also prevents further writing into the disk. The other mode is called “Live” which is the best one to be chosen if you are just planning to use the disk on Windows computers. This mode allows further writing or rewriting depending on the type of disc used.
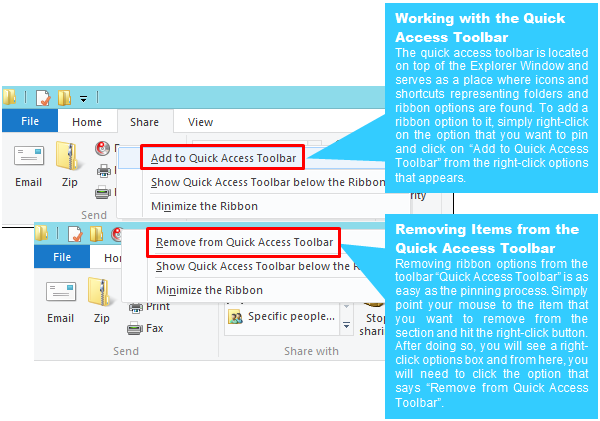
Tip # 4 Add Ribbon Options to the Quick Access Toolbar
On the topmost portion of the Explorer Window is a Quick Access Toolbar. There might be one folder that is already pinned on it but you can add even more ribbon options to it. Simply right-click on the option that you want to add to the to the toolbar then select the option that says “Add to Quick Access Toolbar” and you’ll see an icon added to the topmost portion of the Window. To remove an item, simply right-click on it from the “Quick Access Toolbar” and select the “Remove from Quick Access Toolbar” option.
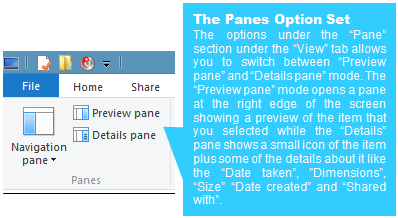
The View Tab
The next tab on the line is called the view tab and again, clicking on it will reveal a new set of options. The first set of options are labeled as “Panes” and it gives you choices of how you would like each Library and other information about your files presented on the Explorer Window both on the left navigation pane and “Details” or “Preview” pane at the right.
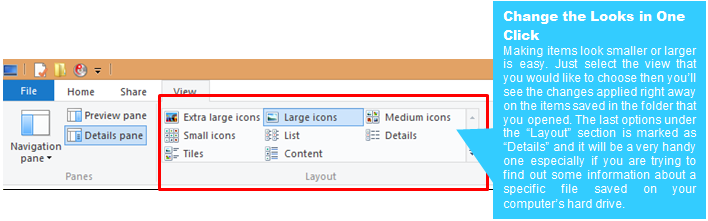
Tip # 5 Make Some Stuff Look Smaller or Larger
To make your files look smaller or larger, simply press and hold the “CTRL” key and spin the scroll wheel of your mouse forward (to make some stuff look larger) and backward (to make it smaller). The changes will only apply to the folder which you’ve done the changes on and will stay the same when you get back to the same folder at a later time. An alternative way of doing this is by choosing your desired icon size under the “Layout” section which is found just beside “Panes”.
More Options For Tweaking Views and Sorting
The remaining two sections under the “View” tab will give you options for sorting as well as showing or hiding some details, name extensions or check boxes of the files that are saved in your Windows 8 machine. These options are not that important for the basic users but it would still be good to experiment on them when you have time. Are you confused about some items lying on File Explorer’s ribbon options? We would like to hear from you. If you have questions regarding this brand new feature on Windows 8, please feel free to post them as comments below.