Exploring the Options in WordPad’s Ribbon
The WordPad desktop application is another built-in app on every Windows 8.1 computer that helps you do some editing and creating of text documents and just like the Notepad and Paint, it also has its own set of options lying on the ribbon which is located on top of its Window. You might think that it would look and work just the same as the the Notepad desktop app but you are wrong because the WordPad has more advanced options that looks very much the same as what you will find in Microsoft Word. In this tutorial, we will be discovering what these options and tweaks are so you can start to get familiar with the things that you can do to every word document that you want to work on.
Accessing the WordPad Desktop App
Windows 8.1 is totally different from its predecessors especially when it comes to the way desktop apps are accessed in it and this is because the Start Menu which used to open when the Start Button is clicked or the Windows key is pressed has already been taken away and was replaced by a brand new feature called the Start Screen. To access the WordPad, all you need to do is access the Start Screen by pressing on the Windows key or clicking on the Start Button and once it opens, just move the mouse pointer over the screen then at the bottom-left corner of the screen, you should be able to see a round button with an arrow down icon in it which you will need to click in order to access the Apps view screen.

Once the Apps view screen appears, simply scroll to the right until you see the category that is labeled “Windows Accessories”. Once you’re able to locate it, just look for the WordPad shortcut and when you find it, simply click or tap on it to open WordPad.

Another way of accessing the WordPad which is relatively easier and shorter than the first one that I have shown above is by using the search feature. To start with, you will need to is access the Start Screen and when it opens, just start typing “WordPad” using your machine’s keyboard. While you are typing, you should be able to see the Search screen appear from the right edge of your computer’s monitor and the word you are typing will automatically be entered into the search input box. After typing the name of the app (WordPad in this case), you should be able to see the app’s shortcut just below the search input box as you can see on the screenshot below.

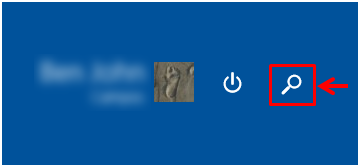
Another way of accessing the Search screen is by clicking on the Search button that is found at the top of the Start Screen just beside your account name and picture as well as the Power options button.
What’s in the WordPad Ribbon?
Desktop apps especially those that are more complex like WordPad contains some options on top of its Window which is collectively called the “Ribbon”. In this section of this tutorial, we will be looking at the options available on WordPad’s ribbon. So now that you were able to open the app, take time to check on the options that are available on top. You will notice that whenever the app opens, the options that would appear on top are the ones that lie under the “Home” tab.

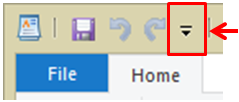
Now, let’s tart with the top-most portion of the WordPad Window where you can find some options like “Save”, “Undo” and “Redo” but these are not just the ones that can appear on this portion of the screen which is also called the “Quick Access Toolbar”. To add even more items or take out some from it, all you need to do is click on the arrow down button that is located just beside (right) of the “Redo” button.
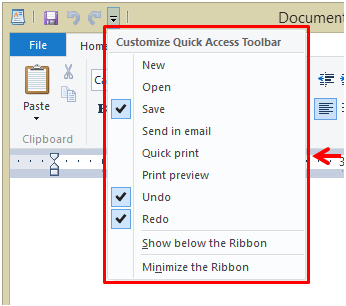
After clicking on the button, a set of options will appear in a box that is labeled “Customize Quick Access Toolbar” which contains all the other options that you can add to the toolbar itself. From here, you can check on the option that you want to add by clicking on it. To remove an option from the toolbar, you will need to click on it again to remove its check mark. The check mark tells you that the option is already on the “Quick Access Toolbar” and removing it (check mark) means that you’re also removing the option. The default options that are enabled to show on the “Quick Access Toolbar” are “Save”, “Undo” and “Redo”.
The 5 Group of Options on the WordPad Ribbon
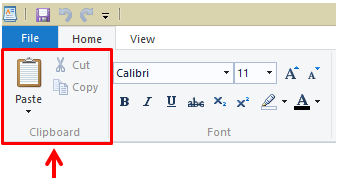
Just below the “Quick Access Toolbar” is the real meat that we’re going to talk about in this tutorial and it is more appropriately called as the “Ribbon”. WordPad’s ribbon-based options are divided into 5 major groups which are “Clipboard”, “Font”, “Paragraph”, “Insert” and “Editing” and most of them are geared towards making tweaks on the stuff that you put into the document that you are creating. For instance, if you are trying to paste something that you copied from a webpage then the options on the “Clipboard” section will be of great help.
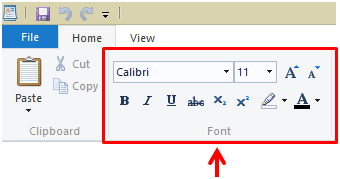
Next, if there are words or phrases that need to be Underlined, set to Bold or Italicized then you can use some options under the “Fonts” section. From here, you will also find tweaks for the Font style and as well as Font size or even change the Font color using some easy to use options and controls.
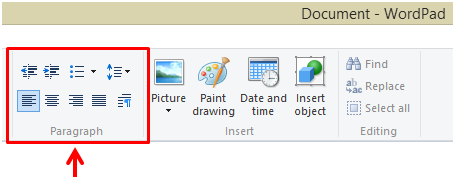
Now, if you worked on a text document in WordPad, you may also find the options under “Paragraph” to be very useful. From here, you will find some useful paragraph formatting options such as “Justify”, “Center”, “Align right” and “Align left” options and as well as others such as indent, bullets and spacing.
The keyboard shortcuts for “Select all” which is “Ctrl+A”, “Copy” or “Ctrl+C” and “Paste” or “Ctrl+V” may also come in handy when you are working on your documents formatting. The “Delete” or “Ctrl+X” keyboard shortcut will also be very useful so you can avoid pressing the “Backspace” or the “Del” key every now and then.
The Insert and Editing Options
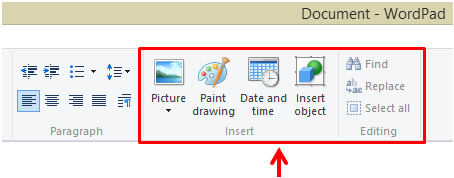
Finally, the last two groups of options are more focused on objects and image that you add to the document that you are working on. For instance, you can add a “Picture” stored in your computer’s hard drive or decide to add some artistic effects on the document by clicking on the “Paint drawing” options. Date and time as well as other objects and shapes can also be inserted to your document so take time to explore on these options when you are not doing anything which will all prepare you for even more complicated desktop apps like Microsoft Word.
Lastly, the “Editing” group of options are more focused in just finding texts and replacing them so you don’t need to be concerned about it that much. Take time to master each option in every desktop app’s ribbon just like the ones we’ve talked about in this tutorial and you’ll surely be on your way to mastering Windows 8.1 and using it like an expert!