Tweaking Power Plan Options in Windows 8.1
Our modern world is full of devices that require power from electricity in order for them to work and it did not take too long until mobile versions of these machines started flooding the market. These past years, we’ve seen PCs become mobile computers called laptops and netbooks and ordinary SMS and call cellphones evolved into smartphones that can already do complex tasks to each and every user. Then, phablets (bigger smartphones with extra features resembling tablets) and tablets have suddenly sprouted into the mobile device ecosystem and now, we even have transformer devices or those that can become a tablet or a portable computer by just detaching its screen from the keyboard base or attaching it back.
If we try to take a closer look on all of these mobile/portable devices, there’s surely one common thing among all of them which is very important, they would not even work as they are supposed to without it. You might already have different guesses on what I am referring to but I am referring to the fact that all of them can run on batteries.
All through the successfull years of Internet and computing, devices have become smaller in size or even thinner so they can be powered by batteries. The once big and home-based PC is now capable of being carried in a bag and all your important files can now be saved to your Windows Phone and kept in your pocket! Our world has permanently changed because of these mobile devices and all the comforts that they bring and in this tutorial, we will be focusing more on mobile computers or laptops and netbooks as we commonly know them which runs in Windows 8.1.
Since these mobile PCs run in both plugged-in and battery modes, it is important that you know how to tweak some aspects of your machine’s power consumption so you can go on batteries in a longer time than the usual and accomplish more things even while you are on travel and that’s what we’re going to cover as we move on in this tutorial.
Where is the Battery Level Icon Located?
To most of us who have been using laptops with Windows loaded to it for a long time, checking for the battery level is almost automatic. In fact, it is one of the most monitored icon on the screen especially when one is on a long travel. Running out of battery power really is a disaster especially if you are working on something that is just hours away from the deadline.
The battery level icon in Windows 8.1 is found in the same location as all of the older Windows editions. You can find it on the system tray which is the extreme-right end of the taskbar and it sits together with the time and date display and other important icons like network connection status icon and volume.
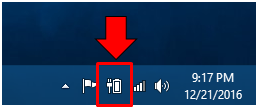
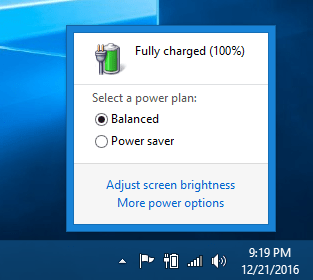
The screenshot above shows that my computer is currently plugged in and charging. If you want to know the current charging progress, all you need to do is put the mouse pointer on the icon and a white box will appear showing the charging progress and the battery level as shown on the screenshot below.
I Can’t Find the Battery Level Icon
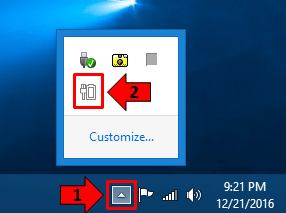
Now, there would be cases that the battery level icon is not displayed on the system tray of your computer. When this happens, you don’t need to worry because it is just hidden somewhere and bringing it back is very easy. To find this very important icon and put it back on the tray where it should rightly be on, simply click the arrow up icon that is located at the extreme-left end of the tray and a box will then open which contains all hidden icons. From here, simply look for the battery level icon and drag-then-drop it toward its rightful place on the system tray.
Accessing the Power Plan Section
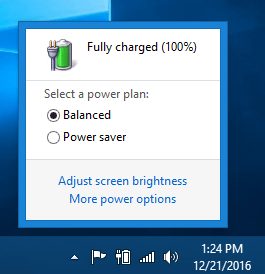
Now that you have already learned the basics in checking for the battery level directly from the taskbar’s system tray, it is time to get deeper into the power aspect of your computer and see what areas can be tweaked to prolong the time that your machine runs on batteries. To start, you will first need to learn how to access the “Power Plan” section. To do this, you can either click or right-click on the battery level icon that is found on the system tray. If you did the former (left-click), you will see a box that contains information about the battery level (in percent) and the current “Power Plan” that is active as shown on the screenshot below.
If you have chosen to do the latter (right-click), there will be a different box that would appear which contains four options as shown on the image below. In order to access the Control Panel section where the Power Plan options are located, you will simply need to click on the “Power Options” link as highlighted below or the “More power options” link if you have left-clicked the battery level icon.

After clicking the “Power Options” or the “More power options” link from any one of the options boxes that we have shown above, you should be able to open the “Power Options” section of the Control Panel and from here, all available “Power Plans” are shown. There are three default Power Plans in every Windows computer except if the hardware manufacturer has added more. The typical Power Plans and their performance impacts are as follows.
- Balanced (recommended)– This Power Plan helps you balance power consumption while making sure that the performance is well maintained. All hardware that is capable of running on lower power is identified to make battery life longer than High Performance Power Plan.
- Power Saver- This is the Power Plan that you need to select and set active when you are on a long travel and your computer would run on batteries. This plan reduces the power consumption by identifying hardware and other system components that consumes power more and reduces their performance to re-route the extra juice in prolonging battery life.
- High Performance- When you are into playing games that require high quality video, the High Performance Power Plan is the one that you need to choose. This plan uses more power so it is recommended that you plug your computer into a power outlet because running on batteries won’t guarantee a long battery life.
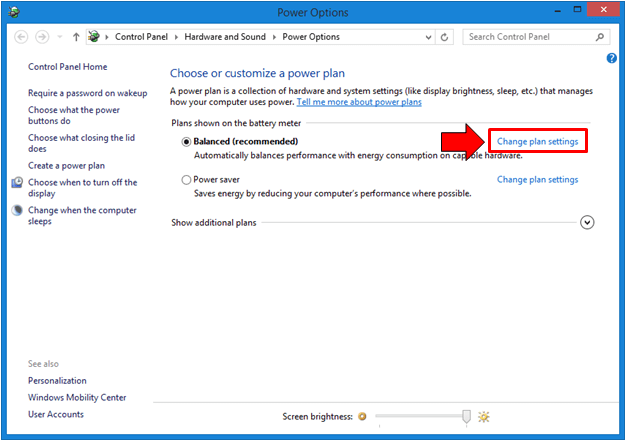
Tweaking a Specific Power Plan
Now, there is also an option for you to change some aspects of a certain Power Plan. To do this, simply click on the “Change plan settings” link that is located at the right of the Power Plan name as highlighted on the screenshot below.
After clicking on the link, you will be taken to the “Edit Plan Settings” Window where you can tweak certain aspects like “Turn off the display”, “Put computer to sleep” and adjust the screen brightness when your computer is on battery or plugged in.
From here, just make the tweaks that you want to do then hit the “Save changes” button at the bottom once you are done. You can also do even more changes to the Power Plan that you have selected by clicking on the “Change advanced power settings” link. Right after you do so, a small Window will open which is labeled “Power Options” and you will see even more aspects of the Power Plan which you can tweak. After making the changes, simply hit the “Apply” then “OK” buttons to save them.
As you can see, changing how your computer uses up its battery juice is made a lot easier in Windows 8.1. Just take your time to explore on the different aspects of a Power Plan and change the ones that you think would best save battery power to make your machine last longer without recharging.