Tweaking the Windows 10 Start Menu (Part 2)
Previously, we’ve talked a little bit about the things that the Start Menu has gone through since it has first been included in the Windows operating system and we’ve also tackled about a tweak that you can do with it on the new Windows 10 Technical Preview Build 10130 (the latest Preview Build available for Windows Insiders at present) but we have run out of space that we decided to continue on sharing even more tweaks that can be done with it on a separate tutorial and make it the second part.
The Start Menu is indeed one of the most important features found in the Windows operating system and has been in existence even in Windows editions earlier than Windows XP and so when users found out that it is missing in Windows 8 and Windows 8.1, almost everyone really turned skeptical in trying these OS versions and numerous comments of it being confusing spread like wildfire all over the Internet.
Thankfully, Microsoft has decided to bring it back in Windows 10 and in this tutorial, we will show you the remaining tweaks that are available for the Start Menu found in Windows 10 Technical Preview Build 10130 so you can get familiar with it and avoid being confused with its redesigned appearance and improved features especially when Windows 10 gets officially released on the 29th of July.
Changing the Start Menu’s Look and Feel
The Start Menu in Windows 10 normally matches with the color of the Taskbar and the Taskbar itself follows the color scheme of the wallpaper and theme that you have selected for your computer. In previous Windows 10 Technical Preview Builds, changing the color of the Start Menu simply involved right-clicking an empty space on it then clicking on the “Personalize” option that will appear. After doing so, the available static colors that you can apply to the Start Menu.
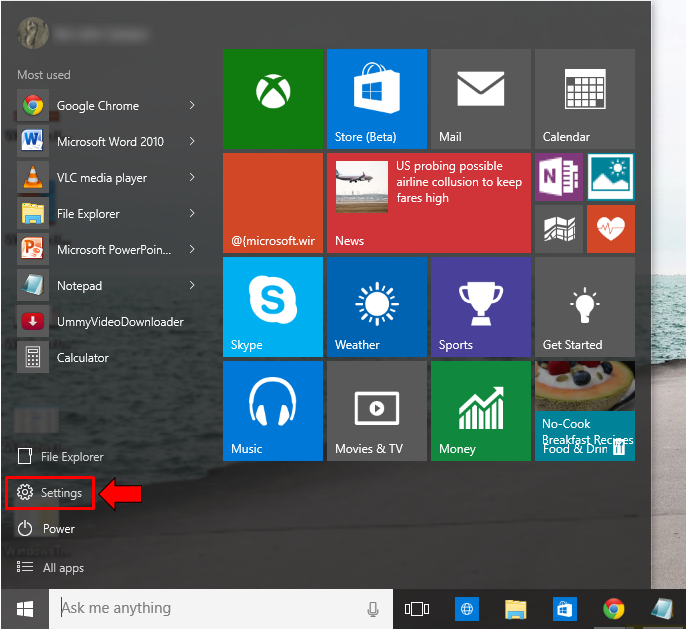
However, in the new Windows 10 Technical Preview Build, this simple method of changing the color of the Start Menu is not available so you will need to access the PC settings section in order to make these changes. To start, you will need to open the Start Menu then click the Settings shortcut found on its left-hand portion as highlighted below.
Now, once the PC settings section appears, you will need to click on the category that says “Personalize” and after doing so, the section that contains some settings for personalizing the appearance of the Desktop and as well as other visual aspects of Windows 10.
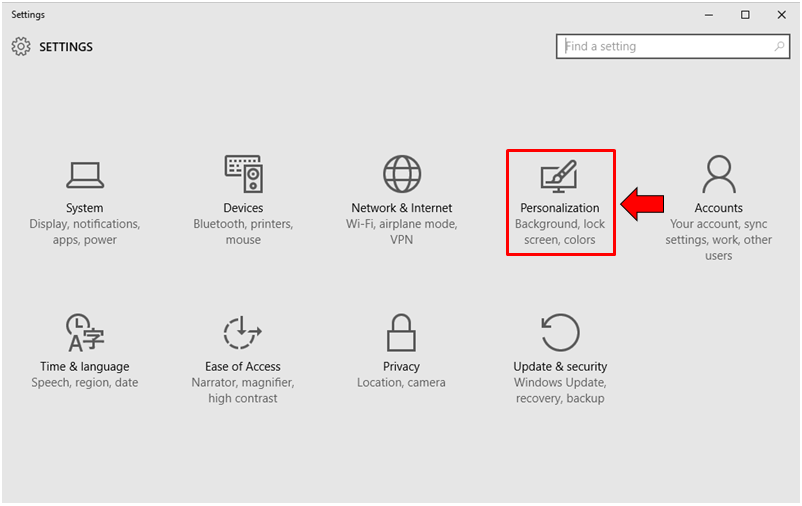
After the “Personalization” category is clicked, the screen that will follow looks like the one shown below. From here, you will notice other sections that you can get into located at the navigation pane at the left. Now, since we are trying to change the color of the Start Menu, the “Color” link found on the navigation pane at the left needs to be clicked as highlighted on the screenshot below.

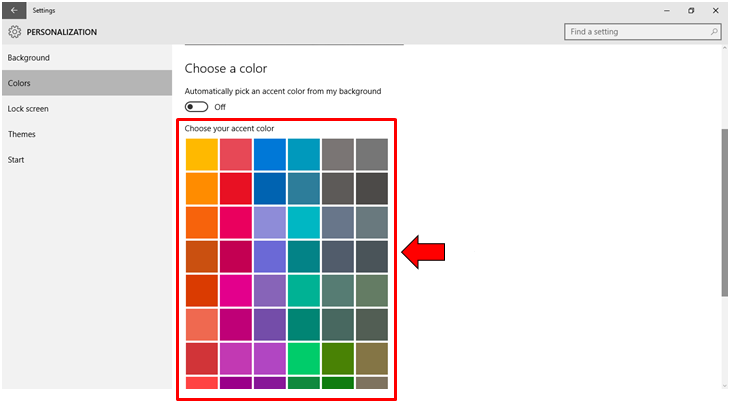
One of the great features in Windows 10 is that the Taskbar and as well as the Start Menu is capable of being set to follow an accent color from the Desktop background/wallpaper image simply by turning on the “Automatically pick an accent color from my background” option found under the “Choose a color” section. Now, if you really want to choose a color of your own then you will simply need to turn off the same option mentioned earlier and you should be able to see all available colors that you can choose from and apply it for the Start Menu and as well as the Taskbar.
Disabling the Bing Search Results
If you’re an advanced user and you know what exactly it is that you’re looking for whenever you use the Search feature in Windows 10’s Start Menu then you might be annoyed with all the extra search results that comes from Bing. Most of the time, these search results that appear right below the ones that are really in your computer makes no sense at all.
As you can see, they all tend to create clutter on the screen. Let’s hope that Microsoft would remove this in the final Windows 10 build that will come out this July 29 but if you want to get rid of it now on your computer that runs on a Windows 10 Technical Preview Build then you will need to follow these steps.
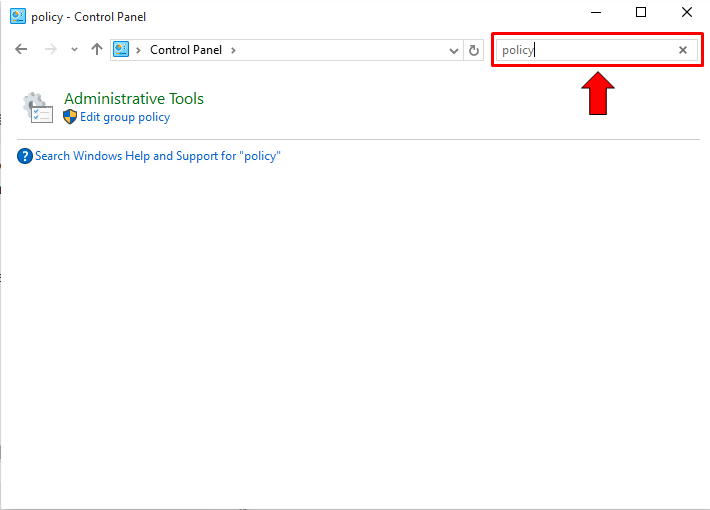
First, you will need to open the Control Panel Window and enter “policy” into the Search box that is located at the top-right portion of the screen as highlighted below.
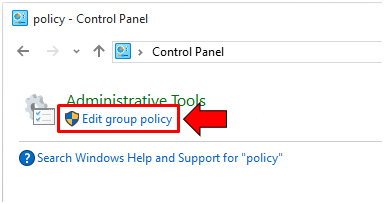
On the search result that will display, all you need to do is click on the “Edit group policy” link that is located under the “Administrative Tools” category as you can see on the screenshot below.
The “Local Group Policy Editor” Window will then open and from here, you will need to navigate to the “Computer Configuration -> Administrative Templates -> Windows Components -> Search” location. Once you’re on it, you will need to enable the policies that are listed on below.
- Do not allow web search
- Don’t search the web or display web results in Search
- Don’t search the web or display web results in Search over…
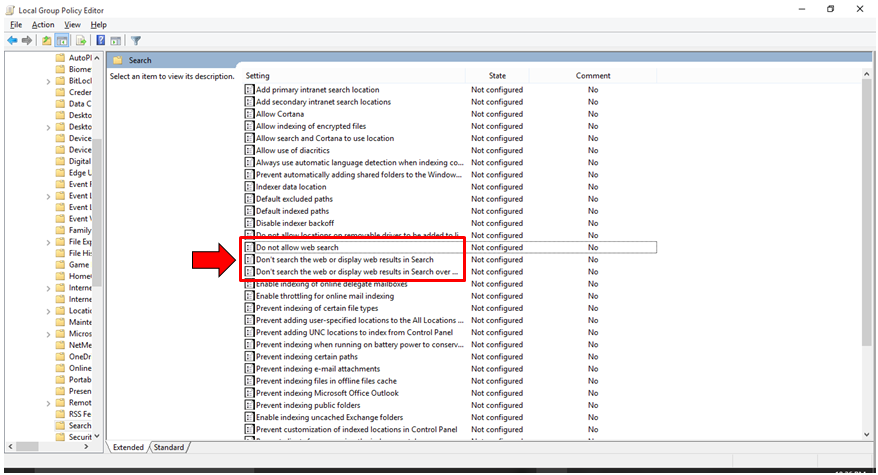
Be sure to turn on the items that were specified above and has even been highlighted on the previous screenshot. Once these policies are enabled, you will no longer see all those annoying web search results whenever you use the Search feature in Windows 10’s Start Menu.
Enable Full Screen Start Menu
Lastly in the latest Windows 10 Preview Build, you can still be able to make the Start Menu appear in full screen and again, doing it involves accessing the PC settings screen as we have shown above. Once the PC Settings screen opens, you will simply need to click on the “Personalization” settings category and once its screen opens, you will need to click on the “Start” link that is found on the navigation pane at the left as shown on the screenshot below.
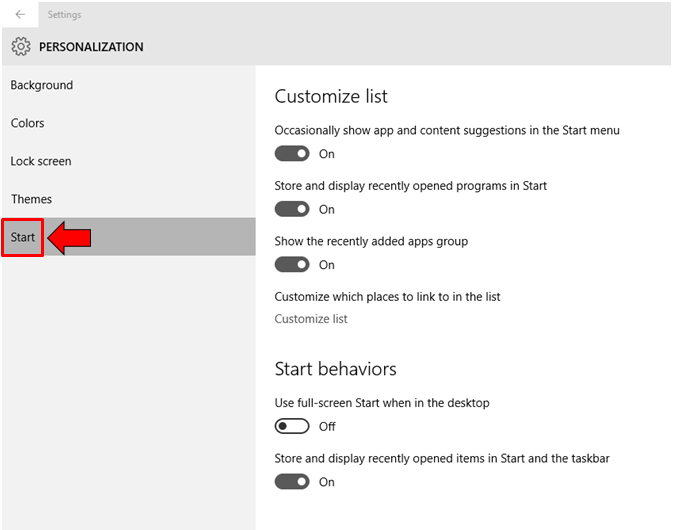
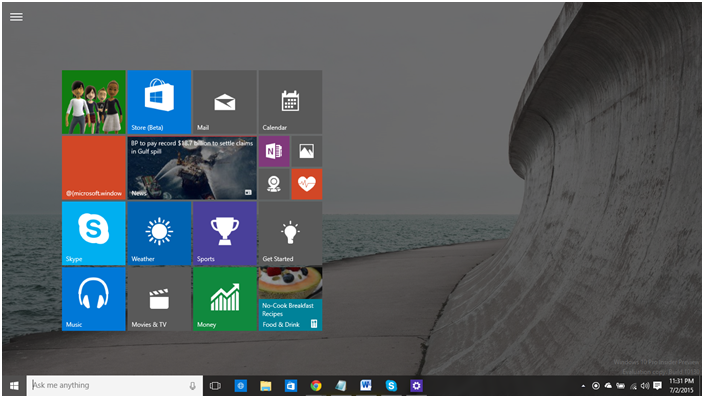
Most of us might not want a full screen Start Menu on our new Windows 10 computers but there are still few who would want to try it so to enable the full screen Start Menu, the “Use full-screen Start when in the desktop” option which is located under the “Start behaviors” section. Once this option is turned on, the Start Menu will now appear like the one shown on the screenshot below.
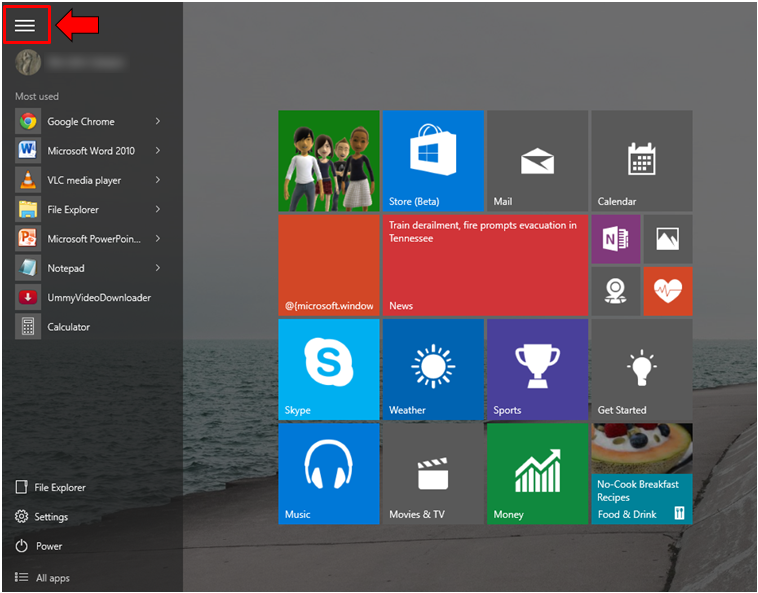
Now, if you want to view the narrow section on the left of the new Start Menu when it is not in full screen then you will simply need to click on the three horizontal link button that is located at the top-left portion of the full screen Start Menu as highlighted below.
To turn the Start Menu back to its default size and appearance, you will simply need to turn off the “Use full-screen Start when in the desktop” option that is located under the “Personalization” section of the PC settings screen as we have shown earlier.