Using the Advanced Sharing Feature on Windows
There are times that you need to disable Windows 7 or Windows 8’s sharing wizard so you can have a greater control on the way folders and libraries are shared. This scenario shouldn’t happen so often if you know how to use the Advanced Sharing feature of Windows.
Using this sharing feature is quite complicated but it gives you more freedom and control on how, what and to whom files should be transferred. This tutorial will show you how Advanced Sharing helps control the sharing process like sharing folders to specific people or having it transferred to a Homegroup and how to stop sharing a folder which you want to have sole access to. You will also learn how to disable your computer’s sharing wizard and know other sharing secrets that you’ll surely feel thrilled of discovering.
Disabling the Sharing Wizard (Windows 7 and 8)
By default, the sharing wizard is enabled on Windows 7 and Windows 8. If you are more comfortable of just sharing things easily without using any wizard then you can choose to disable it anytime. To do this, just follow the steps below:
- Click on the “Start” button or Press the “Windows Key” then type “windows explorer” on the search box. Once the search results show, click on the Windows Explorer icon under the “Programs” category and press “Enter” on your keyboard (Windows 7) or click/tap on the “File Explorer” link (Windows 8).
- Once the Windows Explorer (Windows 7)/File Explorer (Windows 8) Window appears, click on the “Organize | Folder and search options” tab (Windows 7) or the “View | Options” tab (Windows 8).
- The “Folder Options” Window will then appear. Click on the “View” tab and scroll down until you see the option that says “Use Sharing Wizard (Recommended)”. The option is enabled by default. Uncheck it from the checkbox located on its left.
- Click or tap on the “Apply” button then “OK” and that’s it! The sharing wizard is already disabled. You can now proceed on with the steps described below so you can share files with other computers on the network you are joined to.
Note:
Once the sharing wizard is disabled, libraries can no longer be shared. Only folders are allowed for sharing on this mode.
Sharing Folders to People You Choose
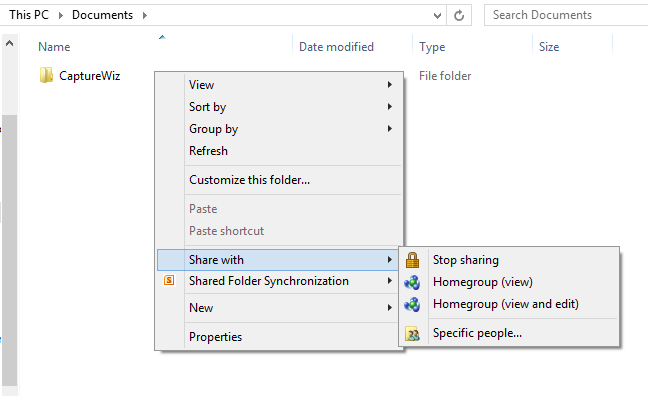
If in case you would like to choose people whom you could share files with, just right click on the folder (Windows 7) or press and hold on the folder icon (Windows 8) then choose “Share with | Advanced Sharing” by clicking or tapping on it from the right click menu.
Another way of doing this tweak is by right clicking on the folder or pressing and holding on its icon then selecting “Properties” then click on the “Sharing” tab once the “Folder Properties” Window appears.
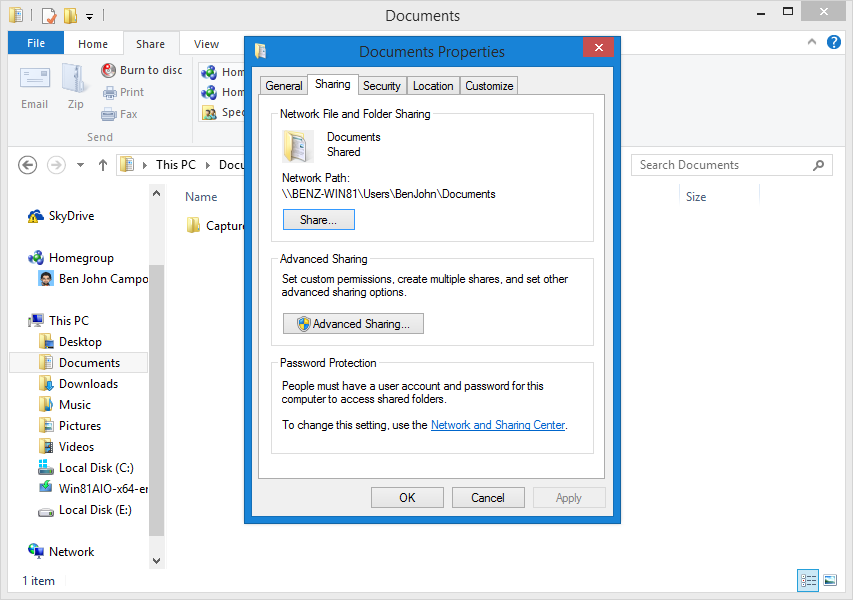
From the “Sharing” tab, you can view whether the folder you chose is enabled for sharing or not. If the folder is not shared yet, you can see that the “Network Path:” entry says “Not Shared”. If this is the case, click in the “Advanced Sharing” button to display more options.
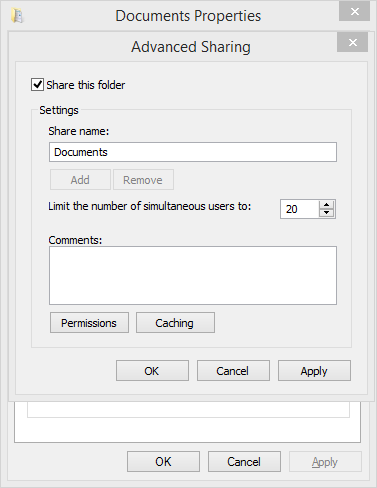
The “Advanced Sharing” Windows then appears. You need to check on the “Share this folder” box first. If you would like to assign a new name that is different from the default file name, you can type it in the “Share name” input box. You also have to set the permissions for the folder that you want to share. You can do this by clicking or tapping on the “Permissions” button.
The “Permissions” Window shows all the Users and groups that you allowed access to the folder that you wish to share. The “Group or user names:” box is set to “Everyone” by default. At the bottom part of the “Permissions” Window, you will see the level of permission set for the particular group or user you’ve chosen.

Before making any modification on the permissions set for a user or group, let us first add a user account that will have access to the folder that we set for advanced sharing. To do this, just look for the “Add” button and click or tap on it.
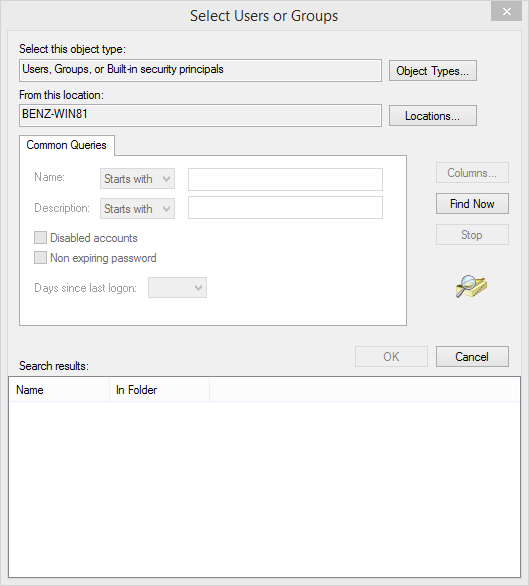
A Window labeled “Select Users or Groups” will then appear. At the bottom of the Window, you will see a textbox where you can type a name to the user that you want to set permissions to. If you are having problems of identifying the Users or Groups that are registered on your machine, you can click/tap the button labeled “Advance”. On the other hand, if you are sure of the User/Group name then you can click/tap on the “Check Names” button so you can have the verification of yourself then click “OK”. Doing this will allow you to just skip the next step.
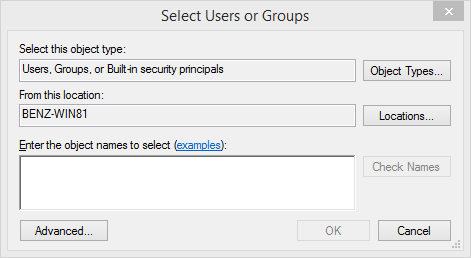
If you click on the “Advanced” button, the “Select Users or Groups” will be extended to reveal additional buttons and options. Just click/tap on the “Find Now” button to show a list of all the user accounts and groups which are registered on your machine. From this list, just choose the one which you want to share folders with then click/tap on the “OK” button so you can get to the Window that was opened previously.
Click on the “OK” button after you select the user/group name from the list.
It’s now time to choose the type of access that you want for each group or user registered on your machine. You can do this by selecting the Group or User from the list then checking or unchecking the boxes corresponding to the level of access that you want to assign which is located below the “Group or user names” box.
- Full Control- When this level is chosen. Users or Groups will have the freedom to do anything to the folder you shared with them. They can view, modify, transfer or delete it anytime they want.
- Change- This level allows Users or Groups to change the content of the shared folder but are not allowed to delete anything contained in it.
- Read- On this level,Users and Groups are only allowed to view the contents but are not allowed to make any changes to any of its contents.
If you want to remove a Group or a User from the list, just click/tap on the “Remove” button. Once everything is set up as you desired just click on “OK” then click “Close” from the “Properties” Window.
The folder will now be shared to the user accounts you have chosen according to the permissions you’ve set.
Sharing Folders with a HomeGroup
You can share Folders to a HomeGroup by simply following the steps above but instead of setting permissions to a User, you need to give the same to the HomeUsers group. Once you see the HomeUsers group added to the list of accounts that can access the folder, you can now proceed to choosing a permission level for it.
How to Disable Sharing for a Specific Folder
You can easily disable sharing for a particular folder by right clicking or pressing and holding on it then select “Share with | Advanced sharing” from the pop up menu.
Alternatively, you can also right click on the folder, choose “Properties” then select the “Sharing” tab from the Window labeled “Folder Properties”.
Click/tap on the “Advanced Sharing” button on the “Sharing” tab so you can get to the “Advanced Sharing” Window.
Uncheck the “Share this folder” option on top to stop sharing the folder you have chosen then click/tap on the “Apply” then “OK” buttons.
That’s it! You can now start setting some restrictions on how files and folders are transferred to other users. This is very useful especially to those who are working with crucial files that needs to be protected from unauthorized access.