Using Windows Defender Offline in Cleaning Your Windows Machine
Viruses and other forms of malware has been around for almost the same time as computers. These tiny destructive codes vary from simple ones that can replicate at a controllable rate to others that reproduce and spread very fast from one computer to the other including the modern devices that we now have. Others can even pass through networks making them easier to transmit to different terminals that are connected to a common infrastructure.
With the spread of computer viruses also came different brands of antivirus programs that promise protection from these culprits. While most of them are really effective, there are others that require you to shell-out some money in order to unlock advanced features that will make your computer more secure.
There are also some antivirus software that eats up a big chunk of your machine’s system resource resulting to poor performance and other problems that can hamper productivity and enjoyment while you are using your PC or any other device.
An Answer to the Problem
Because of these problems, Microsoft decided to create their own antivirus program which is designed to work smoothly with the Windows Operating System. The good thing about the software itself is that it is very simple in terms of its user interface and is very light on system resource. It also works silently in the background sparing you from the annoying prompts and notifications that most third-party antivirus or antimalware programs display on your computer screen.

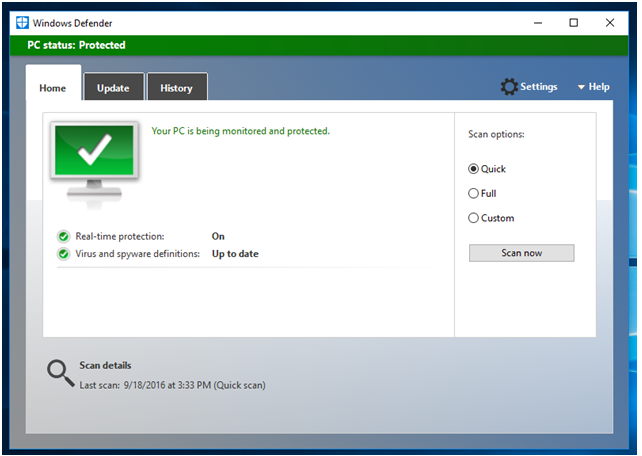
This software is called Windows Defender. You might have even encountered it in the past when it was still named Windows Security Essentials back in Windows XP, Vista, Windows 7 and even Windows 8 but this time, it’s name has changed but its performance and features found some very good improvements.
What if a Malware Blocks Windows Defender from Being Installed
The problem about antivirus or antimalware programs like Windows Defender or even any other types of software is that they are not perfect at all. Yes! the program can be affected by strong malware that can block your access to it or if you are trying to install Windows Defender on older Windows operating system versions like Windows Vista or Windows 7, a certain type of malware can hinder you from installing the program on to your machine.
If this happens, you will need the help of an antivirus/antimalware program that can boot in a safe environment and thankfully, Microsoft has made an offline version of Windows Defender which is very useful in these kinds of situation. If you’re wondering how this tool is used then you’ll need to read this tutorial towards the end because we’re going to show how scanning and cleaning is done with Windows Defender Offline in Windows 10 or older Windows editions like Windows 8.1 and Windows 7.
How to Use Windows Defender Offline in Windows 10
The steps in using Windows Defender Offline in Windows 10 and Windows 8.1/Windows 7 is different and since most of us are already using the latest Windows operating system edition then we’ll discuss the steps in using Windows Defender Offline version in it first.
To start, you will first need to access the universal Settings app and in order to do so, you can do any of the methods that we’ll be showing here. First, the easiest way in launching Settings is by using the keyboard shortcut combination “Windows + I” so go ahead and press it on your machine’s keyboard.

After doing so, the Settings Window should launch in an instant. Another method which you can also use in accessing the Settings Window is done from the Start Menu. To start, you will need to simply click on the Start Button or press the Windows key and the Start Menu should appear right away at the left portion of your computer screen. On the narrow vertical bar which is found on its left portion, just click on the Settings icon as highlighted on the screenshot below and the Settings Window should appear instantly.

On the Settings Window, you should be able to see 9 Settings categories for your computer and in this list, you will need to click and open the one that says “Update & security” as you can see being highlighted on the screenshot below.

After clicking on the category, you should now be able to see its contents and on the left side, you’ll be able to see the navigation pane which contains different links that leads to other settings related to “Update & security”. From this navigation pane, just click on the link that says “Windows Defender” as highlighted on the screenshot below.

On the contents of the Windows Defender section which are found on the right hand portion, just scroll towards the bottom on to the last part where you will find the Windows Defender Offline item. From here, you will be able to read a simple explanation on what this version of Windows Defender is used for and below the short explanation is a button that says “Scan Offline”. To initiate the offline scanning, detection and cleaning process, just click on this button and you should be able to receive a prompt on your screen telling you that Windows will sign out and shut down in less than a minute. Be sure to save any work so that you won’t lose any of them once your computer is up and running again.

After your computer signs out, you should be able to arrive at the same screen that is shown below which displays a single progress box at the middle which is labeled “Windows Defender Offline”. This screen actually means that Windows Defender Offline is already doing its job in looking for malware and viruses on your computer.

Now, if Windows Defender offline detects a malware, it will ask you what action you want to take while if it doesn’t find anything, it will just continue on showing this same screen until the scanning process ends and your Windows 10 machine should boot up once the process is done.
How to Use Windows Defender Offline in Windows 7 and Windows 8.1
The process in doing the a scan using the offline version of Windows Defender in Windows 7 and Windows 8.1 is quite different. This is because Windows Defender Offline is not built within these operating system editions. In order to start using Windows Defender Offline on your Windows 7 or Windows 8.1 computer that you suspect to be infected by a malware, you will first need to download the version of the tool which matches your computer’s system type either 32-bit or 64-bit.
If you don’t know yet how to find out the system type of the version of Windows that is installed on your computer, you can find the steps in knowing this information along with other relevant system information in this tutorial. Once you know this information, just download the version of Windows Defender Offline that you need from the links below.
Both of these versions of Windows Defender Offline are less than a megabyte in size so you don’t really need to worry about the size it would take from your computer’s memory or the length of time it would take for the download to complete because before you even know it, the setup file is already done downloading!

After downloading the tool, all you need to do is click on it in order to run the wizard. While starting with the process, the User Account Control feature might ask you to allow the setup to run on your computer so just click “Yes” on the prompt that would appear. The very first Window that would welcome you during the installation process looks exactly like the one shown below.

On this Window, just click on the “Next” button that is found at the bottom-right portion and you should be taken to the next step in an instant. The Window that follows will now show you the software’s license terms agreement and in order to proceed on to the next step, you will need to click on the “I accept” button at the bottom as highlighted on the screenshot below.

Next, the wizard will then ask you which type of media you want to use to store the Windows Defender Offline files on. From here, just select the one that matches the available storage media which you currently have in hand but for illustration purposes, we will be selecting the second one which says “On a USB flashdrive that is not password protected” then hit the “Next” button once again that is found at the bottom of the Window.

The next Window will then warn you that the USB flashdrive which you want to use for Windows Defender Offline will be formatted and it means that all of the files that might be stored in it will be deleted permanently. If you have saved something important on the USB storage device that you want to use then be sure to save and backup them on to your computer. Once you are done with this, just click on the “Next” button once again which is found at the bottom as you can see below.
NOTE:
If there are more than one USB flashdrives attached to your computer, an additional Window will appear which asks you to select the USB flashdrive that you want to use. Be sure that you select the right one or if the device does not appear on the list, just click the “Refresh” button found at the right end of the drop-down options box then try finding the USB drive again.

After finding the right USB storage device from the list, all that you need to do is click on the “Next” button that is found at the bottom right portion of the screen so you will be able to proceed to the final steps.

Now, the setup file will take the steps in creating the Windows Defender Offline tool in the USB flashdrive that you used. The process takes quite long if you are connected to a slow Internet connection but it won’t really take forever so just be patient. The screenshot below shows which step the setup wizard is currently on.

Finally, once the creation of Windows Defender Offline tool on your USB flashdrive is done, you should be able to arrive at a Window which says “Installation complete”. Below it are instructions on how you can use Windows Defender Offline in your Windows 7 or Windows 8.1 computer so if you really are certain that your machine already is infected with malware then you will need to scan and clean it using this handy tool.

A Very Useful Tool Just Made Handy!
As you can see, Windows Defender isn’t really limited to that silent program that runs in the background protecting you from certain forms of malware that can infect your computer anytime. This tool can actually be made handy as well as you have seen in this tutorial and the good thing about it is that you can use it on as many infected PCs as you want without worrying about FREE Trial period expiration as other third party antivirus software have.
Are you having some troubles with the steps in creating a Windows Defender Offline Tool in your Windows computer? We’re here to help you! Just post the description of the problem on the comments section below and we will do our best to respond to it as soon as possible. Our geeky community of readers could also help you so go ahead and enjoy free support which we can provide only here at WindowsTechies.com! See you all in our next tutorial!