Windows Defender Offline Error Code: 0007-80004005? Here’s How to Solve It!
Our previous tutorial talked about creating a tool that would help any Windows user who has Windows 7, Windows 8.1 or Windows 10 installed in their computers clean it from malware or any other types of malicious programs and codes that can spread, infect or even corrupt files and render the machine useless unless the causes are removed.
The tool itself needs a USB flashdrive which would serve as the storage media in which the required files would be stored and installed. The good thing about it is that it makes the USB drive bootable in order to help a user to run scans and clean the affected computer even if it already refuses to boot up to Windows.
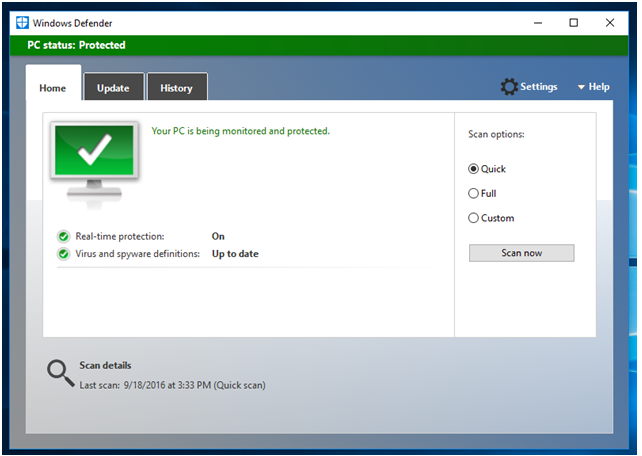
If you haven’t heard about this tool yet then we are actually talking about Windows Defender, the built-in antivirus/antimalware program in Windows 10 which is also available for FREE on other Windows operating system versions such as Windows 7 and Windows 8.1. This software program actually has its own offline version built within Windows 10 while there are versions for both 32-bit and 64-bit versions of Windows 7 and Windows 8.1 available for download from Microsoft.
To learn the steps in creating and using Windows Defender Offline tool in Windows 10, Windows 8.1 and Windows 7, you can read and follow the steps that we’ve shown in our previous tutorial and in case you were stuck somewhere near the final steps in creating the bootable Windows Defender USB tool because of a problem then we are going to fix it in this tutorial!
How to Solve the Error code:0007-80004005 Problem When Creating Windows Defender Offline USB Tool
Keeping your computer safe from any kind of malicious program or code than can prey on your important information or even render certain files corrupted is one of the most important tasks of a Windows PC owner. While it is true that Microsoft already made a big step forward in keeping all of us safe by offering Windows Defender for FREE to all Windows users, there would still be instances especially some kinds of malware and viruses that can block this security software from doing its job.

This is the reason why the offline version of Windows Defender was created but problems still don’t seem to give up even with it because many of our readers reported an error that appears near the end part of the bootable media creation process which is described as “Error code:0007-80004005”. This error occurs when the setup file detects that the USB flashdrive being used has been inadvertently formatted as GPT instead of the default which is MBR.
Because of the error, Windows Defender Offline could not proceed into formatting the USB drive and loading the needed files to make it a bootable media containing Windows Defender in it. Thankfully, solving this problem and making your USB flashdrive useful for creating the tool is easy and that’s what we’re going to demonstrate below.
Diskpart is the Answer!
In order to solve this error which plagues most USB flashdrives that has been used many times as an installer for Windows OS or any other software, you will need the help of another handy tool which is also built within your Windows machine called “Diskpart”. Launching the tool itself is very easy. First, you will need to launch Command Prompt with administrator privileges.

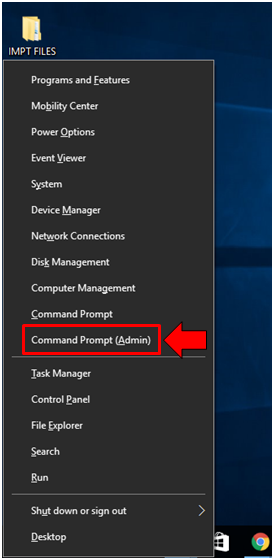
To do this in Windows 8.1 and Windows 10, you can press the Windows + X keys in order to pull-up a menu that will appear at the bottom-left hand portion of the screen and from this menu, simply click on the option that says “Command Prompt (Admin)” as shown on the screenshot below.
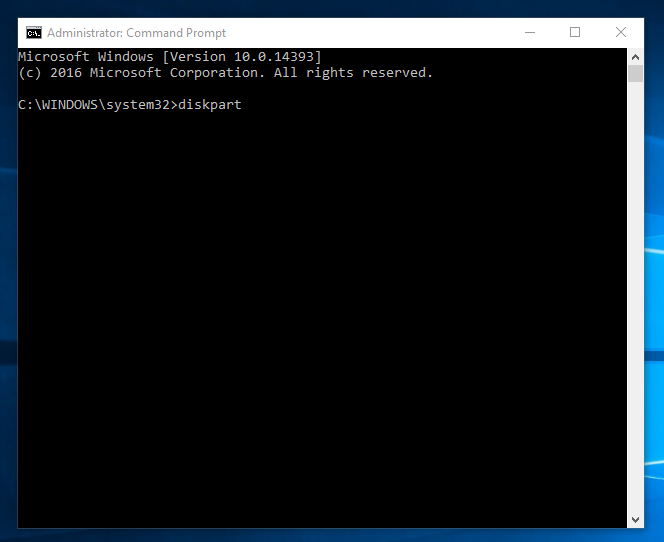
Once the Command Prompt tool Window opens, you will need to type in “diskpart” into it (excluding the quotation marks of course) then hit the “Enter” key in order to launch the Disk Partition tool
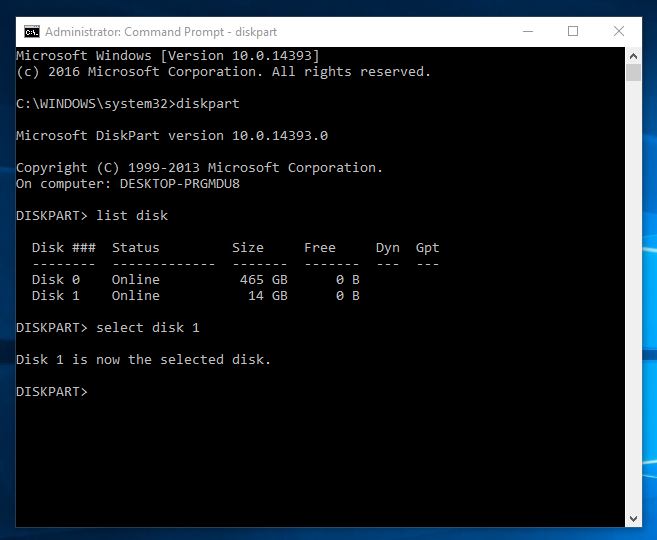
After pressing the “Enter” key, command prompt will now launch DISKPART and this is where we are going to do most of the magic in order to let Windows Defender Offline be loaded into your USB flashdrive. Now that the tool itself is open you will need to enter “list disk” (excluding quotation marks) as you can see on the screenshot below.
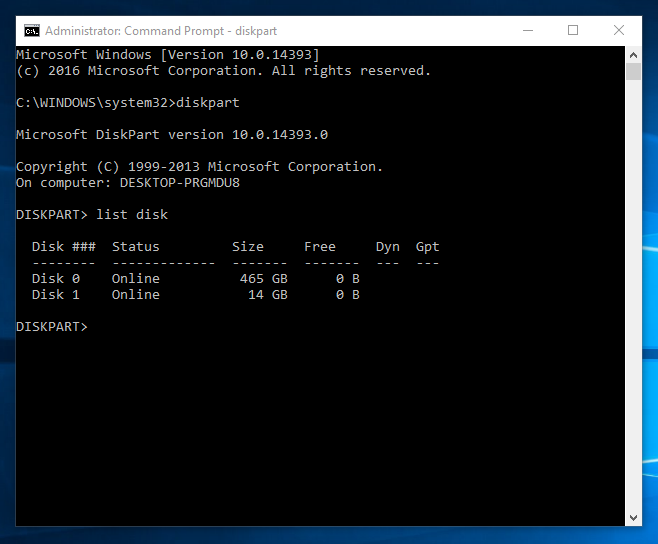
This command will show a list of drives that are attached to your computer and the number assigned to them by the DiskPart tool as clearly seen above. To avoid confusion, we suggest that you remove any other USB flashdrive that is attached to your machine aside from the one that you want to use for Windows Defender Offline.
If you do this, you will only see two drives being detected by DiskPart and of course, the one that has a smaller memory space is your flashdrive while the other one is your hard drive. Normally, hard drive is listed as “Disk 0” while your USB storage device is listed as “Disk 1”. Now, what you need to do is type in “select disk 1” in order for your USB flashdrive to be selected as shown below.
Moving on, your next move should be showing the details of the drive that you have just selected. This step can actually be skipped if there is only 1 USB flashdrive that is attached to your computer but you can also try executing the command if you wish to. Just type “detail disk” (excluding the quotation marks) then hit the “Enter” key and the relevant information about your disk will show up instantly!

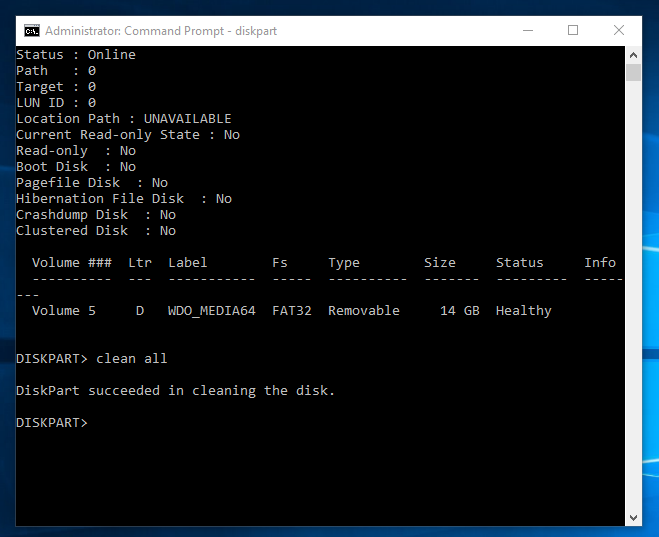
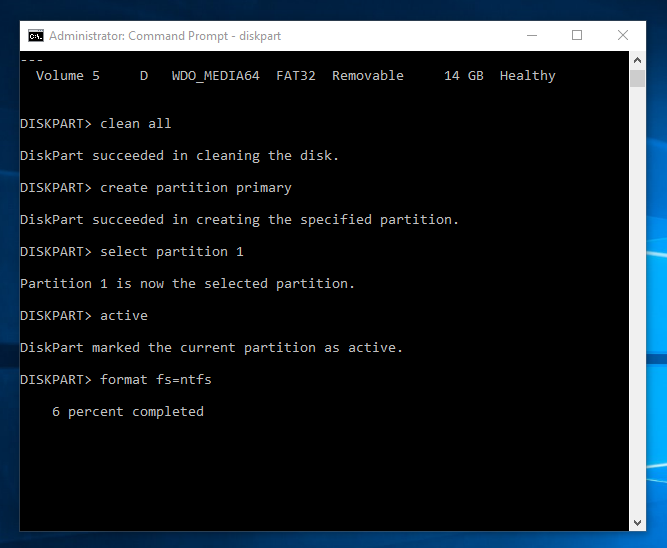
Once you are sure that you have selected the right USB storage device, you can now clean it from all of its contents. To do this, just type “clean all” (excluding the quotation marks) then press the “Enter” key in order to execute the command. Again, DiskPart might look like it’s not doing anything after you execute this command but it actually does work things out cleaning everything from your USB storage device so just wait until the tool tells you that the cleaning process has completed successfully.
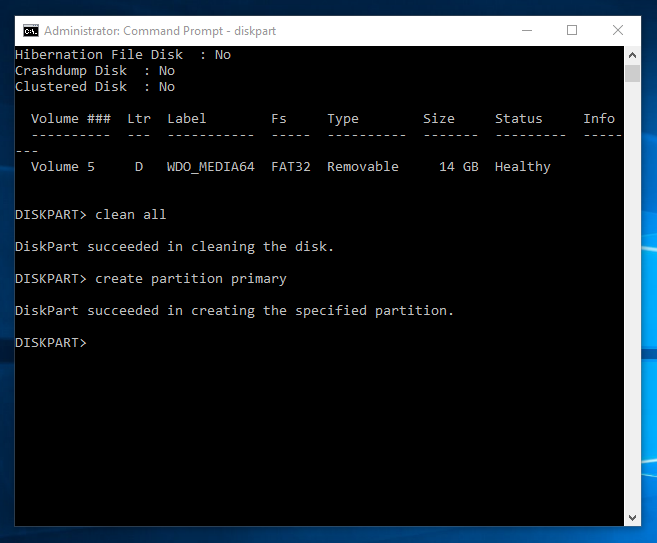
After the cleaning process succeeds, you can now proceed on to the next step which is creating a primary partition in your USB drive. To accomplish this, you will simply need to type in “create partition primary” (excluding the quotation marks) into the DiskPart tool then hit the “Enter” key as shown on the screenshot below.
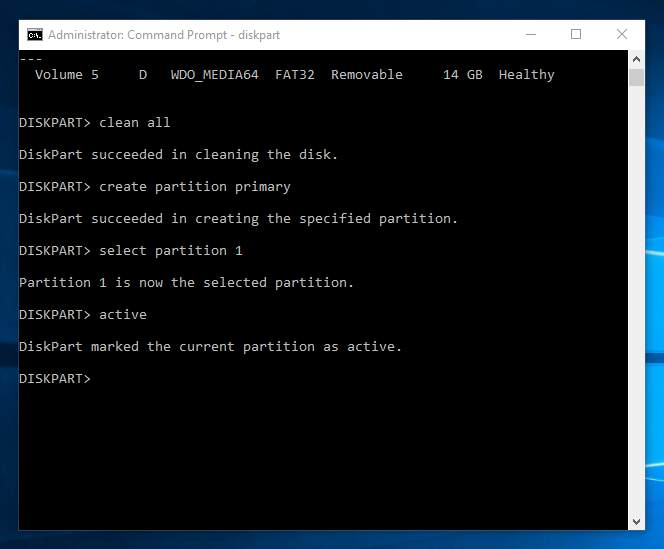
Then you will need to select the partition that you have just created once again and you can do so by typing “select partition 1” (excluding the quotation marks) into the DiskPart tool. After you do so, just hit the “Enter” key to execute the command. This selects the drive ready for reformatting so that Windows Defender Offline can be loaded to it without any problem.

Now, what follows is setting the partition you have created is active. In order to accomplish this, all you need to do is type in “active” to the DiskPart tool then hit the “Enter” key. An active partition is a bootable partition which is exactly what we need in order to get Windows Defender Offline loaded to it.
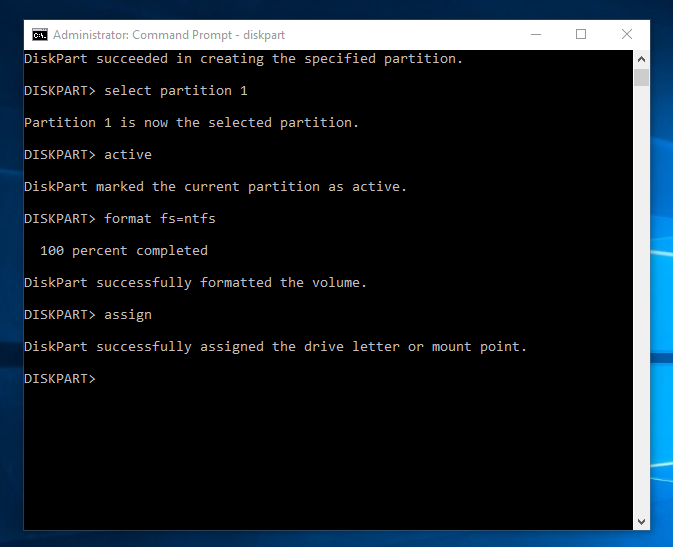
Next, you’ll need to format the drive to NTFS which is the recommended file system format for bootable drives. To do this from the diskpart tool, all you need to do is type in “format fs=ntfs” (excluding the quotation marks) then again hit the “Enter” key to execute the command. The process also takes some time but you will see the overall progress on the DiskPart tool Window as you can see on the screenshot below so you will actually know if the reformatting of the USB drive is done!
Finally, you will now need to assign a drive letter to the USB storage device that you have just reformatted to be used for Windows Defender Offline. To do this, all you need to do is type in “assign” then hit the “Enter” key and diskpart will automatically assign the next available drive letter to the device.
Once done, the last command that you will need to enter is “exit” and this will automatically close diskpart then take you back to the Command Prompt Window. From here, you can simply exit the Window and proceed to installing Windows Defender Offline into the USB flash drive once again. This time, it should succeed and you should be able to use it for scanning and cleaning Windows 7 or Windows 8.1 computers by booting into it.
To Make the Steps Easier to Follow, Here’s a More Concise Guide
The guide we’ve shown above is designed for the ordinary types of users who do ordinary tasks in their Windows computers. If you are the geeky kind of Windows user then you can simply follow this concise guide which is arranged in order.
- diskpart – {opens the Disk Partition tool in Command Prompt with admin rights}
- list disk – {shows a list of all drives and their assigned names by Diskpart}
- select disk 1 – {selects your USB storage device}
- detail disk – {shows the complete detail of the device you have just selected to help you make sure that it is the right one}
- clean all – {removes and deletes all stuff stored in your USB device}
- create partition primary – {creates a primary partition in the USB storage device}
- select partition 1 – {selects the partition you have just created in previous step}
- active – {marks the partition active such as a bootable partition}
- format fs=ntfs – {formats the USB drive to ntfs}
- assign – {gives the drive a name by choosing the next available drive letter}
- exit – {closes Diskpart and takes you back to Command Prompt (Admin) Window}
If you enter all of these commands correctly according to their order as listed above, you should be able to get your USB storage device up and ready to be used for Windows Defender Offline. Once you are done formatting the flash drive, just proceed on the the Windows Defender Offline setup file then execute it and just follow the steps that we’ve shown in this tutorial. Just be sure that you are connected to the Internet before doing this because the setup file will still need to download around 300MB of files to be loaded into your USB flashdrive.
Did you find this tutorial helpful? Be sure to share it with your friends who might have also experienced the same problem in creating a bootable Windows Defender Offline tool on a USB storage device. If you’re having other sorts of problems using this tool or any other Windows features and stuff then please feel free to let us know through the comments section below.