Windows Easy Transfer Migration Options
You might have bought a new computer and thought about the lengthy process that lies ahead especially if you are planning to transfer plenty of files from your old Windows 7 machine. In the past, exporting files from one computer to another required that you first transfer everything, folder by folder to an external hard drive or a memory stick and connect to the new computer that you have then start copying everything. This process takes long depending on the size of the data which needed to be transferred. To other people who really want to get the same look of the desktop that they used to have in their old computer, the process may take a bit longer but it does not need to be so at present when you want to export your files over to Windows 8.
Microsoft knows how hard it is to migrate files and other stuff from an old computer to a new one so they developed a tool to help do the same process with ease. The tool is called Windows Easy Transfer which comes pre-installed in Windows 7 and Windows 8. It helps you migrate your important files, digital photographs, music, contacts, favorites and other stuff from an old computer running in Windows 7 to a new one which runs in Windows 8 so there will be no other preparations and downloads to be done for you to start the migration process and enjoy your new PC with the contents that came from your old one.
In this tutorial, I will be showing you the options that are available for you to choose from if you want to move your files from an old Windows computer to a new one that runs in Windows 8 and on the next tutorial, we’ll go into the details of how you can use the tool using one of the options that we will describe here so be sure to prepare and organize the files, settings and all the other stuff that you want to transfer and get the needed accessories for whichever process you would choose.
What Options Are Available?
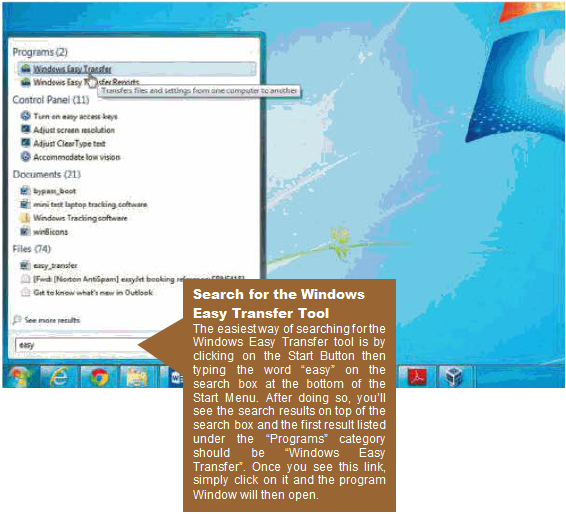
The very first move that you need to take is turn on your old Windows 7 computer and start the Windows Easy Transfer tool. You can do this by either searching for the tool using the search feature of the Start Menu or by going directly to where the tool is located. If you want to use the former, simply type the word “easy” on the search box of the Start Menu then hit the “Enter” button. The search results will then appear and from here, simply look for the “Windows Easy Transfer” link then click it.
The latter method of accessing the tool is done by accessing the Start Menu, clicking on “All Programs” then “Accessories”, “System Tools” and lastly on the link that says “Windows Easy Transfer”.
After the link is clicked, you will see that the Windows Easy Transfer Window will open. From this Window, simply click on “Next” and select the method of data migration that you want to use. The options available are enumerated and explained on the screenshots below.
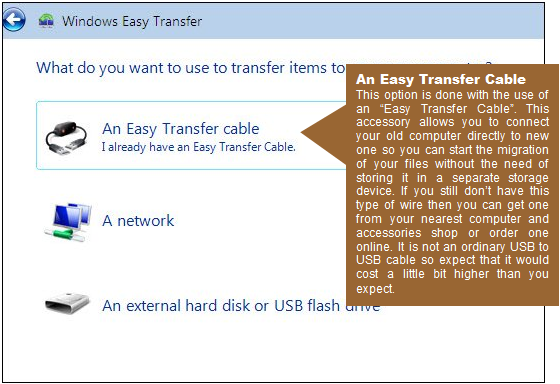
1. Using a Special Cable
One method that you can use in transferring files, settings and other stuff from your old computer to the new one is by using a cable called an “Easy Transfer Cable”.
2. Using an Existing Network
Another method which is listed second among the three options is done by utilizing a network (preferably wired and not wireless) in transferring all the stuff from the old machine to the new one.

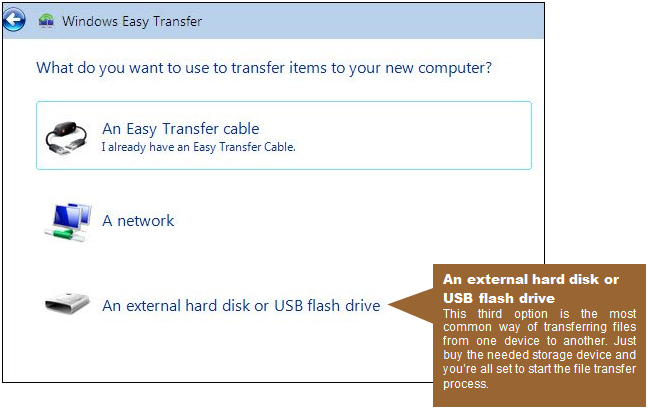
3. Using an External Storage Device
The third method is considered as the traditional way of migrating files from one device to another and is the one that most of us have grown very familiar with. All you need to do is find out the overall size of the file/s that needs to be transferred and secure an external hard drive or a USB flash drive that can handle all the files that you are planning to transfer.
How One Differs from the Other
Before starting the migration process. It is important that you first identify which option would fit your purpose. Generally for those who want a faster way of transferring files, we recommend the first option since it is a direct and straightforward way of moving your files from one device to the other. It is also safer since there will be lesser time for the transfer process to complete.
The second option that we would recommend which is relatively faster is by using a network. Though this one takes a little bit longer and less stable than the first one, it is still a safe method because of the absence of a big gap between both devices. The problem that you would encounter is only when something happens to your network connection (preferably wired) which causes it to become unstable but if everything works on your favor and with the right amount of preparation, you’ll surely be able to transfer every file, settings and other stuff from your old device to the new one.
The third option is the traditional way of data and files migration which makes use of a storage device that can handle the size of the files that you want to transfer. Before doing the migration process using this method, you need to make sure first that the device you are is free from any malware or virus that can out all your files to risk. If you are in doubt, you can first use a virus protection suite in scanning the device for viruses and other forms of malware and reformat it to erase all of its contents. The files that you are going to transfer should also be scanned against viruses. Once everything is prepared, scanned and connected properly to the device, you can start doing the selection of files to be transferred and finally move it to the new computer or to the storage device and more of this will be discussed and illustrated on the next tutorial.