Working with Files in OneDrive from a Web Browser
One of the awesome features that Windows 8.1 has is its perfect integration with an online cloud storage which is also developed by Microsoft called “OneDrive”. You might have experienced using a third-party cloud storage service before but nothing really get close to all of the features that OneDrive has especially that it is already part of the Windows 8.1 operating system. Yes! Your brand new machine actually has a free 7 gigabytes of online storage and you can take advantage of it anytime to secure your important files and protect them from being lost due to software or hardware failures that can occur without prior notice.
One way in using the OneDrive online storage in your computer is through the help of any web browser (Internet Explorer, Mozilla Firefox, Google Chrome etc). From within the OneDrive environment which you can open in your favorite browser, you can do many things such as creating and editing documents, adding or removing files and many other things without the need of any application coming from outside the cloud storage environment. In this tutorial, we will be learning how these things are done so you can take the use of the free 7GB of OneDrive storage to its full use so read on and follow the steps that I’ll be showing below.
Access OneDrive from your Favorite Browser
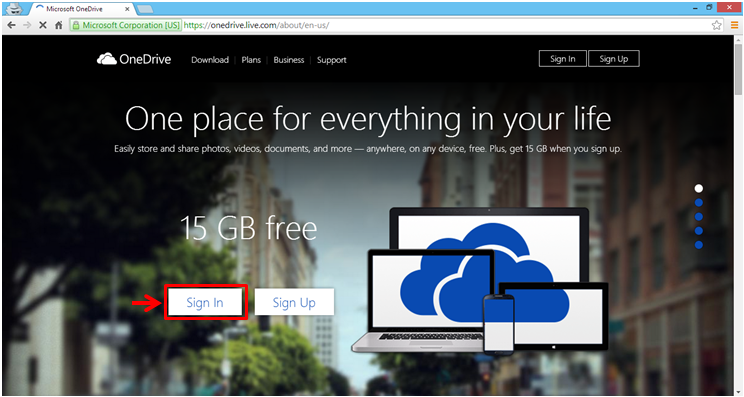
You can access OneDrive from the modern app or from a browser and as a long time Windows user, you surely are very familiar with the latter. To do this, simply open your favorite browser and after doing so, you’ll need to enter “onedrive.com” or “onedrive.live.com” into the web address input box at the top as shown on the screenshot below and hit the “Enter” key on your computer’s keyboard.

You will then be taken to the Sign in page of the OneDrive website and from here, simply click on the button that says “Sign in”. You can also scroll down a little bit and read some relevant information about the cloud storage and what it does. All of the information that are provided in this page are designed to give you a bird’s-eye view about this awesome storage tool from Microsoft.
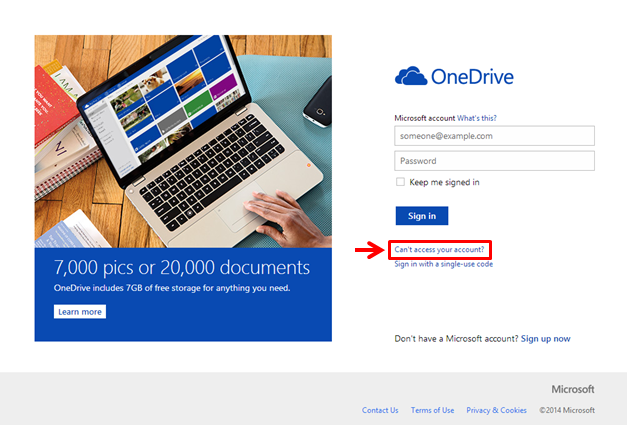
The page that will follow is the section where you will need to enter your Microsoft email and your password into the boxes provided. After doing so, just hit the “Sign in” button. In case you forgot your password, all you need to do is click on the link that says “Can’t access your account?” and follow all the other steps that will be shown to reset your password and finally access your OneDrive account from your favorite web browser.
Adding Files or Documents Using Office Online
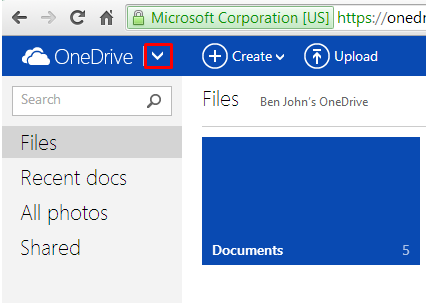
The OneDrive cloud storage allows you to add files which you want to access in all your other Windows-based devices such as a smartphone or tablet. There are two ways in doing this and the first one might surprise you since you since it is a brand new feature that has just been recently added when the Windows 8.1 operating system got released. It is done using the “Online Office” apps which is readily available when you access your Microsoft account for any purpose. To access these apps, simply click on the arrow down icon that is located at the top-right portion of the webpage just beside the “OneDrive” label.
After doing so, a black bar which contains all thumbnails to the “Online Office” apps will appear and from here, simply click on the one that you want to use for creating a new file or document. Once you are done, just save it and it will automatically be stored under the “Files/Documents” section. Don’t worry about familiarity because the “Online Office” apps equivalent for Microsoft Word (Word Online), Microsoft Excel (Excel Online) and Microsoft Powerpoint (Powerpoint Online) all work just the same as their desktop equivalent so you won’t really find it hard doing the tasks that you want to accomplish with these apps.

This is an awesome feature in the new Windows edition because even if you don’t have the Microsoft Office Suite installed on your computer, you can still create Word, Excel and PowerPoint documents as long as you are connected to the Internet.
Adding Files or Documents from Your Computer
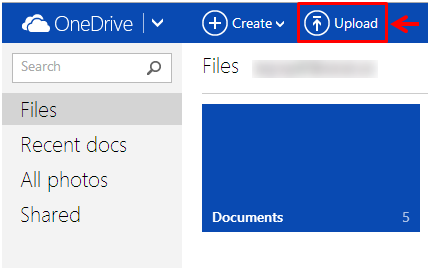
The other method in adding some important files and documents to OneDrive is by uploading them from your computer. To do this, all you need to do is hit the “Upload” button which is located at the top of the OneDrive page as you can see on the screenshot below.
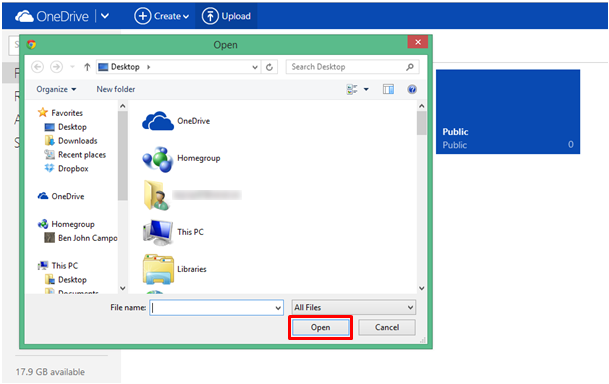
After doing so, a File Explorer Window which is labeled “Open” will appear on the screen and from here, you will need to browse to the location of the file that you want to store in OneDrive and when you find it, simply select it then hit the “Open” button that is located at the bottom-left portion of the Window.
After doing so, you should be able to see the upload progress from the upper-right portion of the screen. Just wait until the file gets completely uploaded to OneDrive and you’ll be able to see it on the OneDrive website’s main screen.
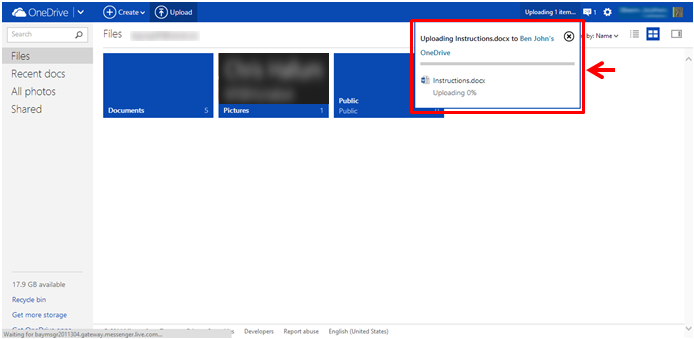
In the “Files” section of the OneDrive website, you will notice some rectangular thumbnails representing its contents. The ones that are in dark blue color represent folders which you can open to see their contents. The “Pictures” folder which is also represented by a rectangular thumbnail on this same section will also play your pictures in a slideshow manner. The files that you uploaded will appear next to these folders and bear logos of the applications that you used in creating them (Word, Powerpoint and Excel). You can click and hold then drag these newly uploaded files into certain folders so you can have better organization in your OneDrive account.

Deleting a File
In time, your OneDrive cloud storage will run out of space and when this happens, you will need to start deleting the ones that can already be removed from your account. To do this crucial task, just put the mouse pointer on the file that you wish to delete and you will see a small check box at the top-right portion of its thumbnail. Just click inside this box to put a check mark in it and from the tab that is located at the top, hit the button that says “Manage”.

All the files, pictures and other stuff that you have deleted from your OneDrive account will be moved to the “Recycle bin” section and in our next tutorial, we will be looking deeper into the other details in how you can work within the OneDrive website and learn some of the other options, tools and features that are readily available in it. As you can see, adding files and other stuff to OneDrive from a web browser is very simple. Now that you learn the steps, you can start adding your important files and pictures into your OneDrive account so you can always have access to them on all your Windows-based devices.