Working with Wi-Fi Settings in the New and Improved Windows 10
We have shown the steps that are involved in forgetting or deleting Wi-Fi profiles from Windows 10 which can help solve certain connection problems or at least make the list of Wi-Fi profiles in your computer shorter and along the process, we’ve promised cover even more about the Wi-Fi settings in the latest update released for Windows 10 called version 1607.
There are even more Wi-Fi settings, tweaks and tricks that you can actually take advantage of in Windows 10’s latest version which were somewhat hidden and other even unavailable in previous versions. If you haven’t got the latest update yet then we encourage that you install it first on your computer since most of the steps and screenshots that will be shown in this tutorial are taken from an updated Windows 10 computer.
Accessing Wi-Fi Settings in the Universal Settings App
Now that we have already set the main topic that we would be talking about in this tutorial, it is time to get things up and running. If you haven’t tried this in your computer yet then we strongly advice that you follow the steps closely as we show them so you can discover great features that you never thought available on your Windows 10 PC.
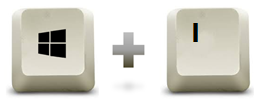
To start, let’s first learn how to launch the Settings Window in your computer. There are several available ways in doing this but we’re just going to show the simplest ones in this tutorial to save you time in reading. First, the quickest method in launching the universal Settings app Window is by pressing the Windows + I keyboard shortcut combination as you can see on the screenshot below.
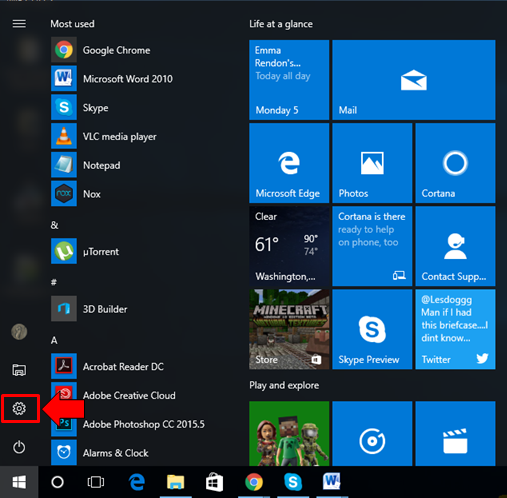
You can also access the Settings Window instantly by clicking on its icon from the Start Menu. To do this, just press the Windows key or click on the Start Button and once the Start Menu launches at the left hand portion of your computer screen, just click on the Settings icon that is found sitting on a narrow vertical bar at the left as you can see being highlighted on the screenshot below.
After clicking or tapping on the icon (in case you have a touch-enabled screen) you should be able to launch the universal Settings app in an instant. There still are some other methods in accessing the Settings Window in your machine but we’ll limit them to these two easiest methods so we can proceed to the real meat of this tutorial which is exploring the new and improved Wi-Fi settings section in the latest Windows 10 build available for FREE right now.
How to Get to the Wi-Fi Settings Section
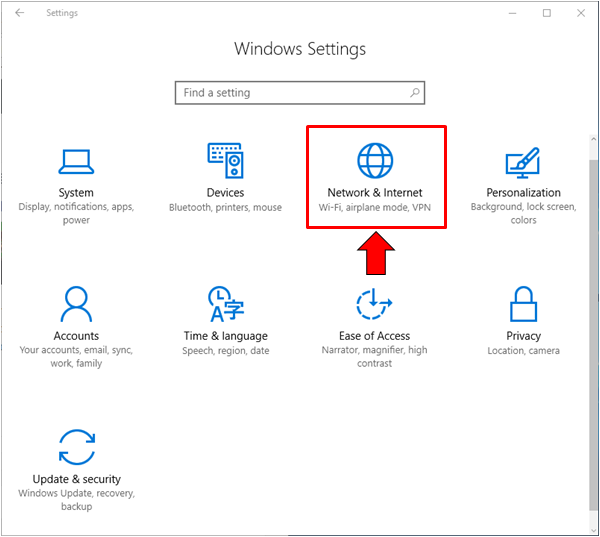
Now that you have already been able to launch the universal Settings app, you should now be looking at the 9 available settings categories and from these categories, you will need to click on the one that says “Network & Internet” as you can see on the screenshot below.
The next Window will then reveal all available “Network & Internet” settings that we will be going through in this tutorial but first, let’s get familiar with the parts of this Window to avoid confusion while we discuss them in this tutorial. On the left hand portion, you will see a navigation pane that contains links to the different “Network & Internet” settings that are available. This section is shown on the screenshot below.
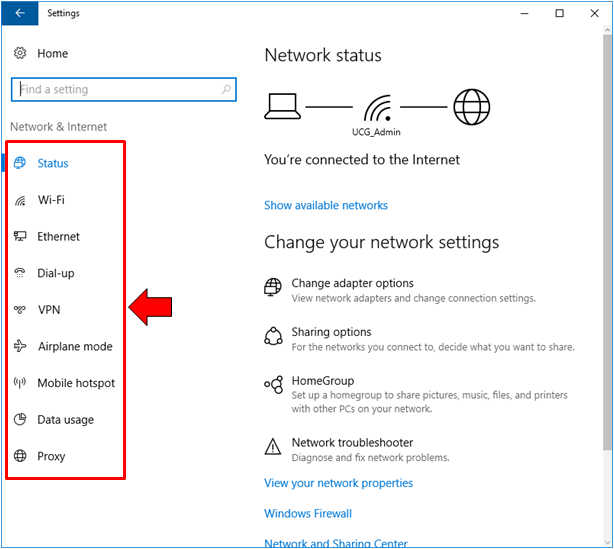
So let’s go through each of these links that are found on the navigation pane of the “Network & Internet” settings category of the modern Settings app in Windows 10 and start playing with every available feature that can be found in this section.
The Status Section
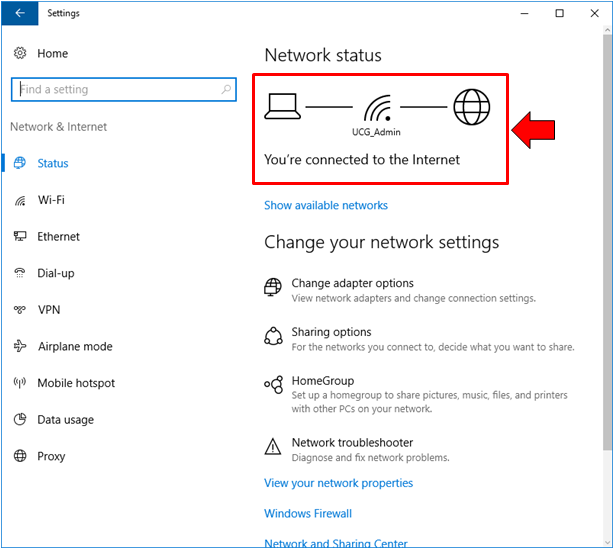
The very first link that we can find on the navigation pane that is found at the left hand portion of the “Network & Internet” settings category is labeled as “Status”. In previous Windows 10 builds, this section wasn’t available and links that pertain to Wi-Fi Status often lead to the Control Panel Window which is actually the traditional counterpart feature found in older Windows OS editions. On the top-most portion of the “Status” link contents that will show up on the right portion, you should be able to see the current status of your network connection as you can see on the screenshot below.
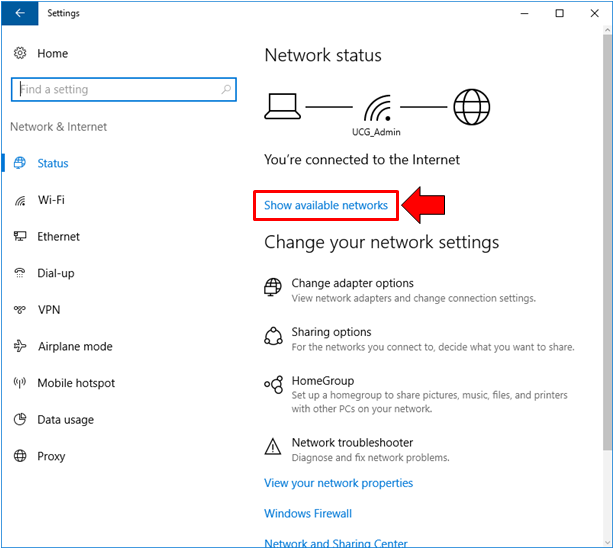
Below this is a link that will allow you to view all available networks that your computer or device can currently detect. You can click on this link in case you want to view the networks in your area or location.
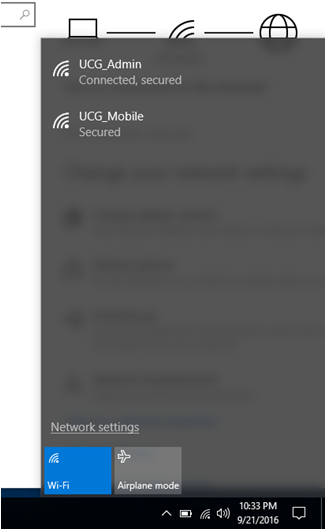
After clicking on the link, you should be able to open the available network box that will slide in from the bottom-right portion of your computer screen as you can see on the screenshot below. You can also view this box simply by clicking on the “Network” icon that is found on the System Tray found at the extreme-right end of the Taskbar.
Next, you will find another section that is labeled “Change your network settings” and under it, there are 4 different options and settings that you can click. The first one is labeled “Change adapter options” as you can see below.
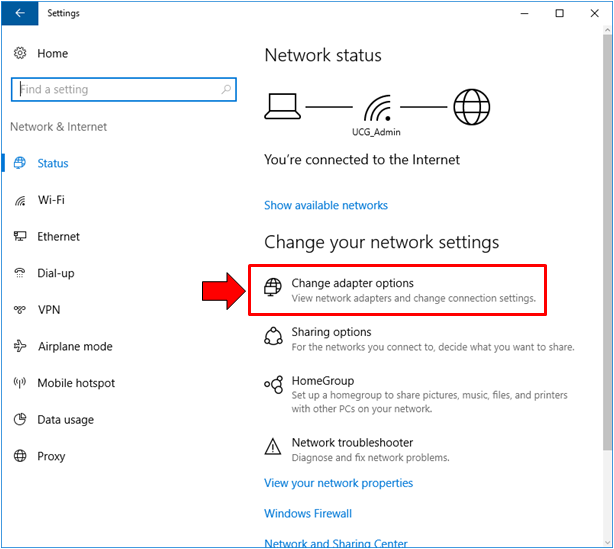
Clicking on this option will lead to the “Network Connections” Window of the Control Panel feature which lists all networks both wired and wireless, their adapter settings and from there, you can also make changes on each one’s settings. This is actually an advanced option so ordinary users shouldn’t attempt any changes on the items that are listed in this section.

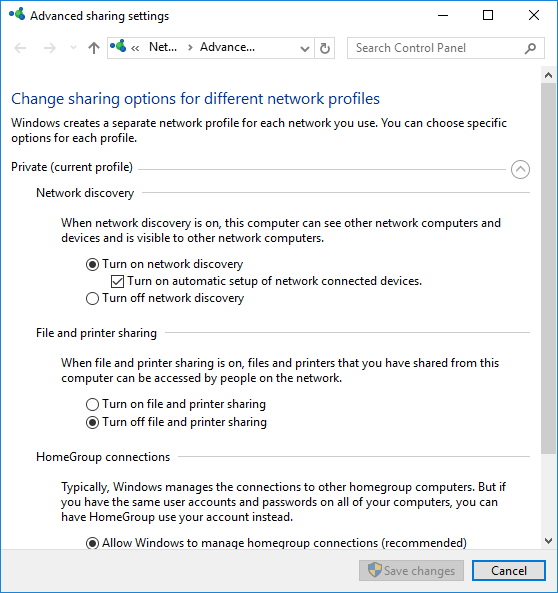
Next option is the one that is labeled “Sharing options”. It basically lets you access the “Advanced sharing settings” section of the Control Panel Window and again, the default settings that Windows 10 automatically puts your computer into whenever you connect to a network works great. We recommend that you just keep these settings as is unless you know what you are doing or you want to set up and allow sharing of files between devices and computers that are connected to your network.
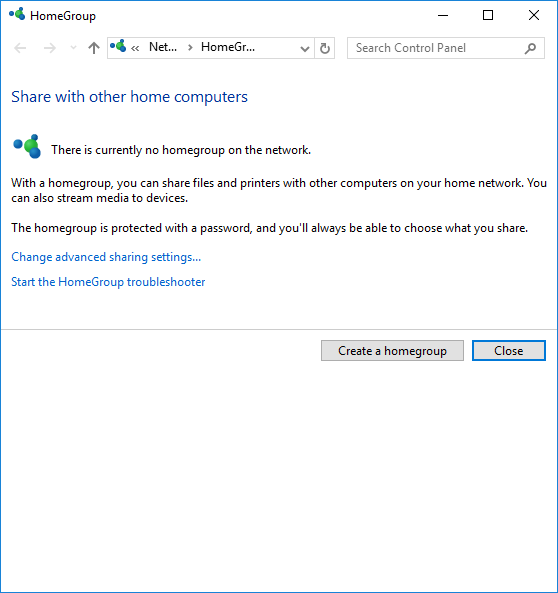
What follows is another option that is labeled as “HomeGroup” and clicking on it will once again open another Control Panel Window that shows the HomeGroup settings and options. If you want to learn more about HomeGroup and how you can set it up in your computer, you can read our previous tutorial that shows how it is done in Windows 8.1. There’s not been that much changes in terms of the steps involved in setting up HomeGroup in Windows 8.1 and Windows 10 so you should be able to set this feature up if you closely follow the steps that are shown in the tutorial.
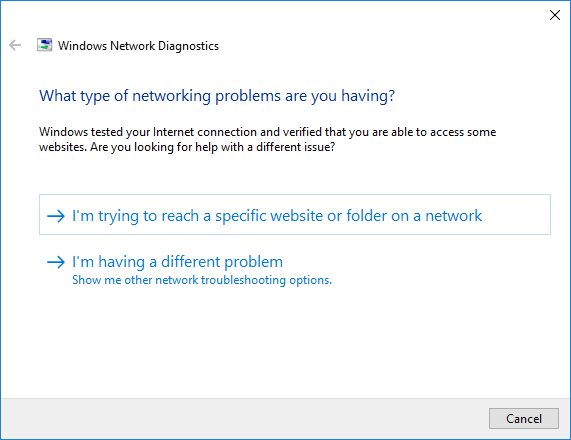
Moving on, you should be able to see another option in this section which says “Network troubleshooter” and if you click on it, the “Windows Network Diagnostics” tool will be launched and automatically identify the problem with your network and as well as fix it if it can or provide recommendations and possible solutions in fixing connection problems that it can’t solve on its own.
In this same section, you will also find additional links (options in blue fonts) which are all designed to help you access other Wi-Fi connection settings and information quickly as you can see on the screenshot. What each of these links do are explained in further detail below.

- View your network properties – Clicking on this link will take you to another Window that displays all relevant information that an advanced user might need pertaining to the Wi-Fi or Ethernet connection that the device is currently connected to and as well as the hardware that handles the connection.
- Windows Firewall – As the name itself suggests, this link when clicked will open the Windows Firewall settings Window of the Control Panel.
- Network and Sharing Center – Opens the Control Panel section that shows different information, options and settings for all your available network connections as well as those that you have connected to in the past.
- Network reset – This link opens a tool that will help you reset a certain network. It reinstalls your network adapters and sets all the other networking components to their original settings.
Most of the settings that are found under the “Status” section of the “Network & Internet” settings category are new so familiarizing yourself with them is a big must-do especially if you often get problems with your network connection on your Windows 10 machine.
The Wi-Fi Section
The next link that you will find on the navigation pane at the left of the “Network & Internet” settings category is the one that is labeled “Wi-Fi” and judging from the name itself, it bears some settings and options for the Wi-Fi feature of your Windows 10 device.

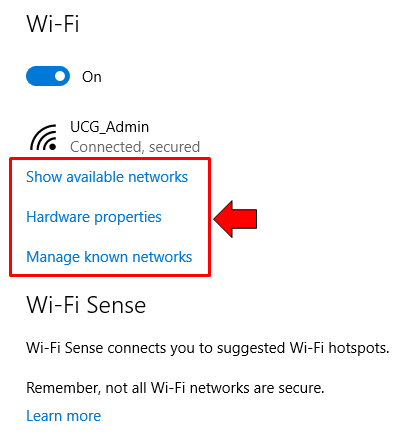
Now, try and click on it and you will be able to see a new set of options and tweaks being displayed on the contents pane at the right. The top-most portion shows a switch that will allow you to turn the Wi-Fi radio on or off. Below it is the name and the status of your network connection. Right after it are links which uses are further explained below.
- Show available networks – Clicking on this link will reveal the available networks box that slides-in from the bottom-right portion of the screen
- Hardware properties – If you want to view some information about your Wi-Fi connection together with the protocol that it uses, the security type, network band, channel, IP address, manufacturer and many others then this link is what you will need to click
- Manage known networks – Deleting Wi-Fi profiles is sometimes a need especially when you change the SSID or Password of your wireless network at home or in the office. Clicking on this link will take you to the list of Wi-Fi networks that your computer or device has connected to before and this is also where you can delete their profiles. To learn more about this tweak in your Windows 10 machine, you can follow the steps that we’ve shown in our previous tutorial.
Next option that is found under the Wi-Fi section of the Network & Internet Settings category is the one that says “Wi-Fi Sense”. This feature basically allows you to connect to Wi-Fi networks that are suggested by your friends and contacts. There’s a warning below it though that says “Remember, not all Wi-Fi networks are secure” which you need to remember whenever you are connecting to Wireless networks in public. It is always best to avoid connecting to these open networks since there could always be someone in the middle spying and collecting information from your online session.

If you wish to turn this feature on then all you need to do is click on the switch that is found just below the “Learn more” link found below the warning. Doing this would flip the switch to the “On” status. There is also an additional option below it that shows notifications for you whenever an action is needed. It would also be safe if you check and enable this option in case you choose to turn Wi-Fi Sense on.
Hotspot 2.0 networks is the next option that you can find and this basically allow you to Sign-Up more securely to wireless networks in public places that supports this feature. If you want to turn this option on, simply click on the switch that is found under the “Let me use Online Sign-Up to get connected” as you can see on the screenshot below.
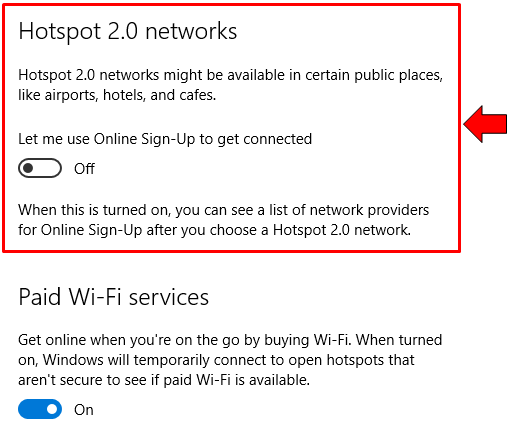
Below the switch is a short description of what the feature would do after it is enabled. It basically makes your connection more secure when you are in public places browsing the Internet through available networks in the area. The Sign-Up authentication does this crucial security thing automatically whenever you are connected to Hotspot 2.o networks.
Next, you will see the “Paid Wi-Fi services” option which basically allows you to be connected to the Internet even while you are on-the-go provided that you are ready to pay the price.
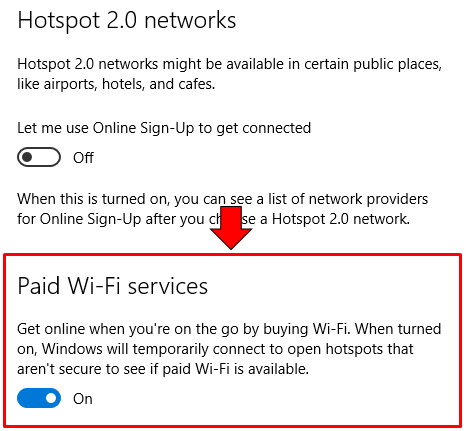
Turning on this feature is done simply by clicking on its switch. When it is turned on, Windows will temporarily connect you to open Wi-Fi and hotspots in order to see if there are paid Wi-Fi services available.
Lastly under the Wi-Fi section of the Network & Internet settings category, you will find the same links as we have already discussed earlier under the “Status” section which are “Change adapter options”, “Change advanced sharing options”, “Network and Sharing Center”, “HomeGroup” and “Windows Firewall”. These links basically opens the Control Panel Window showing you the available options for the features being described by them. Please refer to the “Status” section to find out where these links would take you if you click on them.
The Ethernet Section
Next to the Wi-Fi link on the navigation pane at the left is another item that says “Ethernet”. If Wi-Fi is for wireless networks, Ethernet is for wired networks that are connected to a router or network splitter via a LAN cable. This setup is commonly found in offices and knowing what options are under it is crucial if you use this kind of Internet/network connection at home. First of all sitting right on the top portion of its contents is the current Status of the Ethernet connection in case your computer is connected via a wired network as you can see on the screenshot below.
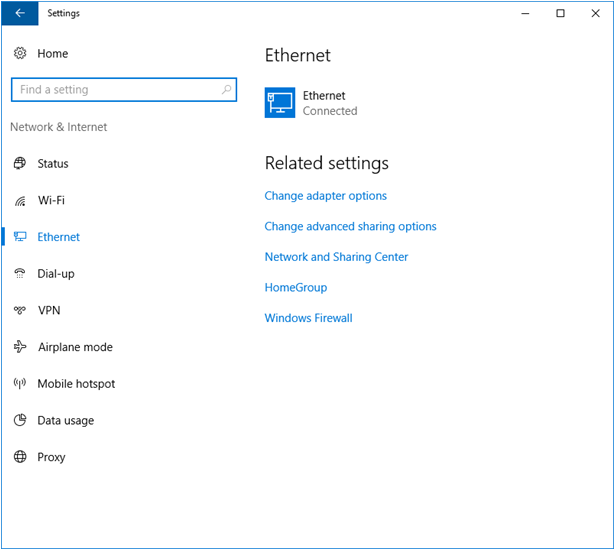
The same as in the “Status” and “Wi-Fi” sections, the links “Change adapter options”, “Change advanced sharing options”, “Network and Sharing Center”, “HomeGroup” and “Windows Firewall” are still found in the “Ethernet” section and if you click on any one of them, you’ll be able to launch the Control Panel Window which shows all settings and tweaks as well as options available for the link that you clicked. Please refer to the “Status” section at the top to learn more about what each link actually offers when you click on them.
The Dial-up Section
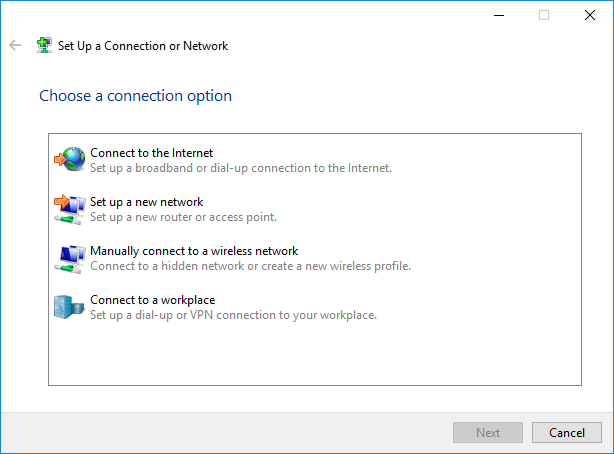
Moving on, we go to the next link that is located on the navigation pane at the left which says “Dial-up”. When you click on it, you should be able to access its contents which will display on the right . The first item is a link that says “Set up a new connection” as shown on the screenshot below.
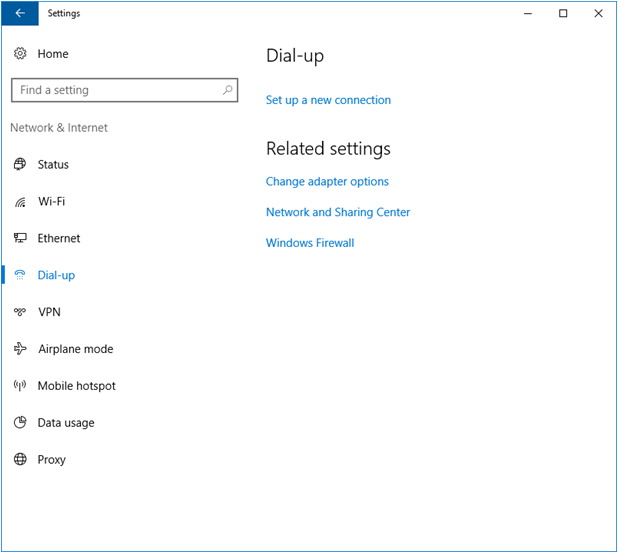
When you click on it, the “Set Up a Connection or Network” wizard will launch which is a tool that will guide you through the steps in creating a new Internet connection or network on your computer. If you don’t know what these options are for then we strongly advice that you leave them as is or ask assistance from an expert if you wish to learn how each of the options are used.
The next links that are found under “Related settings” are the same as what was found in the previous sections that we’ve discussed above but instead of 5, you will only find 3 of them which are “Change adapter options”, “Network and Sharing Center”, and “Windows Firewall”. Clicking on any of these links will launch the Control Panel section where their options and tweaks are found.
The VPN Section
The next option is for Virtual Private Networks and this is the place that you should go into if you want to make your browsing and other Internet sessions more secure. If you have access to VPN then you can add one to this section by clicking on the “Add a VPN connection” option that is found on the top-most portion. Below this are two switches that are labeled “Allow VPN over metered networks” and “Allow VPN while roaming” and both options are turned on by default but you can choose to disable or turn them off simply by clicking on their corresponding switches found below each one of them as you can see on the screenshot below.
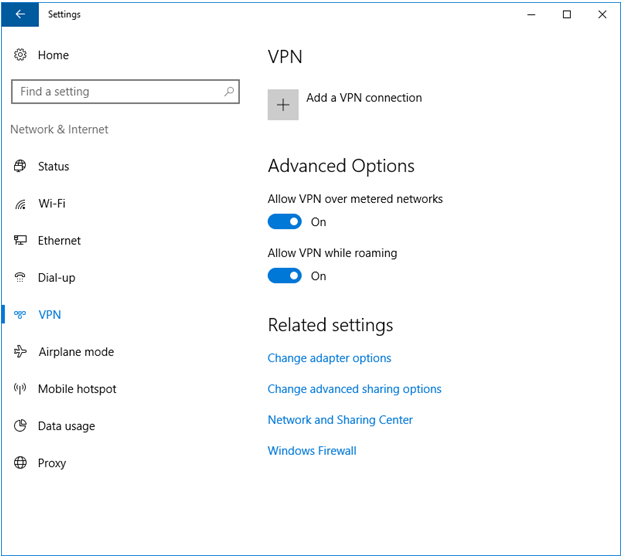
Now, the same “Related settings” section is found containing 4 of the same links found in the previous sections that we’ve discussed above. If you want to learn more about these links, you can read the “Status” section that we’ve discussed at the first part of this tutorial.
The Airplane Mode Section
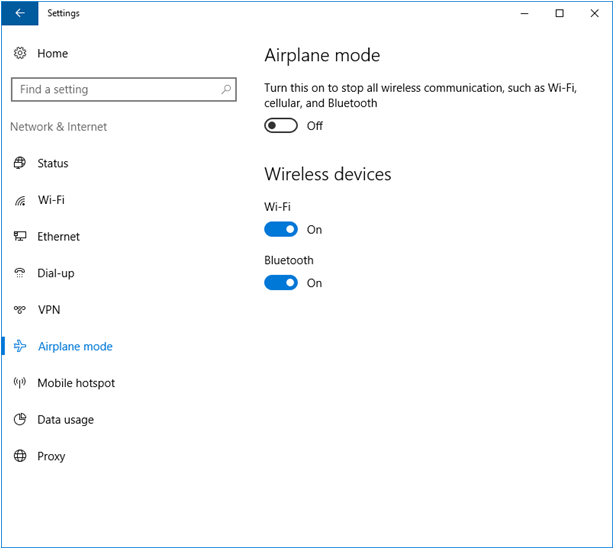
The next section that you will find under the Network & Internet category of the universal Settings app is the one that is labeled “Airplane mode”. The name of this section itself suggests that it contains switches for Wi-Fi and Bluetooth radios and you’ll need to turn these radios off whenever you are in an airplane so it wouldn’t interfere to the communication links between the aircraft and the control tower in the airport to which you are going. These switches are shown on the screenshot below.
The Mobile Hotspot Section
We now go to the third to the last section under the “Network & Internet” category of the universal Settings app which is labeled “Mobile hotspot”. If you often use a mobile device running on Android or you are using a wireless file transfer app in it like ShareIt then you should be very familiar with Mobile Hotspot. This feature actually turns your device to a type of wireless connection gateway by sharing its internet connection whether it’s getting it through Wi-Fi or Ethernet to other device nearby.
The top-most portion of this section is a switch that will allow you to easily turn on mobile hotspot or turn it off if it isn’t needed anymore since it can also drain battery power faster. You can also choose which type of connection you want to share. If you are currently connected to a Wi-Fi network and you want to set up mobile hotspot then you must choose “Wi-Fi” from the dropdown options that would appear while if you are connected through wired network then you need to choose “Ehternet”.
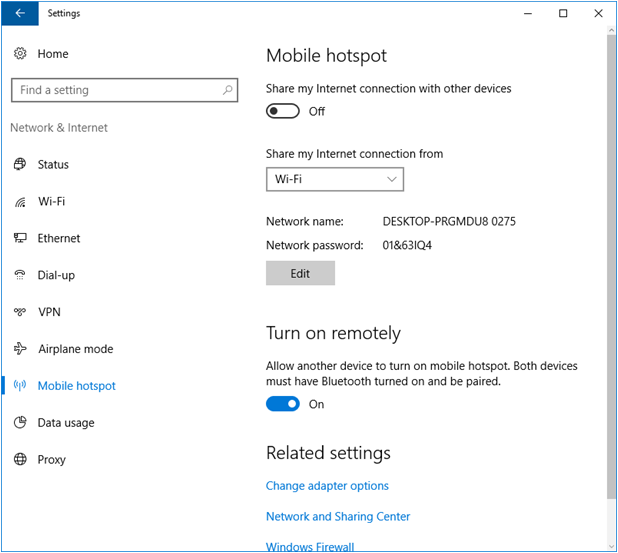
Just like a Wi-Fi gateway or access point, the wireless connection that will be created on your device has a “Network name” or SSID and a “Network password” and if you wish to change these then you can simply click on the “Edit” button and enter the values that you wish to assign for the network name and password.
There is also an additional option that will allow other devices to manage the mobile hotspot provided that they are linked to your PC or device that generates the hotspot signal via Bluetooth. Turning this feature on or off is done simply by clicking on the switch found under it in order to toggle from on to off and vice-versa. Once again, the “Related settings” section that contains quick links leading to other options in the Control Panel Window appears here and there are 3 of them which are “Change adapter options”, “Network and Sharing Center” and “Windows Firewall”.
The Data Usage Section
The next section which is now the second to the last one is labeled “Data usage” and clicking on it will reveal only two sections showing the overall data usage that the device has incurred through Wi-Fi and Ethernet which is illustrated using a pie graph with the legend sitting on its right section as you can see below.
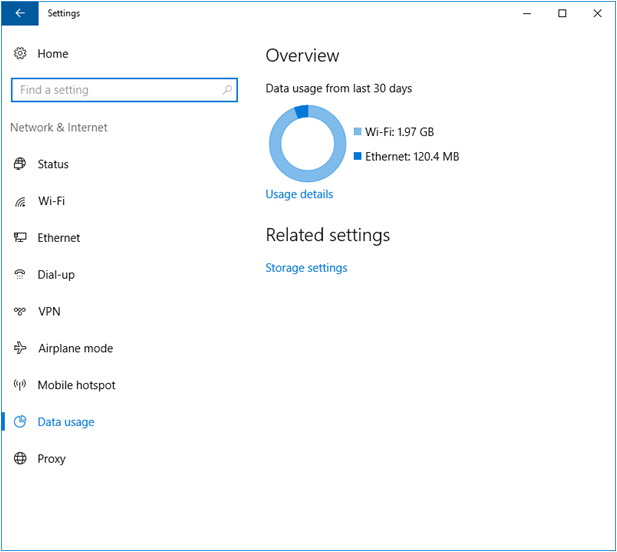
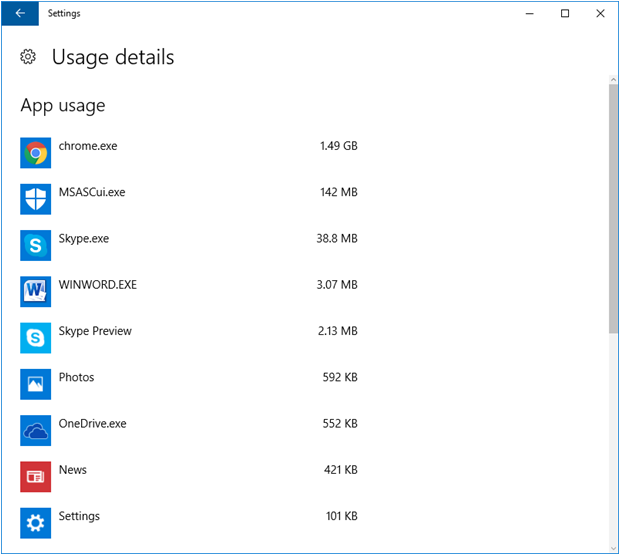
If you want an even more detailed information and breakdown on which apps and programs have been using the data on Wi-Fi or Ethernet then you can simply click on the link that is found just below the graph which says “Usage details” and you will be able to view the list of apps and programs as well as their corresponding data usage on opposite to each one of them on the right as shown on the screenshot below.
Just like all of the other sections that we’ve discussed and talked about above, there is also a “Related settings” portion in the “Data usage” section but this time, it contains a new item which says “Storage settings”. Clicking on it will take you to another section which shows the options available for storing files such as documents, downloads and other stuff that you copy or download or take from the Internet and other sources.
The Proxy Section
Lastly, we come to the section that is found at the very bottom which is labeled “Proxy”. If you are able to use your computer and connect to the Internet without experiencing any problem then we strongly suggest that you just keep these settings as is. These are actually advanced network and Internet settings intended for use by networking experts.
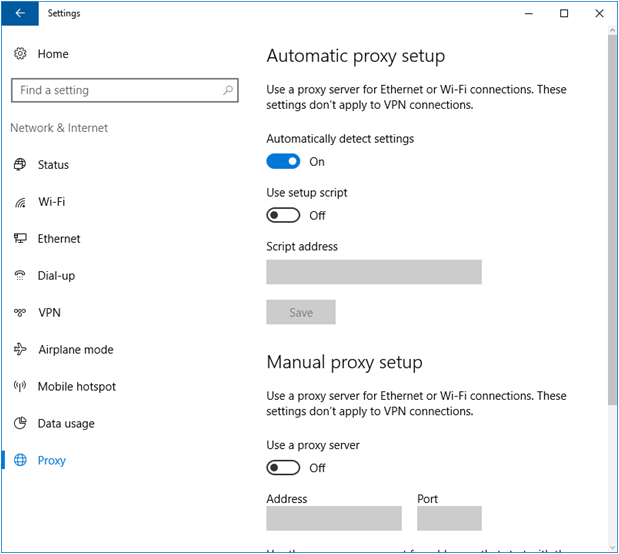
If you want to learn more about Proxy and Proxy settings then you need to watch out for our next tutorial that will discuss how these features are set and used and what they are used for.
A Better and More Detailed Network & Internet Settings Indeed
As you can see, the latest Windows 10 version which has been released on its anniversary really bears much improvements that makes it a lot easier to manage and tweak. The section that we’ve covered in this tutorial for instance has many links, options and sections that are nowhere to be found in previous Windows 10 editions released and made available in the past and the good thing about them is that the interface side of things has been improved for faster identification of certain settings.
Did you have problems in any of the Wi-Fi, Ethernet and other network settings and tweaks that we’ve shown in this tutorial? If you did then we want to be of help to you. Please feel free to let us know your concern by describing it on the comments section below and we’ll do our best to respond to you as soon as possible. You might also get additional support from our community of readers before we even send you our response. If you found this tutorial helpful then please spread the word! Remember, “Sharing is caring”. See you all in our next tutorial!