A Detailed Guide for Using the Home Tab in the New File Explorer Window (Part 3)
In Part 1 and Part 2 of our “Home” tab tutorial series, we’ve talked about the first three set of options that are found on the ribbon that appears when the “Home” tab on top of the File Explorer Window is clicked. They are the “Clipboard”, “Organize” and “New” set of options but if you try and inspect the “Home” tab’s content, you’ll find that there are still two more of these group of options that we have not discussed yet.
These are the “Open” and “Select” option groups and since we’re trying to give you a detailed guide on how you can use all of the options under the “Home” tab, we’ll be talking about these two remaining options and as well as take a peek on some other locations where you can find these same options on your Windows 8 or Windows 8.1 computer so join us as we explore the last two group of options that are found under the “Home” tab of the more improved File Explorer tool!
How to Use the Options Under the Open Section
We’re now on the last part of our tutorial on the “Home” tab found at the top-left portion of the File Explorer Window which appears when you open libraries and folders saved in your machine’s hard drive and this time, we’ll go to the options that are found under the “Open” group as you can see on the screenshot below.

To learn what each of the options found in this section does, here are some detailed descriptions of their functions and uses:
- Properties- clicking on the paper with red check mark icon will open the “Properties” Window of the file that you have selected. From this Window, you can view some information about the file under the “General”, “Security” and “Details” category as shown below.
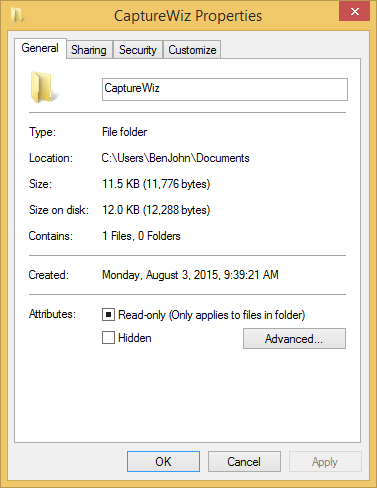
Under the “General” tab of the “Properties” Window, you will find some information about the selected file such as its type, the application that is set to open it by default, its location, size, size on disk, the date it was created, the date it was last modified and accessed and its attributes. From these information, you can change some aspects such as the application that opens the file and as well as its attributes (Read-only or Hidden).
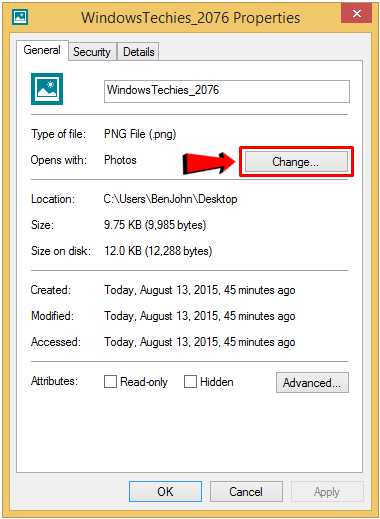
If you want to change the application that is set to open the file by default, you will simply need to click on the “Change…” button that is found at the right side of the “Opens with” item as highlighted on the screenshot below.
After clicking on the “Change…” button, a box will open which contains a selection of all available applications which you can use to open the file. From here, simply click on the one that you want to use in opening the file.
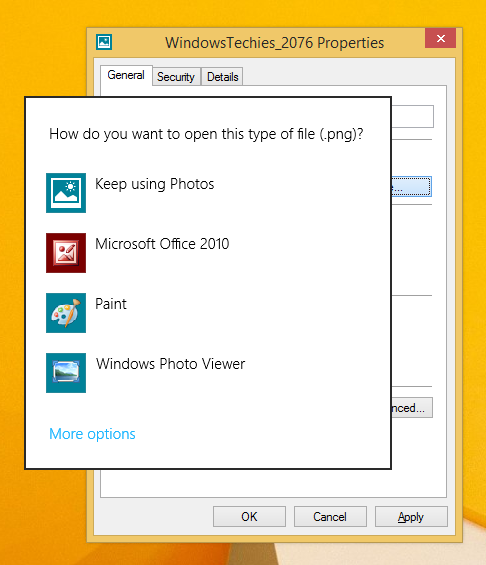
If you don’t see the app that you want to use in opening the file from the list that readily appears inside the box, you will simply need to click on the “More options” link that is found at the bottom of the selection box and you will see more options that will appear towards the bottom which you can scroll through.
Below the paper with a red check mark icon overlay is a down-pointing arrow and if you click on it, you’ll be able to access two more options under “Properties” as you can see on the screenshot below.
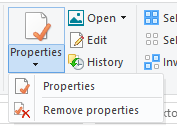
From these options, try clicking on the one that says “Remove properties” and you’ll be taken to a small Window that lists the file’s properties which you can choose to remove.
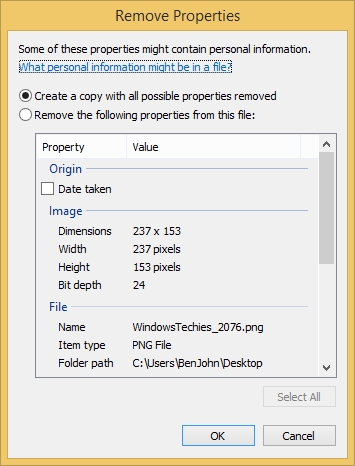
From here, you simply need to mark the checkbox that is located at the left of the file property that you wish to remove then after marking them, hit the “OK” button. This feature is very useful especially if you’re going to share a file and you don’t want to divulge the your identity being its author.
- Open- This option readily opens any selected file using the default application that is set to open it however, if you want to choose from different programs, you can click on the down-pointing arrow that is located on its right side and you will be able to view the programs and apps that you can use to open the file itself.
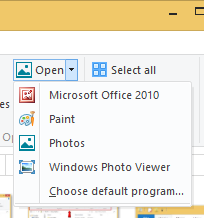
From these program and app options box, you can also click on “Choose default program…” and you’ll be able to access the same program/app selection box that has appeared when we did some tweaks within the “Properties” section earlier and from here, you can freely select the program/app that you want to set as the default tool to open the selected file.
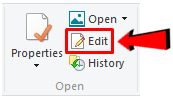
- Edit- Next, the “Edit” option will simply open the selected file for editing within the default program that you have set in the earlier options. For instance, if you have selected a MS Word file, clicking on the “Edit” option will open the file in MS Word itself and from here, you can start doing the edits.
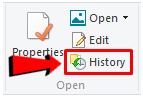
- History- While working on a file on Microsoft Word for instance, it automatically gets updated and by the time you are done and save the file’s latest version, you automatically get no access to the older versions of it. However, if you configured the “File History” feature to work by saving previous versions of any file for future reference and use, you can simply click on the “History” option and the “File History” will open in a new Window displaying all the previous versions of the file that it was able to record.
How to Use the Options Under the Select Section
Finally, we now come to the last group of options found under the “Home” tab which is labeled “Select”. To learn what each of the options under this section does, here are some descriptions of each one of them:
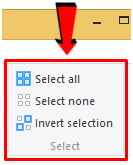
- Select all- This option simply selects all of the items that are displayed in File Explorer’s content pane.
- Select none- Does the opposite of the Select all option. When all of the files and folders in File Explorer’s content pane are selected, clicking on the “Select none” button will deselect all of them in an instant.
- Invert selection- After selecting a certain group of files and folders on File Explorer’s contents pane, clicking on the “Invert selection” option will deselect the selected files then select the earlier unselected files.
Right-Click Menu Options Still Available
As you can see, the newly improved File Explorer tool in Windows 8 and Windows 8.1 has really revolutionized file management in our favorite operating system. By placing these options on top of the File Explorer Window, moving files, copying them and doing many other tasks are really made quicker compared to having the right-click menu.
However, that doesn’t mean that the right-click menu is already gone. It is still available in these Windows editions and most of the options that we’ve taken up in this tutorial series are still found in it.