How to Burn Discs Using the New and Improved File Explorer (Part 2)
Microsoft has been improving Windows in the past years and they’ve been doing pretty well in many aspects. One awesome improvement that has started in Windows 7 and continued on towards Windows 8 and Windows 8.1 is the inclusion of a disc-burning feature to its file management tool called Windows Explorer in Windows 7 and File Explorer in Windows 8 and Windows 8.1.
In the first part of this tutorial, we have shown how this feature is accessed in Windows 7 and Windows 8 and we’ve also shown how you can burn files with it using the first option that says “Like a USB flash drive” but there’s still one more option for burning some stuff into CDs and DVDs that is left which we were not able to show in Part 1 because we ran out of space so we’ll discuss and learn about it in this second part.
Accessing the Burn to Disc Option
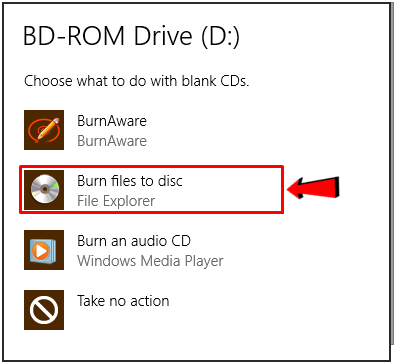
But before we start, let’s first review how the “Burn files to disc” (in Windows 7) or the “Burn to disc” (in Windows 8 and Windows 8.1) feature is accessed. Again, if “AutoPlay” is turned on in your computer, you can simply insert the blank CD or DVD into your computer’s disc drive and after doing so, you will see a small Window in Windows 7 where you can simply click the “Burn files to disc” option as shown below.

In Windows 8.1, this Window will look slightly different but most of the items are basically the same and you can select what program you’d like to use in burning files to the blank disc but since we are trying to use File Explorer, you’ll need to click on the option that says “Burn files to disc”.
What if AutoPlay is Turned Off?
In case the “AutoPlay” feature is turned off and you don’t want to turn it on, you can simply insert the blank CD or DVD into your computer’s disc drive and after doing so, simply click on the disc drive under the “Devices and drives” list of the “This PC” or “Computer” section and after doing so, just click on the “Manage” tab located at the top of the File Explorer Window.
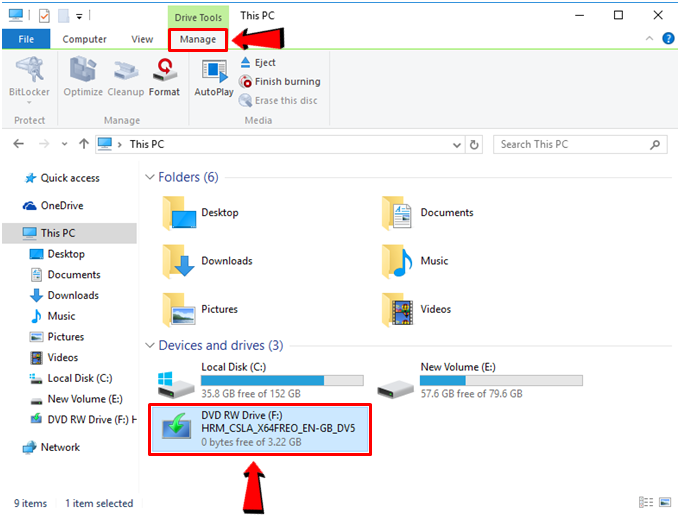
Once the ribbon-based options under the “Manage” tab appears, all you need to do is click on the “AutoPlay” option and after doing so, you’ll be able to access the same Window where you can select the software tool that can burn files to discs and from here, you will simply need to click on the one that says “Burn files to disc” since it is the one that will let you use File Explorer in doing the disc-burning job.
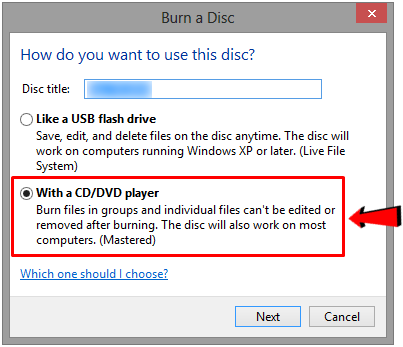
After the “Burn files to disc” option is clicked, you’ll now be able to see the “Burn a Disc” wizard which is the tool that will guide you through the process. From this small Window, you’ll see the two available options that we’ve been talking about since the start of this tutorial and from here, you’ll simply need to select the second one which says “With a CD/DVD player”.
Burning a Disc Using the With a CD/DVD Player Option
We’ve covered the steps involved in burning files and other data into CDs and DVDs using the “Like a USB flash drive” in Part 1 of this tutorial so now, let’s go over to the second option and see how burning to discs using this option is actually done.
The process is actually quite the same as the first one and the only difference is that the files to be burned into the disc are not automatically written into the disc as you add them, they are just added to a temporary files folder.
To start, you’ll need to make sure that all of the files and other stuff that you want to burn into the disc are already added. Once the burning process starts, all of the other steps look the same in both Windows 7 and Windows 8/Windows 8.1.
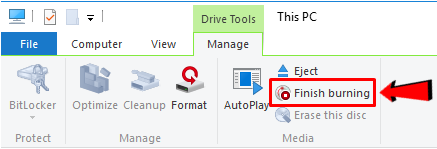
In Windows 8.1, you will need to click on the “Finish Burning” option under the “Manage” tab in order to initiate the process as highlighted on the screenshot below.
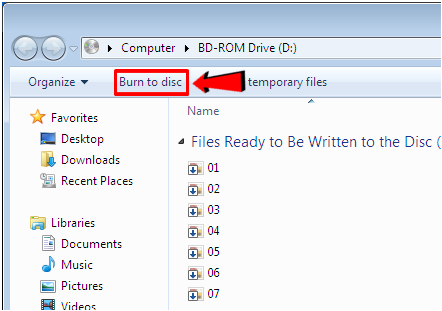
While in Windows 7, you will be clicking a different option but it is also found on the top portion of the Windows Explorer Window and it says “Burn to disc” as shown on the screenshot below.
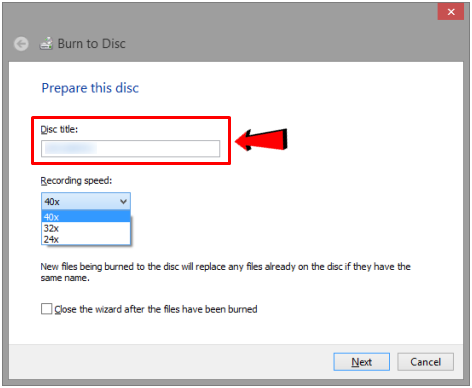
Now, before this process starts, the “Burn to Disc” wizard will allow you to tweak some aspects about the process and even give you the chance to add a custom “Disc title” to the output disc as you can see on the screenshot below.
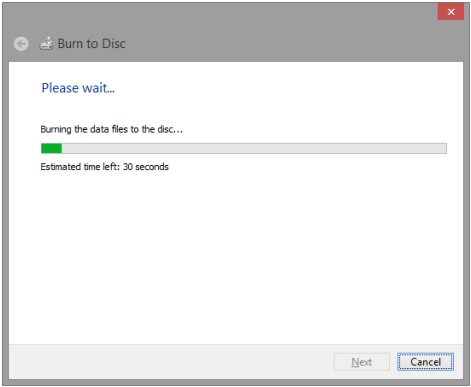
After making all your desired tweaks on the “Burn a Disc” wizard, simply hit the “Next” button and the burning process will start automatically. The duration of the whole burning process depends on the type of hardware (disc drive) that you are using, the type of disc and as well as the amount of data that needs to be burned to it. The speed that you have selected earlier will also affect this aspect of the burning process.
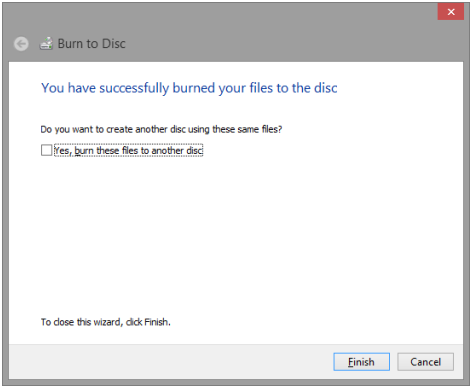
After the burning process is completed, you’ll be able to see a prompt that asks you if you want to copy the same files to another disc in order to create another backup. If you choose to do so, simply click inside the check box that says “Yes, burn these files to another disc” while if you don’t want to do so, just hit the “Finish” button that is located at the bottom in order to close the wizard.
You Can Still Add Files But Can’t Remove One Any Longer
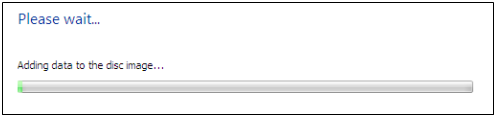
Unlike the first option which says “Like a USB flash drive”, the files that you burn into a disc using the “With a CD/DVD player” can no longer be removed but you can still add more files to the disc itself. Adding files to a disc that already has contents in it that were burned using the second option is basically the same and the only difference is the message that you see above the progress bar which will now say “Adding data to the disc image…” instead of “Burning the data files to the disc” which appears if you’re adding data to it for the first time.
NOTE:
Even though you can add and remove files from a disc that you burned using the “Like a USB flash drive” option as often as you want, you need to remember that every time you close the session, it will actually deduct 20MB of space from the disc so you’ll notice that the available storage space would actually be smaller the next time.
Erasing Burned Data from Re-Writable CDs and DVDs (Windows 7 and Windows 8)
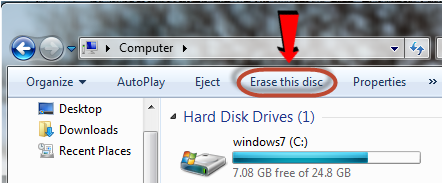
More expensive discs like BD-RE, CD-RW and DVD-RW allow users to erase all files from them no matter which burning option was used. All you need to do is launch Windows/File Explorer, select the disc drive under the “Devices with Removable Storage” list in Windows Explorer or from the “Devices and drives” list in File Explorer then after doing so, all you need to do is click on the “Erase this disc” button on top if you’re using Windows 7.
If you’re on Windows 8 or Windows 8.1, you will simply need to click on the “Manage” tab that is located on top of the File Explorer Window the on the ribbon-based options that will appear, simply hit the one that says “Erase this disc”. In both Windows 7 and Windows 8/8.1, after the “Erase this disc” option is clicked, you will see a prompt Window where you need to click the “Next” button and the process will now initiate. You will see the overall progress until the process is done and that’s it! You now have a clean disc which you can use again for storing other files and stuff.
A Handy Disc-Burning Tool for Everyone
As you can see, Windows actually has a built-in tool that can handle all your disc-burning needs but sadly, because of the may third-party software that are offered all over the Internet, there are only a few who really knows about this and really use it but now that you already know about the “Burn to Disc” feature in Windows, be sure to try it one time in creating disc backups of files, folders or even software installers. If you missed the first part of this tutorial then please feel free to read it to learn more about the first option offered by this free tool found in every Windows 7, Windows 8 or Windows 8.1 computer.